
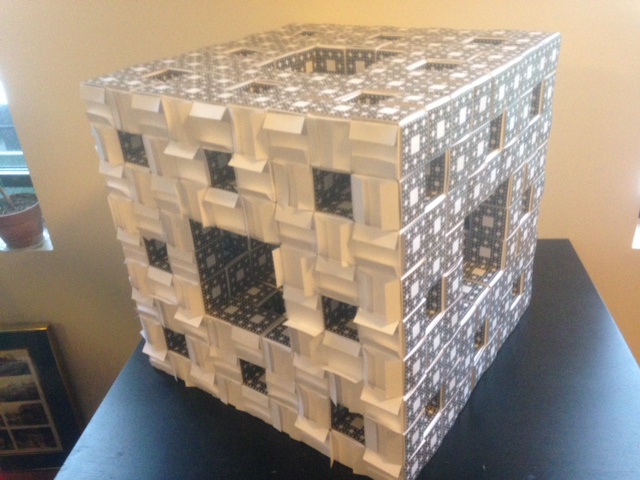
Earlier this week we walked through how to build Level 0 and Level 1 Menger cubes out of business cards: six business cards makes a Level 0, and twenty Level 0’s made a Level 1. Time to level up! Twenty Level 1’s come together to make a Level 2 like this:

There are many ways to assemble a Level 2 from twenty Level 1’s. One way is to use more general forms of tripods built out of Level 0’s; this is what Jeannine Mosely’s Level 3 sponge project did. With this method, a Level 2 uses 80 cubes, 4 Level-0 tripods, 12 so-called “double” Level-0 tripods, 12 “triple”, and 4 “quadruple”. There are some very detailed worksheets explaining this method at the MegaMenger site, but it is not the method that we’re recommending people use for the MegaMenger project. We need something quicker, more accessible, easier for everyone working on the project, and that really shows off the fractal nature of the Menger sponge. The new method will acheive all that, but with the penalty of sacrificing some stability in the final object. If it works then we’ll have a method that makes building Level 3 Menger sponges much easier than ever before. If it doesn’t work then, well… more on that in the next post. Either way this has “hacktastic” written all over it.
What we are going to do is the most mathematically elegant thing possible: we’re going to repeat exactly the same process we used when we assembled a Level 1 from twenty Level 0’s, except with big Level 1’s taking the place of all the little Level 0’s. In fact, if you compare the sequence of pictures from our Level 1 post with the ones in this post, you’ll see that the pictures are the same in both cases, except that here the basic building blocks are Level 1 sponges instead of Level 0’s. We start by making four Level 1 blocks, three of which are paneled on two adjacent faces:

Then we put these four Level 1’s together to get a “mega tripod”, which we’ll call a Level-1 tripod because it is built out of Level 1 blocks. Each Level-1 tripod has an orientation just like the Level-0 tripods did, and we can use the corner tabs to determine the orientation. Looking at the corner tabs, notice that the Level-1 tripod below has the “horizontal on the left, vertical on the right” property that we required of our Level-0 tripods.

To be honest, we just glossed over the hardest, hackiest part: how the heck do you attach two Level 1’s to each other? This is where we have to compromise a bit, because it is nearly impossible to get all of the tabs on one side of a Level 1 to attach to all of the tabs on the side of another Level 1. We can manage to do half of them, specifically, the ones where the tabs are around the outside edges of the Level 1’s. It turns out that while not perfect, it is enough. Hacktastic.
Now make four Level-1 tripods and four plain Level 1 sponges:

Then put them together the same way we did before, according to this worksheet from MegaMenger:

The worksheet says you can get 90% of the tabs, but even with the 50% we’ve been managing, we got a perfectly stable Level 2 using this method.
Can you guess what is going to happen next? Here’s a clue… we started by paneling two sides of our Level 2…

——————
As an Amazon Associate we earn from qualifying purchases, so if you’ve got something you need to pick up anyway, going to Amazon through this link will help us keep Hacktastic running. Thanks! :)

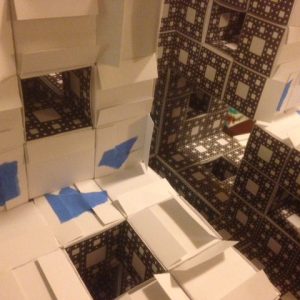
[…] to an in-progress Level 2, and in this case the tape isn’t actually necessary at all. In our last post we made a perfectly good Level 2 by zipping up Level 1’s with no tape at all. This tape […]