
Also published at Shapeways Magazine
—–
Looking for a fast way to design a 3D printed gift for the holidays? In this Tutorial Tuesday we’ll walk through an easy way to make personalized 3D printed snowflakes for ornaments or jewelry, using the Thingiverse Customizeras a design tool. Specifically, we’ll use a customizable design called The Snowflake Machine that can procedurally generate over one billion unique snowflakes based on random seeds and user-set design parameters. Don’t worry, it’s easier than that just sounded! Here’s a step-by-step how-to guide so you can get your holiday snowflake shopping out of the way. (Or order some pre-made Snowflake Machine ornaments and earrings at the geekhaus shop, if you’re really in a rush…)
Step 1: Fire up the Snowflake Machine
From your web browser, go to the link for The Snowflake Machine:

From there, click on the button that says “Open in Customizer” (at this point you’ll have to sign up for a free Thingiverse account, if you haven’t done this already). This will open a new page that has controls on the left and an output view on the right. By setting the controls on the left you can control the 3D design shown on the right.
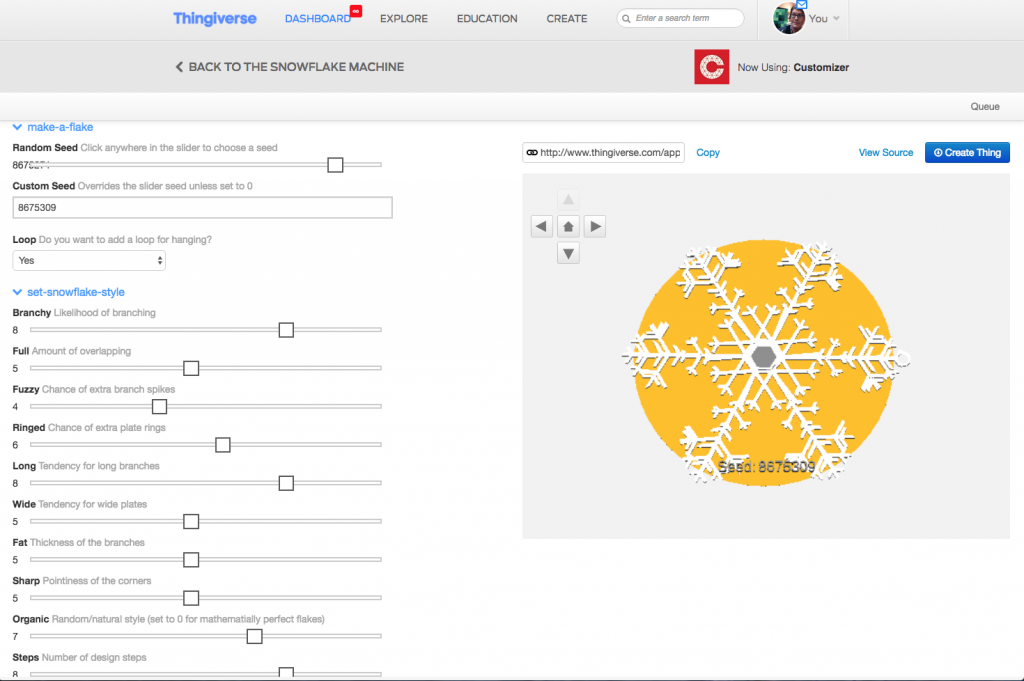
Step 2: Seed and Style your Flake
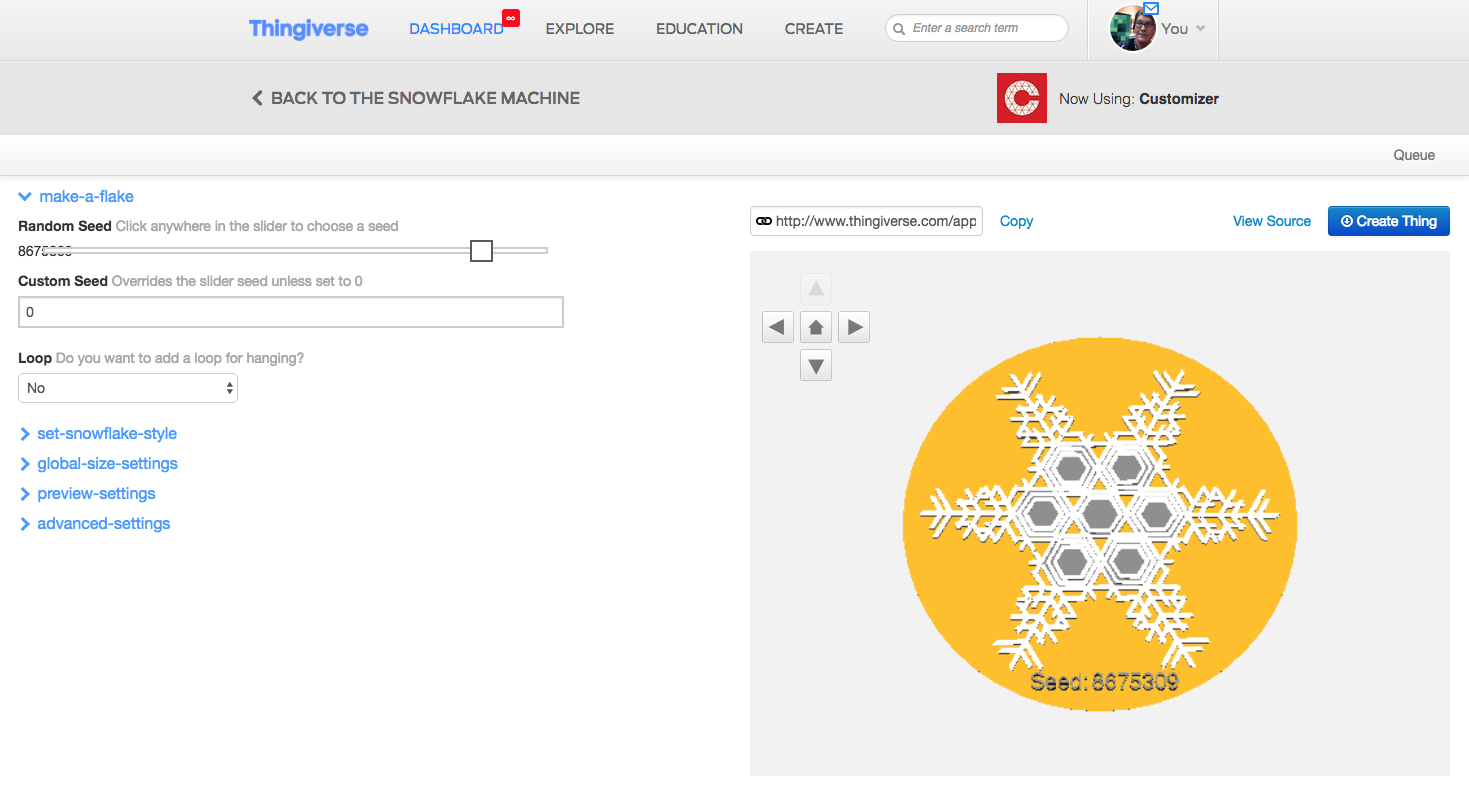
The Snowflake Machine customizer uses a random number “seed” to decide where to place branches and plates of the snowflake design. All good children of the 80’s will of course start with the seed 8675309. We’re going to make a hanging ornament, so we set Loop to “Yes.” Under the “set-snowflake-style” menu are a lot of sliders. By pushing the sliders around you can control style parameters such as the lengths of the branches, the fuzziness of your flake, and so on. Here’s our stylized flake:

That’s it for the design phase! For more information on how the Snowflake Machine uses OpenSCAD code to generate snowflakes, and tips on printing snowflake designs in a variety of materials, check out our recent article Trim Your Tree With Mathemagical Snowflake Ornaments.
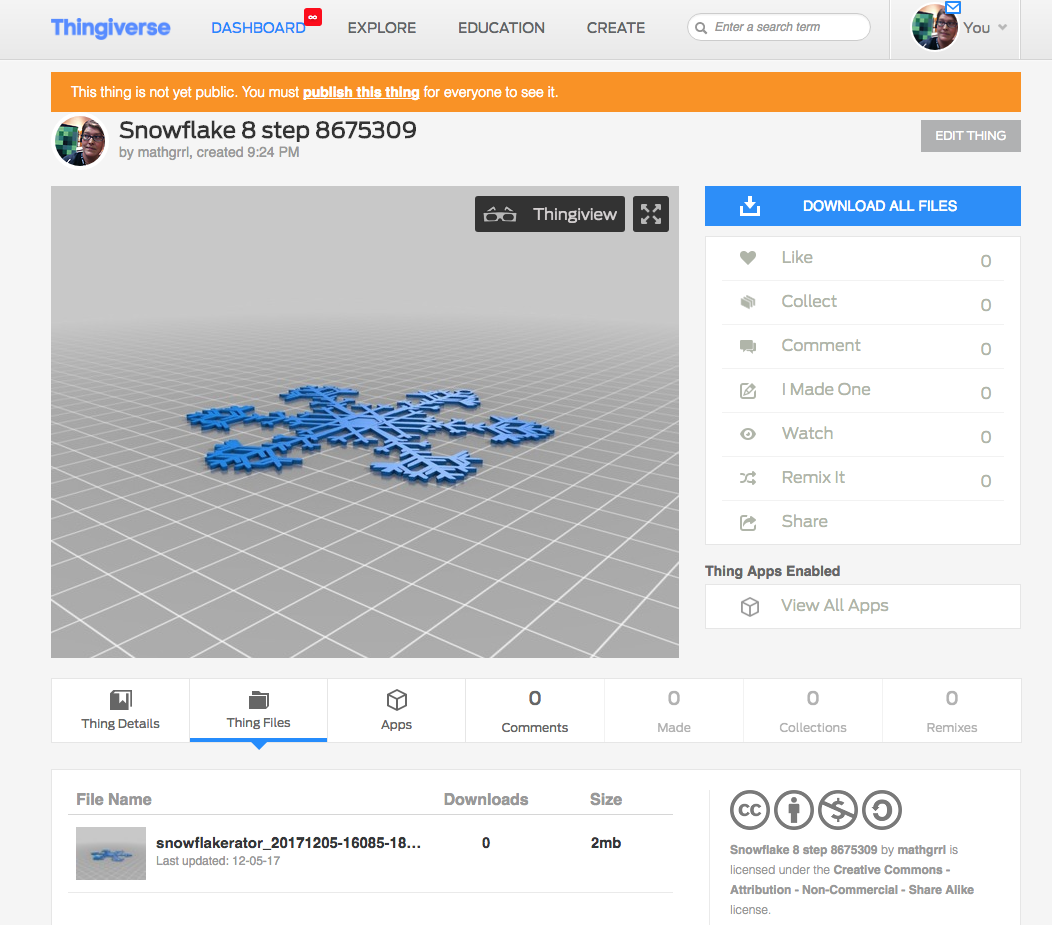
Step 3: Download an STL of your snowflake from Thingiverse
To download the snowflake, click on the “Create Thing” button, and give your snowflake a name. After a couple of minutes click on your avatar icon in the top right of the screen, and from the dropdown menu choose “My Things”. From here you’ll be able to click on your completed design and download an STL file for printing.
Step 4: Upload your snowflake STL to Shapeways
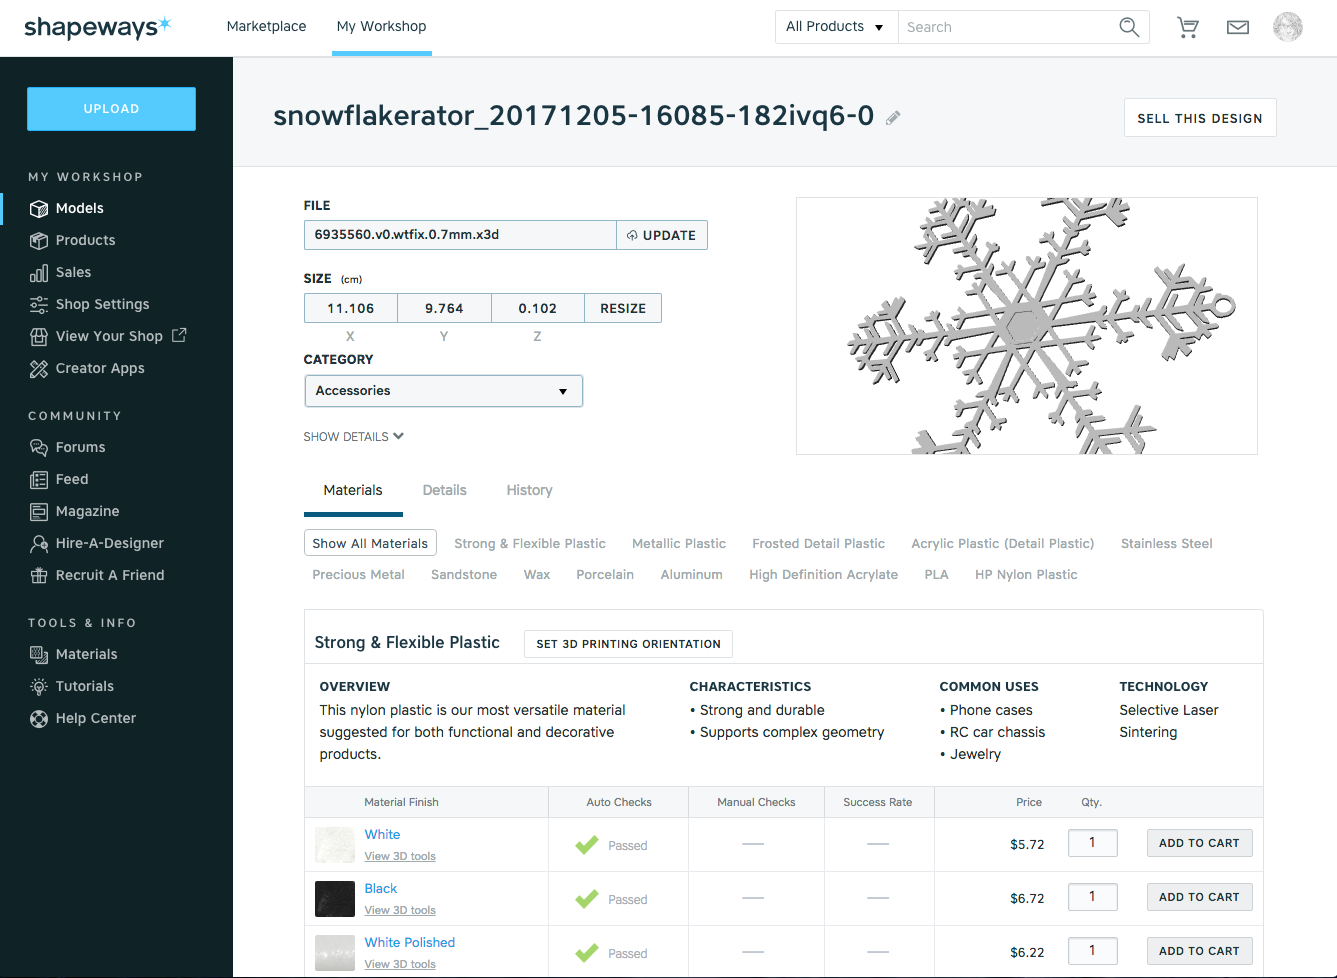
If you’ve got your own 3D printer, you can start printing your snowflake right now. If you want to make a fancy ornament on one of Shapeways’ SLS printers, then go to Shapeways and click “Upload”, then upload your STL file. After a minute or so you’ll see something like this:

There are a few things to notice here. First, the snowflake is pretty big: about 11 centimeters across! If you’d like it to be a different size then you can use the “Resize” button to scale your flake, or you can go back to the design phase and change your target size in the Snowflake Machine customizer. The second thing to notice is that, especially for such a large snowflake, this model is pretty cheap: only about $6 in White or White Polished Strong & Flexible plastic.
Step 5: Fix any printability issues
The third thing to notice about our Shapeways snowflake model page is that there are some scary yellow caution icons saying telling us that there are issues with the model. If this happens to you, click on the “View Issues” button for the material you are most interested in. The issue is most likely “Wall Thickness”; if so, then click on that item in the left column menu. In the middle of the screen is a description of the thickness required for your chosen material. On the right you’ll see an image of your snowflake with yellow coloring the “Suspect” areas that are too thin. Note that in our model that’s the middle of the snowflake and some of the very tips of the branches:

Luckily, there’s an easy fix: Just press the “Fix Thin Walls” button! (If you don’t see that button, then make sure that the “Show Heatmap View” checkbox is un-checked.) After a few minutes of computational time, your model should be repaired and printable. Its price might change slightly; for example our model somehow got five cents cheaper after the fix.
Step 6: Print!
Here’s our model, ready to order and print:
Step 7: Sell your snowflake design (optional)
If you want other people to be able to purchase your snowflake design on Shapeways, click the “Sell This Design button” at the top right of your design’s product page. Fill out a title and description, choose a category, select the materials you want to make available, set prices, and so on.
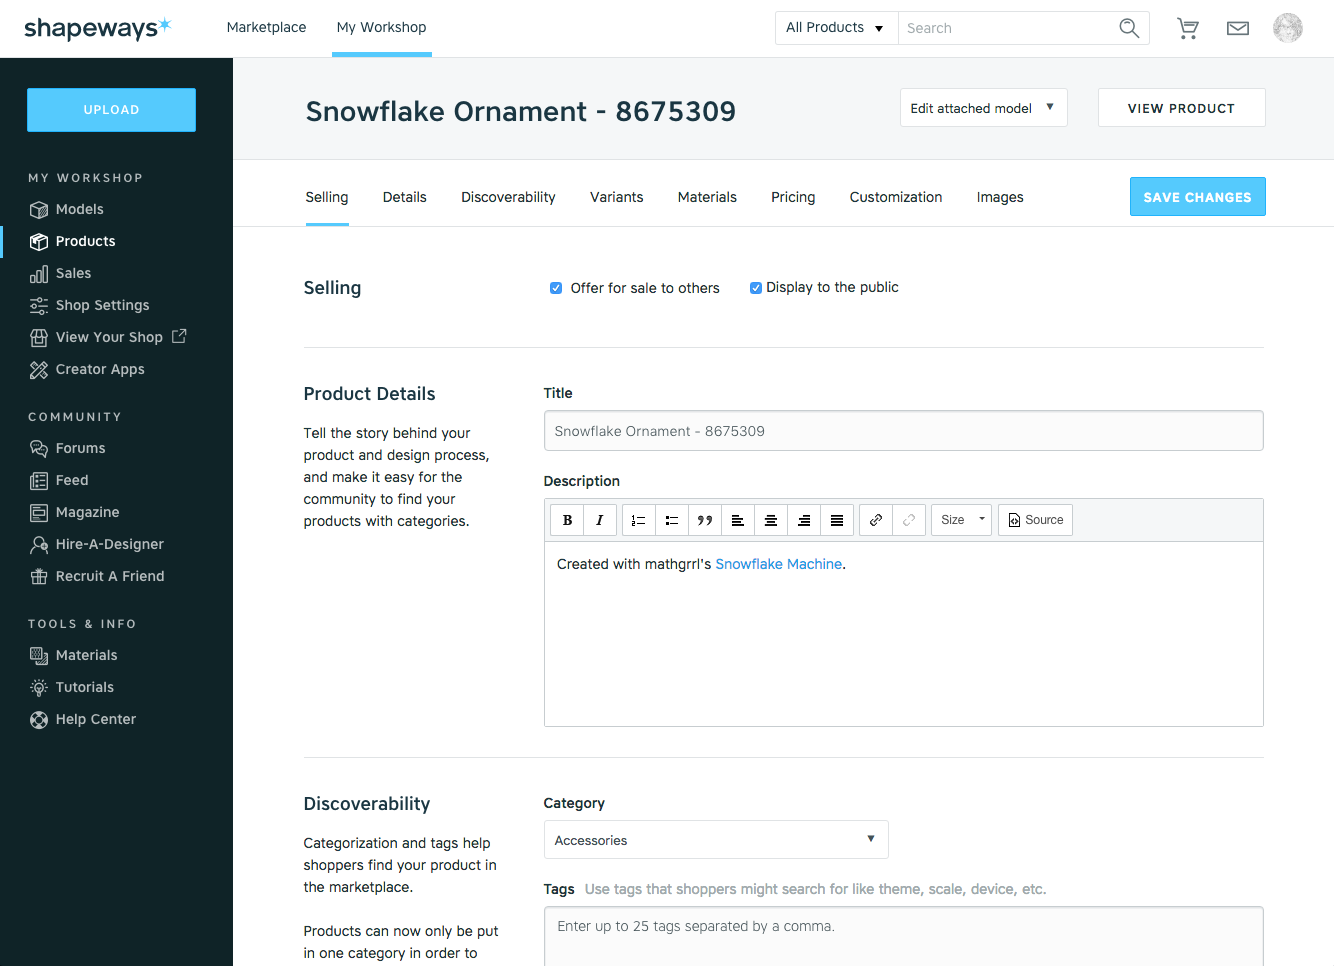
Don’t forget that the Snowflake Machine is under a Creative Commons Attribution – Non-Commercial – Share-Alike license that requires attribution, so if you do sell your model, you need to mention in your item description that you used the Snowflake Machine to create your design, and link back to the Snowflake Machine page on Thingiverse. We did exactly that in the Product Details section of the screenshot above.
The “Non-Commercial” part of the license means that you can’t use models you create with the Snowflake Machine for commercial purposes unless permission is given. The good news is that the author of this post is the creator of the Snowflake Machine, so she can give you permission right now. Here it is: If you just want to sell a few fun Snowflake-Machine-created snowflake designs on Shapeways then consider this my official permission for you to do that, with proper attribution. If you want to use the Snowflake Machine for more than that, just ask!
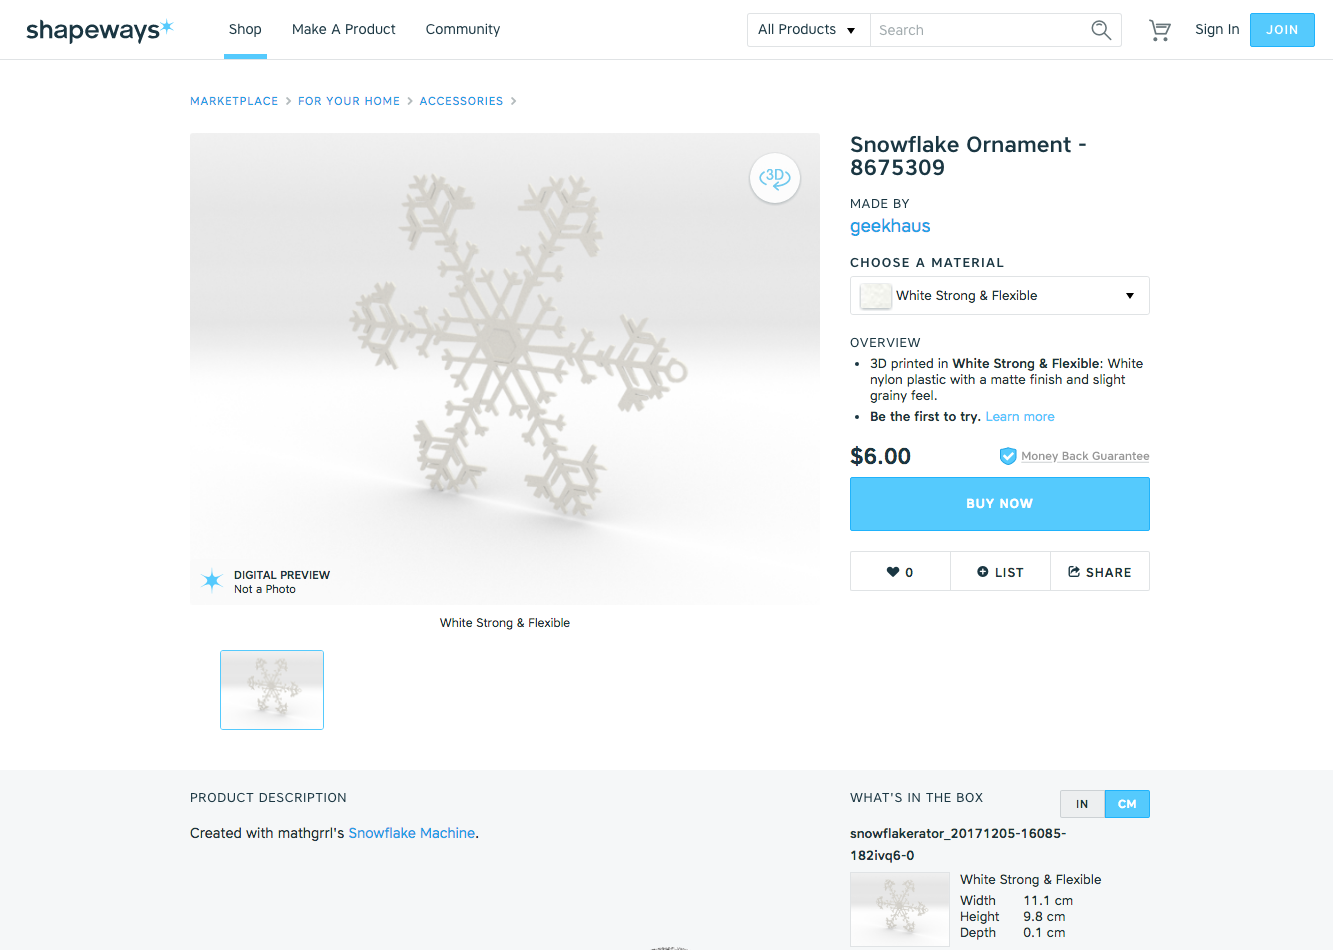
Here’s how our snowflake looks on its Shapeways product page. Notice that the Shapeways site has created a nice render image that shows approximately what the design might look like when printed:
Okay, that’s one snowflake made, but there are still over a billion more you could make, so get moving!
——————
As an Amazon Associate we earn from qualifying purchases, so if you’ve got something you need to pick up anyway, going to Amazon through this link will help us keep Hacktastic running. Thanks! :)


Leave a Reply