

Also published at Shapeways Magazine
—–
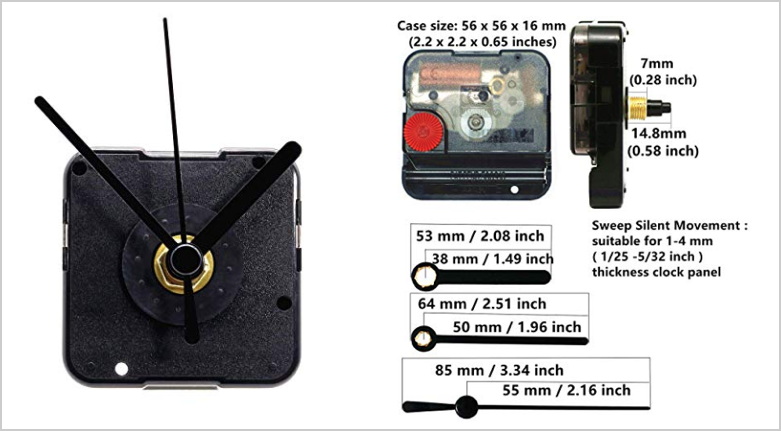
Need a last-minute gift for a special person on your holiday list? You can create a unique, custom 3D-printed clock with just a little bit of design knowledge and an inexpensive battery-powered clock kit like this $8 Youngtown Silent Clock Mechanism with Small Hands:
You’ve got from now to the second week of December to get a 3D design together, if you want to order a 3D print before the Shapeways Material Cut-Off Dates for the holidays. In this post we’ll show you how you can create a custom 3D-printable clock face with three different software programs. Don’t have time for that? Skip to the end to see how you can customize a retro clock very quickly with our Sunburst Clock Maker.
Beginner: Tinkercad
Even if you’ve never created a 3D design before, it’s easy to get started with Tinkercad, a free in-browser 3D design tool with a simple drag-and-drop interface. To get started, sign up for a free account and check out the All3DP video Getting Started in Tinkercad: A Tutorial for Complete Beginners. Once you know a few Tinkercad tricks, you can create complex designs from very simple combinations of shapes; throughout this post we’ll link to helpful YouTube videos to show you exactly what you need to know.
To make a simple clock in Tinkercad, we’ll start with a cylinder for the center face, and then create a couple of stretched-out rings with Rotated “Round Roof” shapes and Holes:
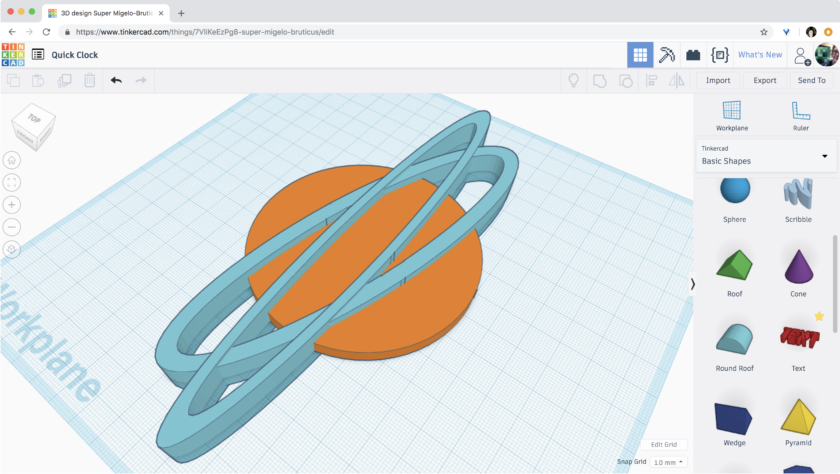
By using the “Control-D” duplication tool we can copy and rotate those rings in a pattern around the cylinder. After modifying the heights of each shape with the Ruler, we get a simple retro clock face design:

If you want to pick apart our Tinkercad design and see how it works, just open this Quick Clock link and tinker for yourself! Add some Text for numbers, if you like, or design something new from scratch. When you’re ready to download your design for 3D printing, click the “Export” button and then choose “Export as STL”.
Intermediate: Fusion 360
To make a fancier custom clock, try Autodesk’s Fusion 360 3D software, which is free for students, educators, and hobbyists. There’s a steeper learning curve to get started in Fusion 360 than there is with Tinkercad, but there are plenty of video tutorials online to help you learn. Some of the best are the Fusion 360 tutorials by Maker’s Muse. We’ll link to relevant video tutorials throughout this section so that you can learn just what you need. Fusion 360 is a very powerful program with a lot of features and tools, but you only need to know how to use a few of those tools to make a simple clock!
For example, if you know how to create a Sketch, add Constraints, and use a Circular Pattern, then you have all the tools you need to create a 2D shape for a clock face design in Fusion 360. To create the example below we started a Sketch, added a Circle at the origin, then formed spoke shapes with Lines. We kept the shapes symmetric by using Constraints, and rotated them in a Pattern around the origin. In the screenshot below we are in the process of duplicating and rotating the thinnest spoke to create twelve copies of it around the center circle:

Most models in Fusion 360 start from a two-dimensional Sketch like the one above. Once you’re done with your Sketch you can Extrude to give it some three-dimensional depth, and then Fillet the edges to make them rounded and professional-looking:
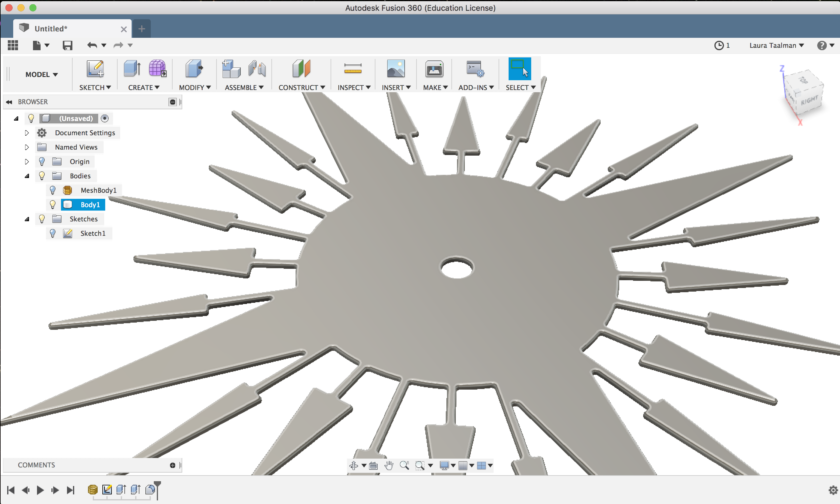
To download your model for 3D printing, right-click on the gray name of your model in the Browser menu (if you haven’t saved your Fusion 360 design yet, then the name of the model will be “(Untitled)”, as it is in the screenshot above). Select “Save as STL”, click “OK” in the new window that pops up, and save the STL file to your computer.
Advanced: Make ALL THE CLOCKS
Feeling more ambitious? With some parametric design you can write OpenSCAD code to generate billions of clocks, each from a random seed. For example, consider the many types of retro-styled “Sunburst” or “Starburst” clocks shown in this Google Image search:
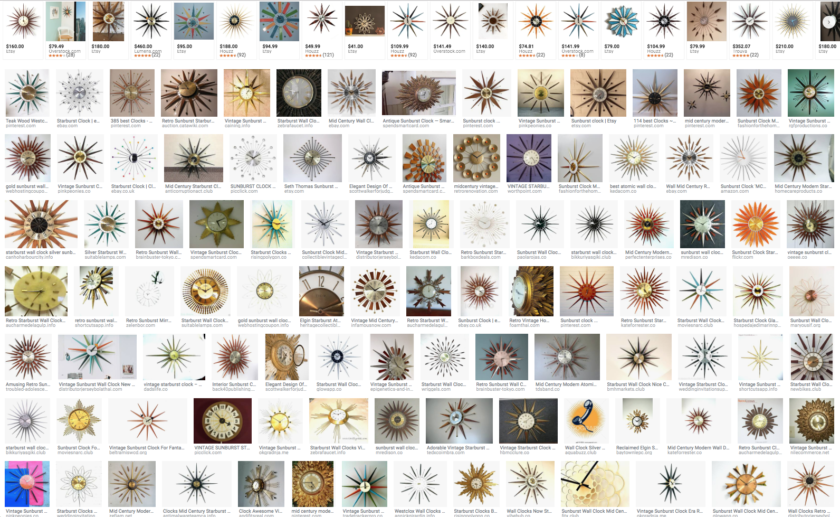
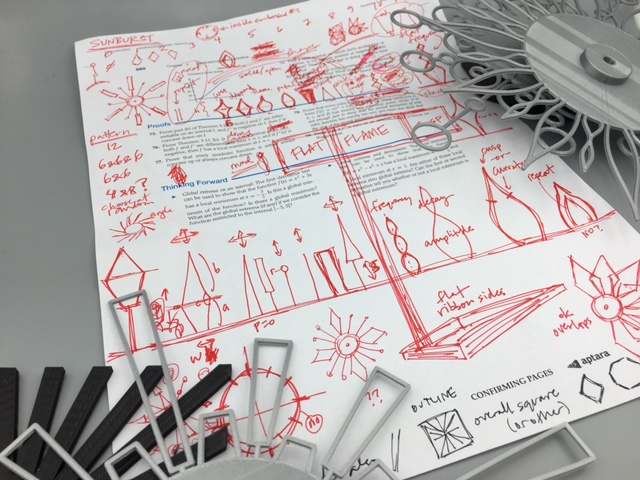
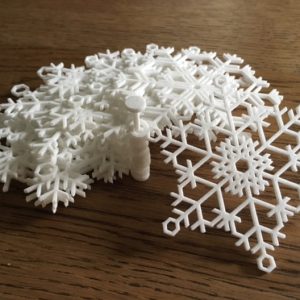
Clocks like these were inspired by the modernist-style work of industrial designer George Nelson, who made many variations of such clocks in the 1950s. There are some common design features that are shared by most of these clocks: geometrically-shaped spokes, a star/sunburst pattern, a circular inside for the hands… Here’s what our first notes looked like when we started thinking about the typical parts and designs for Sunburst Clocks, and some of our early test prints:
OpenSCAD is a free code-based design software that works on any platform. With just a little bit of coding knowledge you can write simple code to describe a library of geometric spoke shapes, and then options for rotating those shapes around a central circle. There are literally billions of configurations; here are just a few:
If you want to learn more about OpenSCAD, check out our beginner’s video tutorial PolyBowls – A simple OpenSCAD code walkthrough and intro document Hello OpenSCAD. The “Hello” document has a link to sample code you can inspect and modify; if you want to play around with the code that made the clocks in the rotating image above, you can download it from our Thingiverse page.
The Easy Way Out: Customize a Sunburst Clock
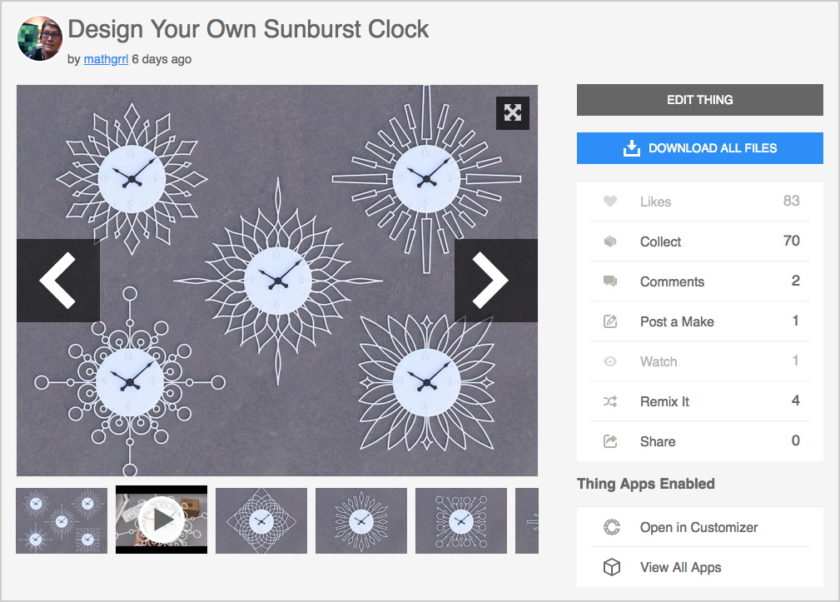
But… you may be thinking… there is NO TIME FOR THIS!! The holidays are coming fast, and you don’t have time to learn how to write parametric OpenSCAD code right now? No problem, just use our Customzier to design your own retro clock! We’ve made our design free on Thingiverse so you can create unique and interesting Sunburst Clocks in just a few seconds. Just go to the design on Thingiverse and click the “Open in Customizer” button to get started (you’ll have to sign up for a free Thingiverse/MakerBot account to open the design in Customizer):
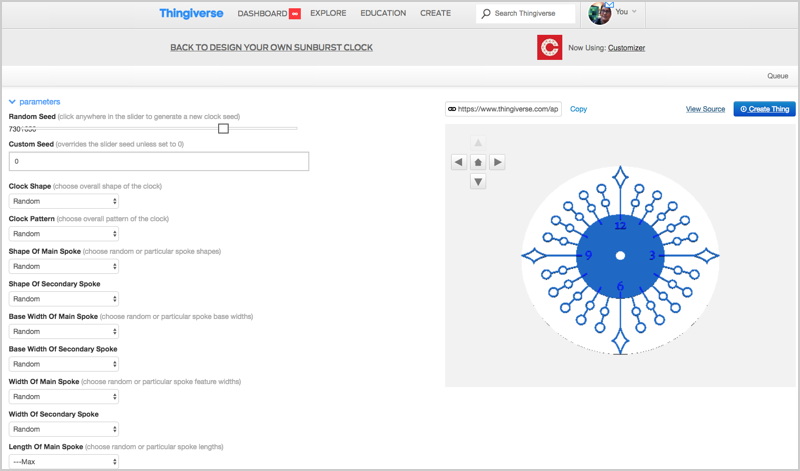
The Customizer version of the Sunburst Clock design lets you create new clocks just by clicking in the Random Seed slider and selecting design options from drop-down menus. You can also set the overall shape and size of your clock, and control the center hole and backing to match your clock kit:
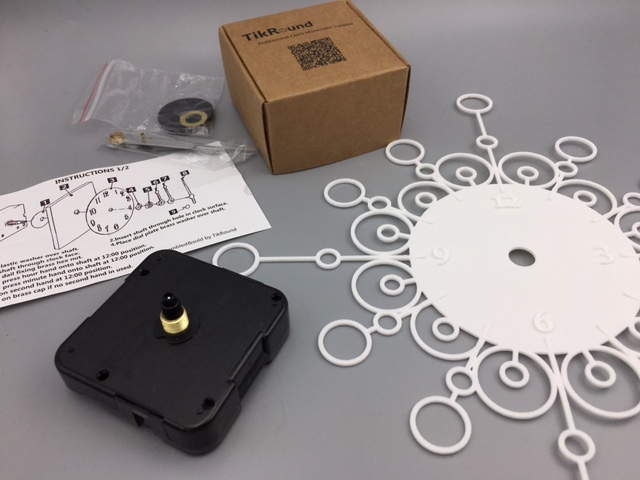
Once you have the clock you want, click the “Create Thing” button and download the STL file from your list of Things within Thingiverse. Here is a design we made with the Customizer and had printed at Shapeways in White Versatile Plastic for less than $30 (it’s the “Cordelia” design), together with the clock mechanism we’ll use to assemble the final clock:
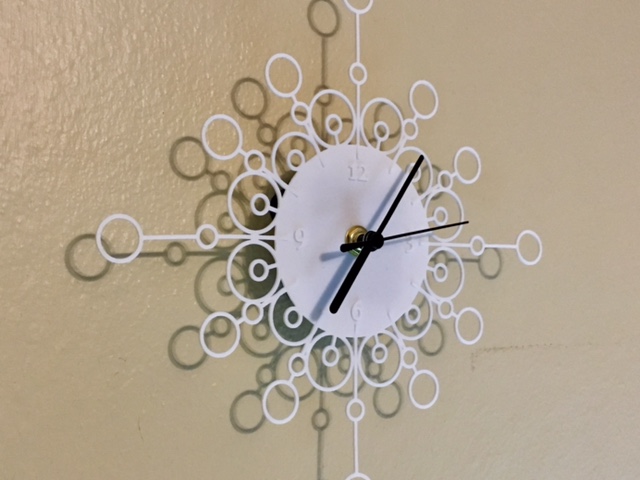
After assembly, the clock looks like this:
And here’s an “action” shot on the wall:
Light Speed: Order an Existing Design
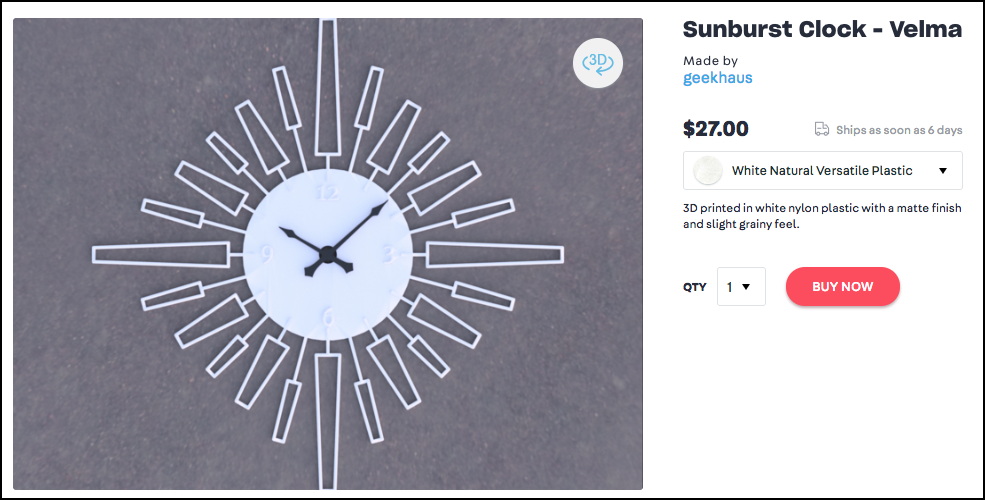
If you’re really down to the wire and don’t have time to create or customize your own design, then quickly head over to the Shapeways Marketplace for a huge selection of unique 3D printed gifts that you can order right away. If it’s before the December 13 cutoff date for medium-sized White Versatile Plastic at Shapeways, then you still have time to order, with next-day shipping and priority manufacturing, one of our best twelve pre-made retro clock designs from the geekhaus shop, like the Velma:
Happy making, and happy holidays!
——————
As an Amazon Associate we earn from qualifying purchases, so if you’ve got something you need to pick up anyway, going to Amazon through this link will help us keep Hacktastic running. Thanks! :)

Leave a Reply