
Also published in Shapeways Magazine
—–
Today we’ll introduce you to Trnio, an iPhone app that guides you through the process of taking 2D photos of a person, statue, pet, or really any 3D thing, then stitches those photos together to create a 3D printable scan. That sounds easy — and it is, except for a few 3D file manipulation and repair steps. Today, we’ll show you how to make the most of the 3D scanning app, whether you’re starting from a work of art, or your own trove of selfies.
To show you what the app can do, we’ll walk you step by step through the scanning, processing, and 3D printing of a Ganesha statue with Trnio.
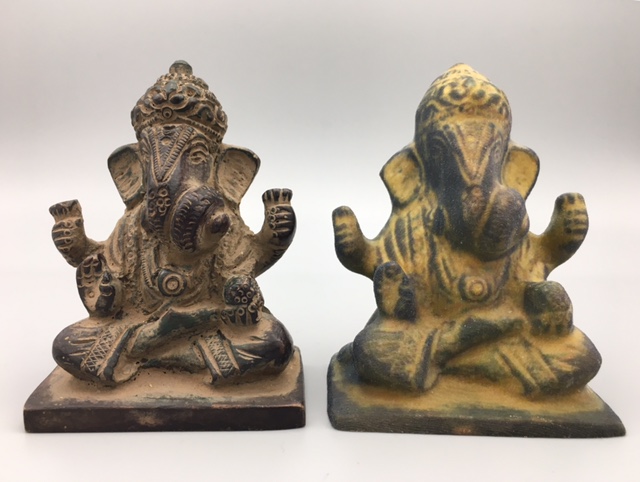
Let’s start with a photo of our original statue next to the Full Color Sandstone replica that we’ll make in this walkthrough.

Photo-Capture With Trnio
First, download the Trnio app. Then place the object you want to scan in a well-lit location such that you can easily photograph it from all sides. For the Ganesha, we put a shipping box on a chair under a bright overhead light.
Trnio will tell you how to take photos so that you capture all sides and then send them to their cloud server, where they will be stitched together into a 3D model.
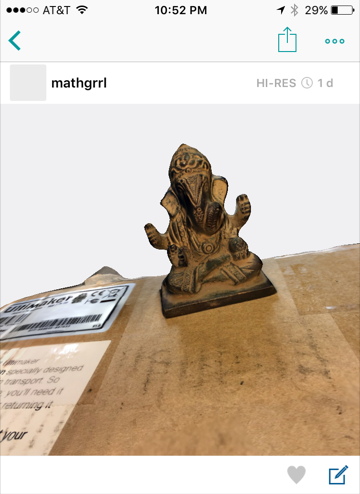
When that model is ready, Export it to a temporary email link. If the link expires, you can resend it from the Profile menu by selecting your scan, then pressing and holding the image until it expands and an iOS Export icon shows up in the top navigation bar, as shown in the following screenshot:
Open the email and download the .zip file. (Note: If your email account refuses .zip files, it may also refuse to activate this link.) When you unzip the file, you should find a .ply file of your model as well as a .jpg that contains information about its texture and color.
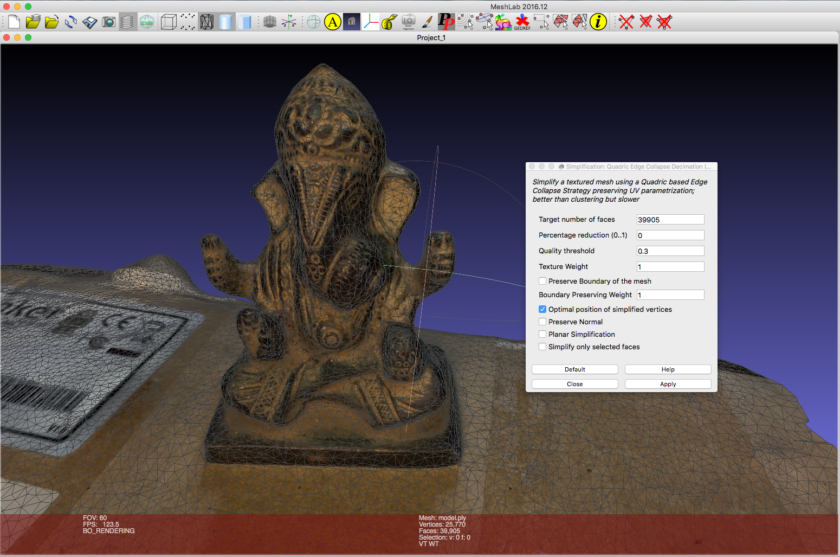
Convert and Simplify with MeshLab
Open MeshLab. Use Import Mesh to import the .ply file for your model, and click on the wireframe cylinder icon in the top menu bar to see the triangles in the mesh. If there seem to be more triangles than necessary, then use Filters > Remeshing, Simplification, and Reconstruction > Simplification: Quadric Edge Collapse Decimation (with texture) to reduce the number of faces in the mesh by half.
Finally, use Export Mesh As… an .obj file. The .obj export will automatically be linked to the .jpg texture file, so keep it in the same folder as you were using previously.
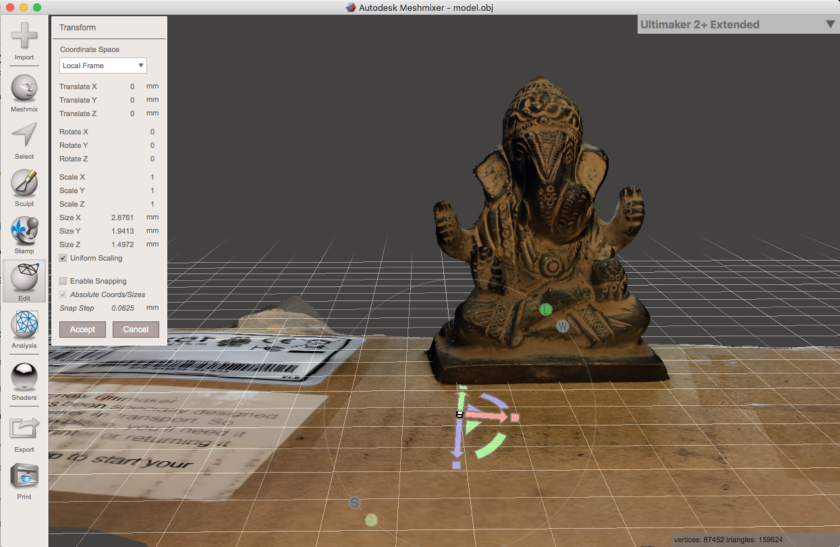
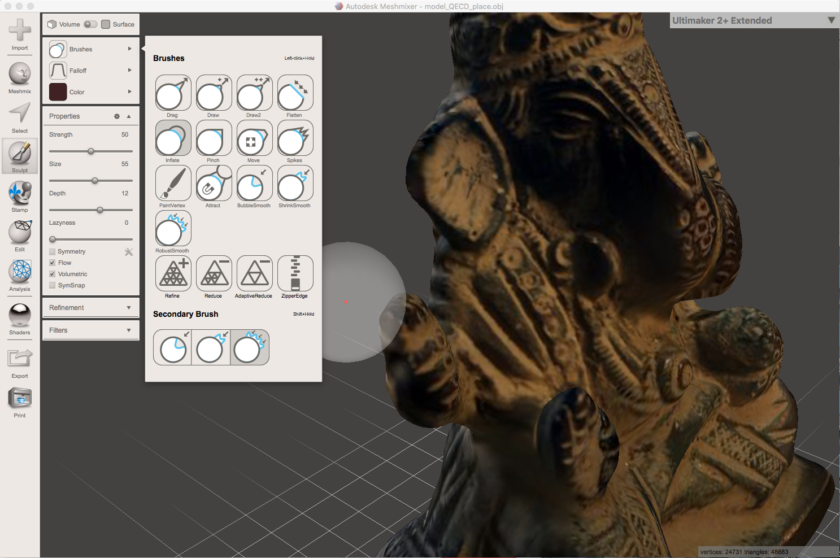
Size, Place, and Trim in Meshmixer
Now open the .obj file in Meshmixer. Use Edit > Transform to scale up by a factor of 100 to make your model the same size as your original scanned object, and to rotate and place your object on the workplane.
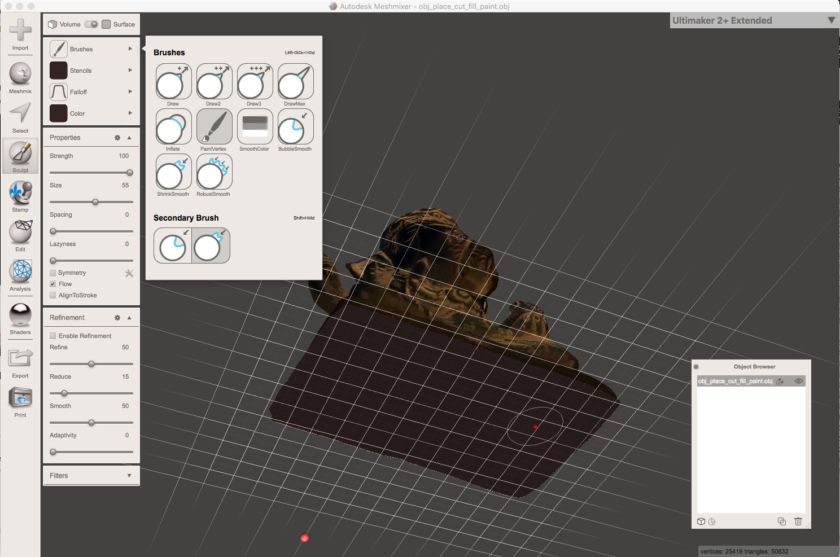
Use Edit > Plane Cut and Select > Lasso > Delete to remove all the parts of the base surface. If Plane Cut didn’t seal the bottom of the model, do Plane Cut a second time, moving the plane slightly higher up the model and making sure that Remeshed Fill is selected.
Repairs and Modifications in Meshmixer
Before you do anything else, apply Edit > Close Cracks. This won’t look like it is doing anything, but it is key for some models! If the surface of your model has holes or missing parts, then you can try to fill them in using Edit > Erase & Fill, as shown in this video from Maker’s Muse:
Fragile parts of your model might not survive the 3D printing process; for example, one of our Ganesha’s ears was tagged as too thin when we uploaded it for printing at Shapeways, so we came back to Meshmixer and expanded out the mesh around the top of that ear. If you plan to 3D print your model and need to strengthen parts of it, choose Sculpt, toggle to Volume mode, and use the Inflate brush to push out those areas as needed.
And if you’re planning to 3D print your model on a 3D printer in Full Color Sandstone, then you’ll probably want to hollow out the model to lower the cost. To do this, choose Edit > Hollow, set Offset Distance to 3mm, and set the diameter of one or more escape holes to let loose powder escape from the inside of the model after printing. Select Update Hollow, then Generate Holes. Move the holes where you want them to be on the surface of your model, then click Accept.
Depending on how you cut off the base plane earlier, the underside of your model might appear colorless. If you want to make the base match the rest of your model, then you can “paint” it. Choose Sculpt, toggle to Surface mode, choose the PaintVertex brush, and set a Color. You can change the Brush Size as needed. Make sure that Enable Refinement is not selected so you don’t change the triangles in the mesh.
Export for Digital Viewing and 3D Printing
From Meshmixer, Export as .obj with Per-Vertex Color Information. This will also produce two files that describe the color and texture of your model, a .mtl and a .jpg.
Before printing, let’s upload our scan to Sketchfab, a fantastic digital file repository for 3D scans. Compress the .obj, .mtl, and .jpg files you just created and upload the zipped archive to Sketchfab. Now you can easily embed a 3D visualization of your object into any website, like this:
Finally, to upload to Shapeways for printing in Full Color Sandstone, go back to MeshLab and Import the .obj file. Then Export the model as a .dae/Collada file. (You can also export in this format in Meshmixer, but sometimes the color information gets lost.) Note on the second save window that the export is associated with the .jpg texture file from the previous Meshmixer export. Compress the .dae and .jpg files together and upload that zipped archive to Shapeways using mm scale. Now you’re ready to print!
Here’s a closeup of our original Ganesha statue and the finished full-color Sandstone print from Shapeways.

Although we’ve lost some fine detail, this is a fairly good replica for a quick scan with an iPhone and a free app!
Do you have a different way to capture and print simple scans? Or suggestions for taking scans to the next level with another software? Let us know in the comments; we’d love to feature your work in a future Tutorial Tuesday.
——————
As an Amazon Associate we earn from qualifying purchases, so if you’ve got something you need to pick up anyway, going to Amazon through this link will help us keep Hacktastic running. Thanks! :)
Leave a Reply