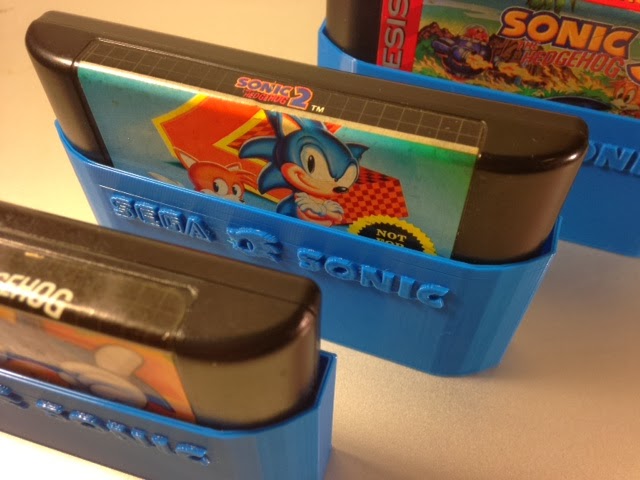
We love Sonic 2 on the SEGA Genesis, and we’ve recently been enjoying the whole series all over again with our son. Our ancient cartridges don’t have protective sleeves, so we printed some custom ones! Designed in Tinkercad with some help from Inkscape and the internet (specifically, the nice .svg images on Wikipedia here and here).
STL file: http://www.geekhaus.com/makerhome/day107_sonicsleeves.stl
Tinkercad link: https://tinkercad.com/things/8BEl67GPJBF-day-107-sega-genesis-cartridge-case
Thingiverse link: http://www.thingiverse.com/thing:203998
Settings: MakerWare .3mm/low in about 37 minutes on the Replicator 2.
Technical notes: We had hoped that since we found the “SEGA” and “Sonic” logos in .svg format we would be able to import them into Tinkercad without problems, but unfortunately the importing process made the insides of the letters all filled in, rendering the words illegible. To fix this we opened the files in Inkscape and did the following:
- Select image with the arrow tool.
- From the “Path” menu select “Object to Path”.
- Using the node-arrow tool (under the usual arrow tool), select and delete parts of the image that are not desired. In this case there was an outline around the letters that needed to be deleted before exporting for Tinkercad. The “delete” key did not work for us, but using “Cut” under the “Edit” window did. This is not needed for all images but it was needed for both of the ones in this example.
- Save the image in .svg format.
- Import the image into Tinkercad using the “Import” tab at the top of the right column menu.
——————
As an Amazon Associate we earn from qualifying purchases, so if you’ve got something you need to pick up anyway, going to Amazon through this link will help us keep Hacktastic running. Thanks! :)


Leave a Reply