
Also published in Shapeways Magazine
—–
Sometimes a design just begs to be printed in Porcelain. If want your model to be food-safe, act as a keepsake, or look great with a beautiful artistic glaze, then Porcelain is a good option to try. However, designing for 3D printing in Porcelain isn’t the same as designing for other materials. This week on Tutorial Tuesday we’ll talk about ways to modify and optimize your designs for printing in Porcelain.
Minimizing Cost
First of all, printing in Porcelain can be expensive, so you might want to start by printing something small. Second of all, according to the Porcelain Ceramic Material Information page, that cost is determined not by the volume or machine space taken up by your model, but by its surface area. That means that objects like espresso cups can get pricey, because they have a lot of surface area not only on the outside of the cup, bit also all over the inside of the cup. It also means that you can’t always reduce the cost of a Porcelain print by hollowing out your model or making it a wireframe, because those actions sometimes increase, not decrease, the model’s surface area.
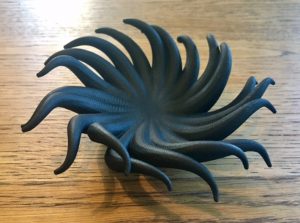
On the other hand, sometimes models can be expensive in plastic or nylon versions but not cost much more when printed in a higher-quality material like Porcelain. For example, consider this Tentacle Bowl, which we initially designed for printing in materials like Strong & Flexible Nylon or the new HP Jet Fusion material:
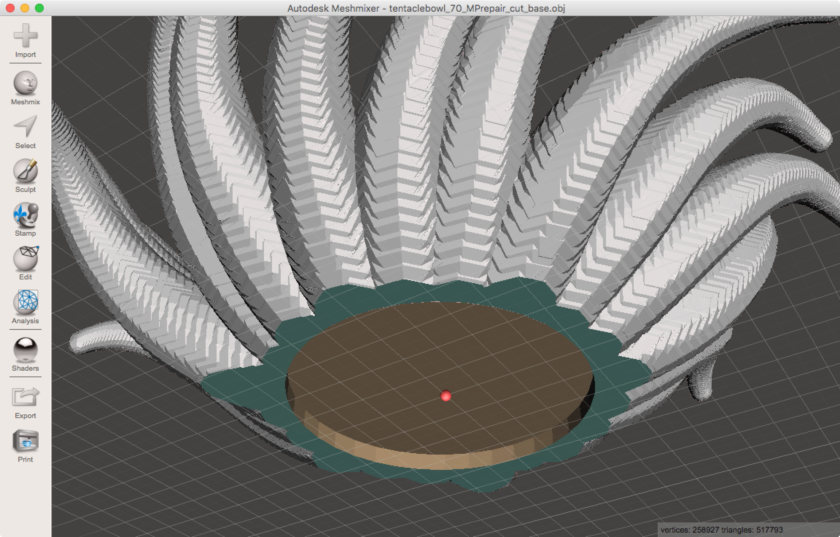
To reduce costs we made it hollow, as you can see in this screenshot from Meshmixer:
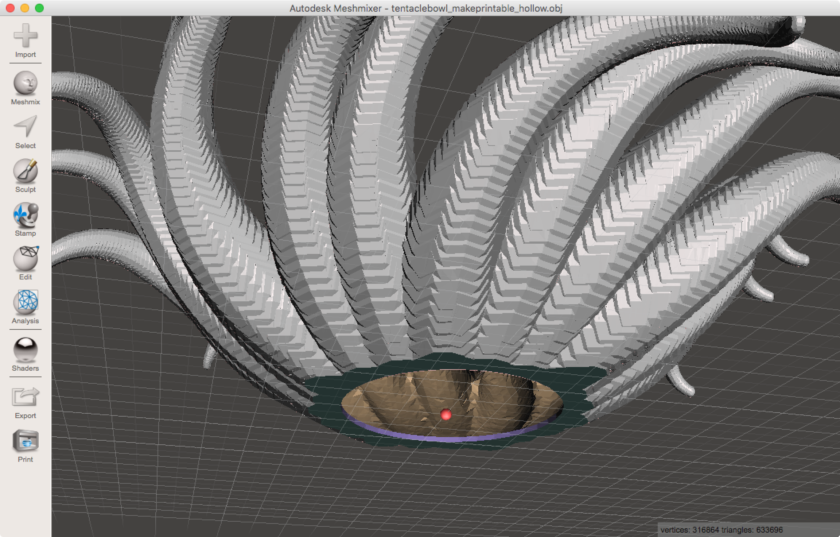
Even when hollowed out and at a moderate size of 12 centimeters across, this model costs about $40 to print in HP Jet Fusion. The result is nice, but the printed bowl is a little too lightweight to justify that kind of cost; it would be better if it felt like a “real bowl” that you would use on your dining room table or keep on a dresser.
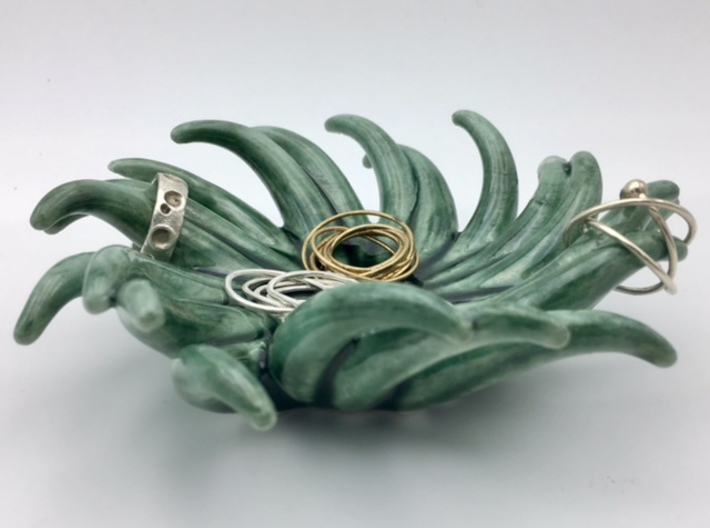
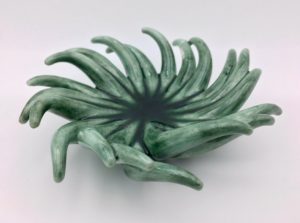
By switching to a Porcelain model in about the same size, we can get a keepsake-quality piece worthy of giving as a nice gift for holding jewelry or other small items. The Porcelain Tentacle Bowl shown below costs just a little bit more; around $50. Because the cost of 3D printing in Porcelain is based on surface area, not volume, for this version of the design we did not hollow out the inside (since this would nearly double the surface area!).

The following Shapeways models also appear in this photo: Moon Ring and Hoop Knot Earring from geekhaus, and Asteroid Pendant from Quantitative Design.
Designing for Porcelain Requirements
Porcelain has a larger Minimum Wall and Wire Thickness requirement than plastics or nylon. To print successfully in Porcelain, non-decorative features must be at least 3mm in diameter. Our first attempt at printing the Tentacle Bowl in Porcelain was just to upload a solid version of our original Tentacle Bowl file. This failed, because the ends of the tentacles were too skinny:
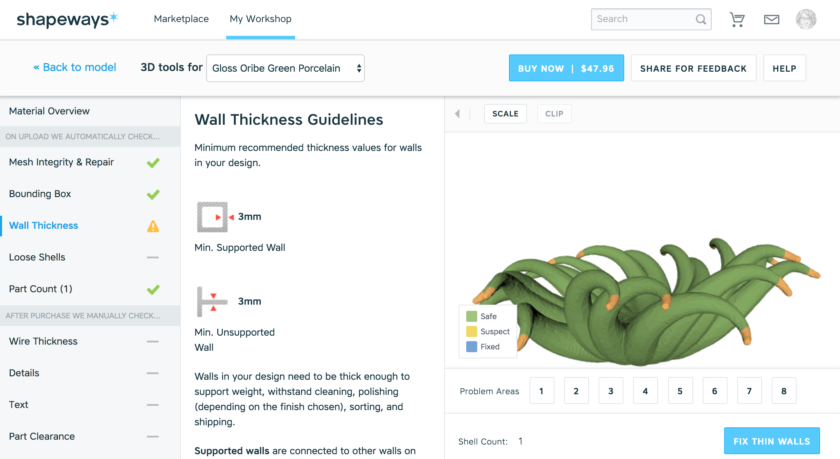
As you can see from this Material Overview, this problem was too much for us to be able to fix it from within the Shapeways interface. Sometimes, pressing that wonderful “Fix Thin Walls” button can get us out of trouble, but this was not one of those times. We had to go back the beginning of our design process in Structure Synth and re-code our model so that the tentacles terminated sooner, while they were still thick enough to print.
We also made a change to the base of the model, not to make it hollow but to add a small indentation. Porcelain models are glazed after printing and firing/baking, but that glaze will not be able to reach the portions of the model that touch the build surface; therefore it is common practice to raise up a portion of the base so that only a small ring of the base will remain unglazed.
Designing for Glaze
The glazing process is where Porcelain models really come to life. We were particularly excited to print our Tentacle Bowl in Porcelain because we knew that the glaze would pool in the indentation at the enter of the bowl, and between the tentacles. We were not disappointed:
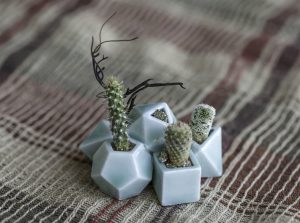
There are two properties of Porcelain glaze that you leverage to make your designs beautiful: First, that glaze will pool in crevices and engraved areas, and second, that glaze will be thinner and lighter on embossed areas, overhangs, edges, and corners. For example, this geometric Polyhedral Dice Planter by Shapeways designer Joaquin Baldwin really benefits from the lighter glaze on the sharp edges of the polyhedra:
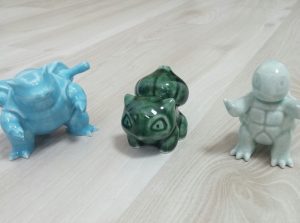
And although Porcelain allows for less detail than other 3D printed materials, you can take advantage of glaze pooling to accentuate lines and features. For example, check out the nice glaze lines on these Porcelain Pokemon Figures by Shapeways designer Seo:
Further Reading
To see how the original Tentacle Bowl model was designed with simple recursive code, and then mesh-repaired for 3D printing, see the articles Tutorial Tuesday 27: Design for Complexity With Structure Synth and Tutorial Tuesday 30: Repair and Prep Structure Synth Models for 3D Printing.
If you’d like to offer one of your products in different materials, but need to use different design files for each material (for example a solid version for Porcelain but a hollowed-out version for Strong & Flexible), then check out the article Tutorial Tuesday 12: Get Some Variety With Variants.
For more information about how Shapeways prints in Porcelain, and how you can optimize your own designs for Porcelain, see the articles Announcing a New Evolution for Porcelain, Tips for Designing in Porcelain and Tips for Getting the Most Out of Details in Glazed Porcelain.
——————
As an Amazon Associate we earn from qualifying purchases, so if you’ve got something you need to pick up anyway, going to Amazon through this link will help us keep Hacktastic running. Thanks! :)

Leave a Reply