
Move over low-poly, it’s time to go low-voxel!
The Stanford bunny is a classic test model, and here we use phooky’s Stanford bunny model to test out a method of producing low-voxel designs.

Download the STL files from Thingiverse: www.thingiverse.com/thing:1052991
When you’re done printing the bunnies, see the tutorial below to learn how to convert anything on Thingiverse into a low-voxel model. Our method is to use Thingiverse to find a starter .stl file, then Tinkercad to convert that file to a “blockified” .schematic file, then Minecraft to play around and repair if necessary, and finally Printcraft to export the new “blockified” file as an .stl that is suitable for printing.
Step 1: Download a 3D model from Thingiverse
Choose anything you like from Thingiverse! But… choose carefully. You’ll want to pick something that will still be recognizable and functional after being block-ified. Download the .stl file for the model that you chose. We chose phooky’s Stanford bunny:

Step 2: Upload the STL file to Tinkercad
Open a new Tinkercad design. (If you don’t already have a free Tinkercad account, get one now; for a reference on using Tinkercad, see the Jumpstart resource page on Tinkercad on Thingiverse.
Use the Import tool in the right-column menu to bring your chosen .stl file into Tinkercad:
 Step 3: Export from Tinkercad as a “voxelized” .schematic file

Believe it or not, Tinkercad has a “Download for Minecraft” option right in their drop-down Design menu. Now is your chance to use it! After selecting this option you’ll have to decide how many millimeters will correspond to one Minecraft block in your model. (A word of caution: 100 Minecraft blocks is a lot bigger that you might think; remember that in Minecraft your own character is only one block wide and two blocks tall…)

Step 4 (optional): Load your model into your Minecraft world
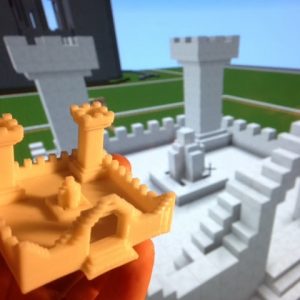
If you have a Minecraft world or server with access to WorldEdit then you can place your new .schematic file into Minecraft and see how it looks, repair it as necessary, and just generally enjoy life.
First you’ll have to put the .schematic file into your plugins/WorldEdit/schematics folder, then you might do something like this:
* Load your .schematic file into the game with //schem load mcedit filename
* Walk to where you want to place your model and use //paste
* Realize that your model is somewhere off to the left of and behind you for some reason and not really where you wanted and OMG quick //undo
* Walk to a new place and try again with //paste
* Uh-oh this still does not look good so use //undo
* Maybe things will be better if you rotate it so rotate the loaded clipboard with //rotate 90
* Okay now maybe now everything is in the right place so try again with //paste
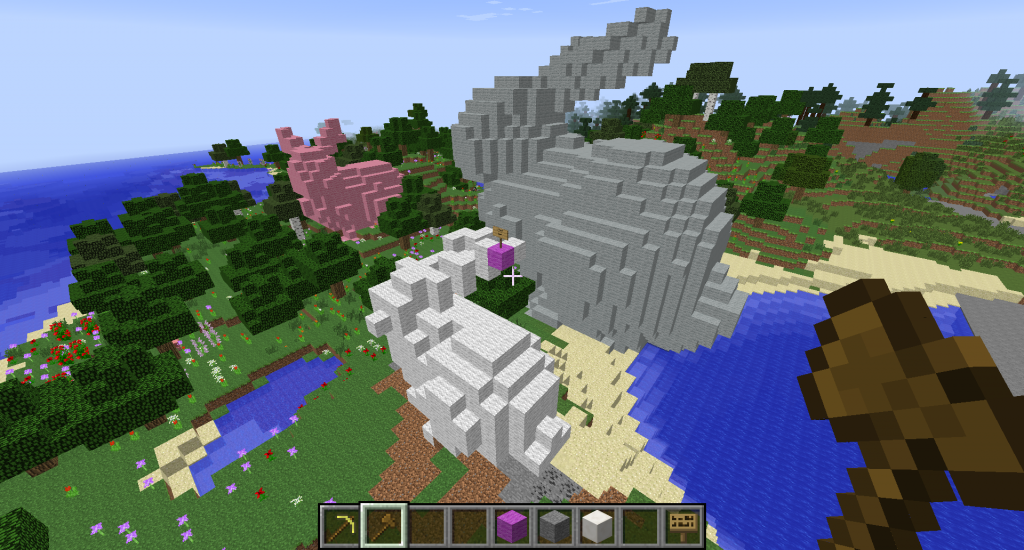
We exported the Stanford bunny at three different resolutions, 3mm/block (the gray-wool bunny), 5mm/block (the pink-wool bunny), and 7mm/block (the white-wool bunny):

Step 5 (optional): Repair your model in Minecraft, if necessary
Bad things can happen if your model has two blocks (voxels) that meet diagonally, only at an edge. In particular, if one block is connected only by diagonal connections to the rest of model, then it might not remain attached with 3D printed. When this happens you can add extra blocks to strengthen the connection. You can see this in the Minecraft image above on the smallest, white-wool bunny; I added a magenta-wool square to one of the ears to fix a diagonal-only connection.
If you repair the model in Minecraft and need to export a new .schematic file, use WorldEdit as follows:
* Using the WorldEdit “wand” (a.k.a. wooden axe), left-select a block to one corner of the model and then right-select a block diagonally opposite, to select the model region.
* To copy the region to the clipboard use //copy
* To save the region as a .schematic file use //schem save mcedit filename
* Now go find the file in your plugins/WorldEdit/schematics folder
(If you don’t have access to a Minecraft world with WorldEdit, you can repair models in Printcraft after completing Step 6, or in Tinkercad after completing Steps 6 and 7.)
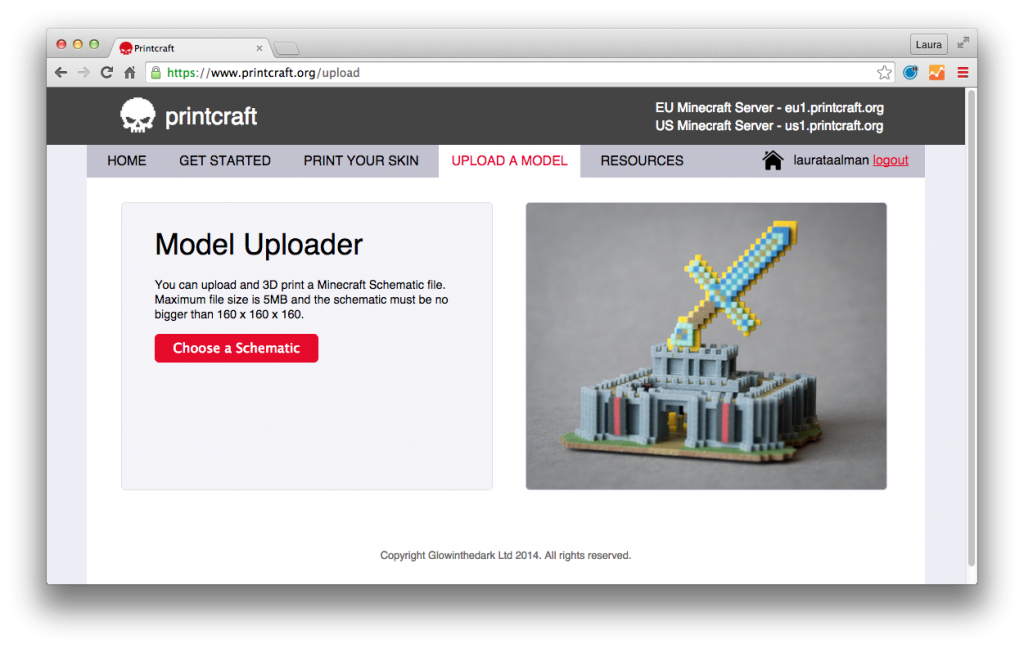
Step 6: Upload the .schematic file to Printcraft
Our model now looks blocky and low-voxel as desired, but we need to get it back into .stl format for 3D printing. You can do this by uploading the .schematic file to Printcraft, which will convert the file to .stl format. You can also use one of the Printcraft servers (us1.printcraft.org or eu1.printcraft.org) within Minecraft to load and remix your designs before downloading, if desired.
 Step 7: Download from Printcraft as an .stl file and scale as needed

Finally, download the .stl file from Printcraft. You may want to scale the model before 3D printing, especially if you are doing comparisons of different resolutions.
For example, we wanted to print three Stanford bunnies that were the same basic size, but at different levels of low-voxel style. Our first model was converted from .stl to .schematic at 3mm/block, and that was our base size. The next model was converted at 5mm/block, which made the resulting voxel-style model *smaller* by a factor of 3/5 from the first model; thus, we scaled the second model up by a factor of 5/3 to match the first. Similarly, our third model was converted at 7mm/block, so we scaled that low-voxel model up by a factor of 7/3 to match the first. Here’s how they all look together in Tinkercad after that process:

——————
As an Amazon Associate we earn from qualifying purchases, so if you’ve got something you need to pick up anyway, going to Amazon through this link will help us keep Hacktastic running. Thanks! :)

Leave a Reply