

Also published at Shapeways Magazine
—–
So you’ve designed something beautiful and the 3D print came out perfectly. But, how do you communicate that online or in your Shapeways shop? In this post, we’ll talk about how to step up your photo-taking game so that everyone knows how awesome your models are.
If you already know something about photography or if you have a nice camera, then this post isn’t for you. Today’s tutorial is for people like me, who needed an easy way to make their phone photos a little bit better and don’t want to break the bank doing it.
Time to Tool Up
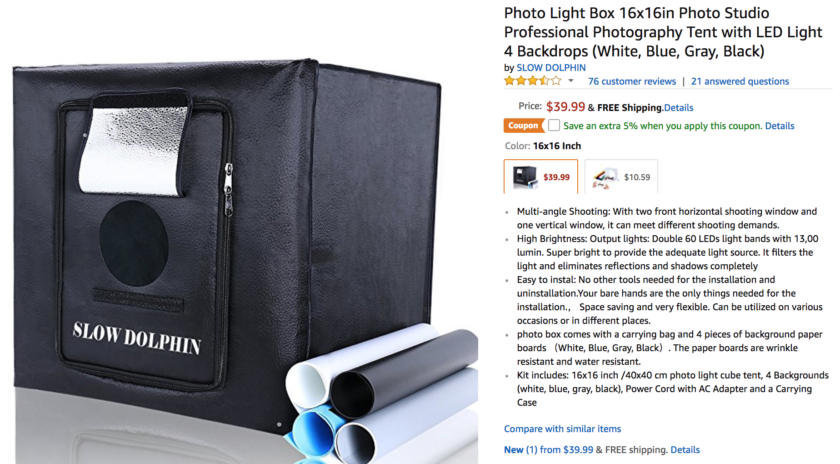
For less than $100, you can get two tools that make a huge difference: a lighting tent and a clip-on macro lens.
If you’ve ever tried to find just the right lighting, taking dozens of pictures with different lamps and in different locations inside and outside, then you will love having an LED light box. It can throw diffuse but bright light all around your object. It also allows you to maintain a consistent look at any time of day or night.
There are lots of light boxes out there that seem as if they would work, but the one I’ve fallen in love with is the Slow Dolphin Professional Lighting Tent Box. It comes with seamless colorful backdrops.
If you often find yourself wanting to take closeups of a 3D print but unable to focus properly, or if you want to take pictures that focus on your print but blur out the background, then a macro lens is your solution.
Again, there are lots of clip-on phone camera lenses, available for a wide range of prices. The one I’ve tested and that I used for the example photographs below is the Amir 2 in 1 Professional HD Camera Lens Kit, and specifically, its 15X macro lens:

One Model, Four Photos
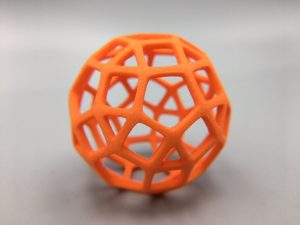
Let’s see how these two basic photography tools can help us take better photographs. We’ll use the Rhombicosidodecahedron from our geekhaus shop as the example model. Here is a photo of this model sitting on a black surface in partial sunlight, taken with an iPhone and no other tools:
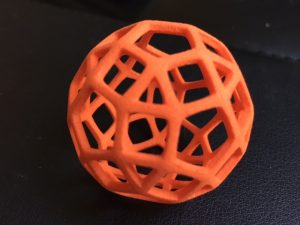
Regular iPhone photo
By clipping on the 15X macro lens, we can focus on the front of the object and have the rear edges blur in the background, which is nice. Notice that we can also capture detail on the surface of the print, and even see some of the layer lines!
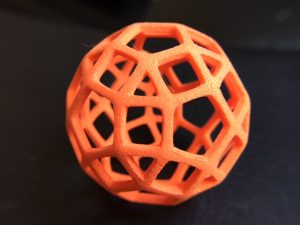
iPhone photo with Amir 15X macro lens
To take those two pictures, I had to try a lot of locations in my house before I could find lighting that produced even a reasonably decent photograph, and they still don’t look so great. By putting the rhombicosidodecahedron in the light box, I can get even light all around the object. Here’s a shot with my regular iPhone lens, inside the lighting tent:
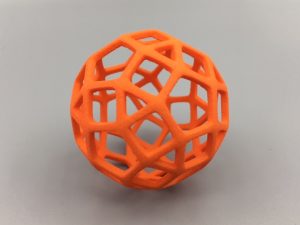
iPhone photo in light box
If we combine both the macro lens and the lighting tent, then we can get a clear, crisp image with focus to the foreground, good surface texture visibility, and no areas with too much light reflecting off the model:
iPhone photo in light box with macro lens
Capturing Detail
Using the macro lens and the light box together, you can capture close-up fine surface detail. Let’s see how it looks with our simple Perko Knot.
The images below compare the surface finish of the Professional Plastic material from Shapeways with Shapeways purple Versatile Plastic on the right. The image has some blurring and distortion toward the edges, but you can see the difference between the smooth black knot and the rougher powdery finish of the purple knot.
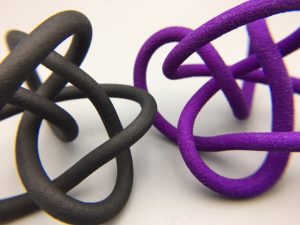
iPhone photo in light box with macro lens
Here’s another image, with the more complex Perko Spikes Knot. From this closeup, you can see that the Professional Plastic material smooths out the spikes a bit, but has a pleasant way of making the indented areas lighter than the spikes, which really highlights the texture and path of the knot.

iPhone photo in light box with macro lens
Controlling Focus
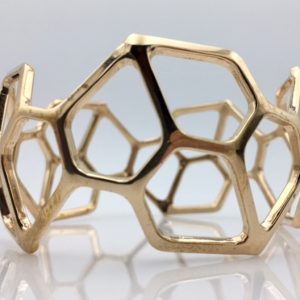
You can also use the macro lens in natural environments to take photos that focus tightly on your object while blurring the background. This can be great for product photography, because you can include a pretty background scene without having it distract from your print. For example, here is a picture of our STEIN Pentagonal Tessellation Bracelet taken with no extra lenses, just with a regular iPhone:
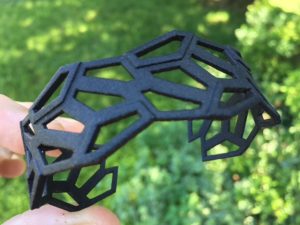
Regular iPhone photo
That’s fine, I guess, but the front of the bracelet is slightly out of focus and the background is distracting.
Here’s the same setup with the macro lens:
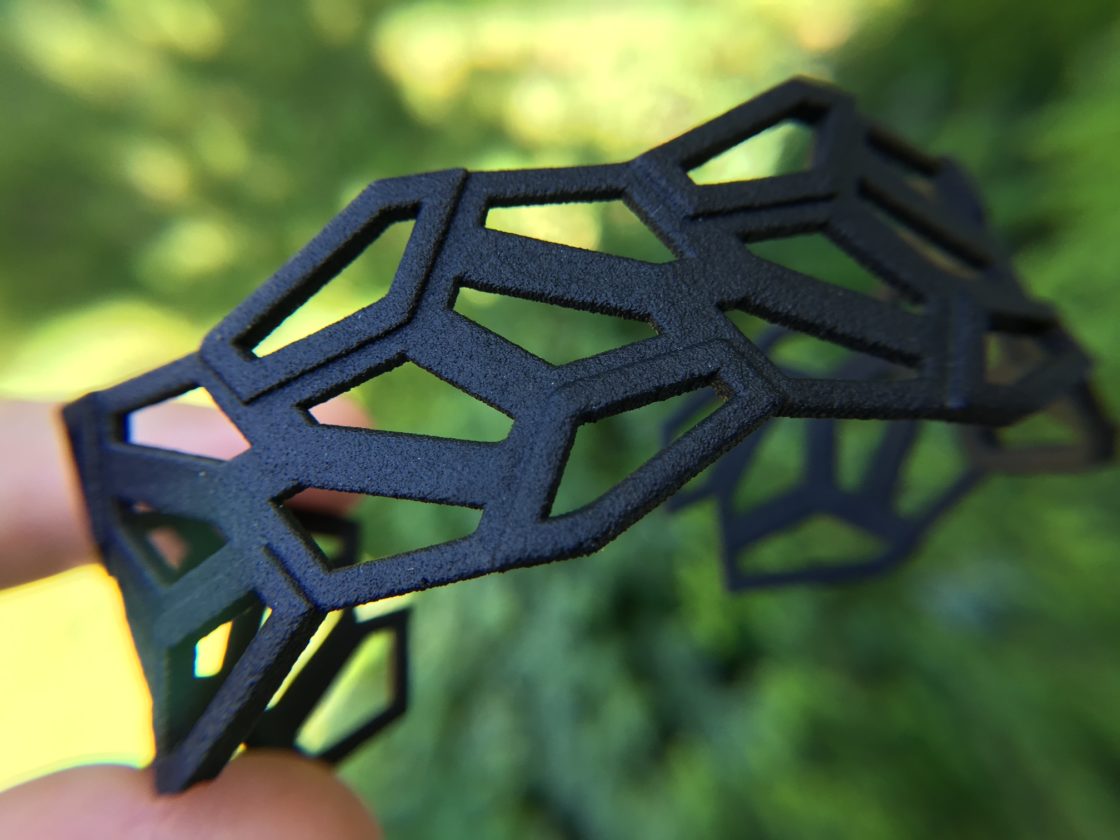
iPhone photo with macro lens
Much better! This picture does a good job of showing off the soft, slightly rounded edges, the smooth overall finish, and the deep matte color.
What’s in your photography toolbox? Do you have any other recommendations for inexpensive tools to help non-photographers take better photographs of their designs? Let us know in the comments!
Want more design tips and 3D printing news? Sign up to our email list!
——————
As an Amazon Associate we earn from qualifying purchases, so if you’ve got something you need to pick up anyway, going to Amazon through this link will help us keep Hacktastic running. Thanks! :)

Leave a Reply