
Also published at Shapeways Magazine
—–
Sometimes a digital 3D design looks great in your software, but just can’t make it in reality. Here in the real world, a 3D model can only be so thin or fragile; models with very skinny wires or delicate parts might break after printing, or worse, not be able to 3D print at all. In this post, we’ll examine how auto-checks, human checks, and prototyping can help you design models that print successfully and are sturdy enough to handle repeated use or handling.
Auto-Checks
Shapeways provides guidelines and auto-checks to ensure that your uploaded models are printable in each material. For example, models created at Shapeways in Versatile Plastic are 3D printed in a durable nylon material in large batches using an industrial Selective Laser Sintering (SLS) printer. Versatile plastic has an intense post production process that includes extraction from powder and other models, cleaning and polishing, and even dying in different colors. Thin or narrow models can be easily broken or separated during post production. You can refer to the Design Guidelines for Versatile Plastic to determine how thin you can make the wires in your model. Here’s what those guidelines say about two success parameters, wall thickness and wire thickness:

In the guidelines above, “walls” are flat surfaces in your model and “wires” are more like strands. Notice that the recommended minimum for supported wires (those that connect to your model nearby on both ends) is 0.8mm. Processed models are put through a polisher, and Premium models are polished even more, so their minimum is higher: 0.9mm. Finally, the minimum for unsupported wires (which don’t inherit as much stability from the rest of the model) is even larger, at 1.0mm.
After you upload your model, Shapeways will perform a series of auto-checks to measure the thickness of walls and wires, among other things. If you click on “View 3D Tools” (or “View Issues”, if your uploaded model failed any checks) from within any Material view of your model, Shapeways will show you the results of these auto-checks. Here’s what that looked like for an early demo version of our Deltoidal Icositetrahedron model:
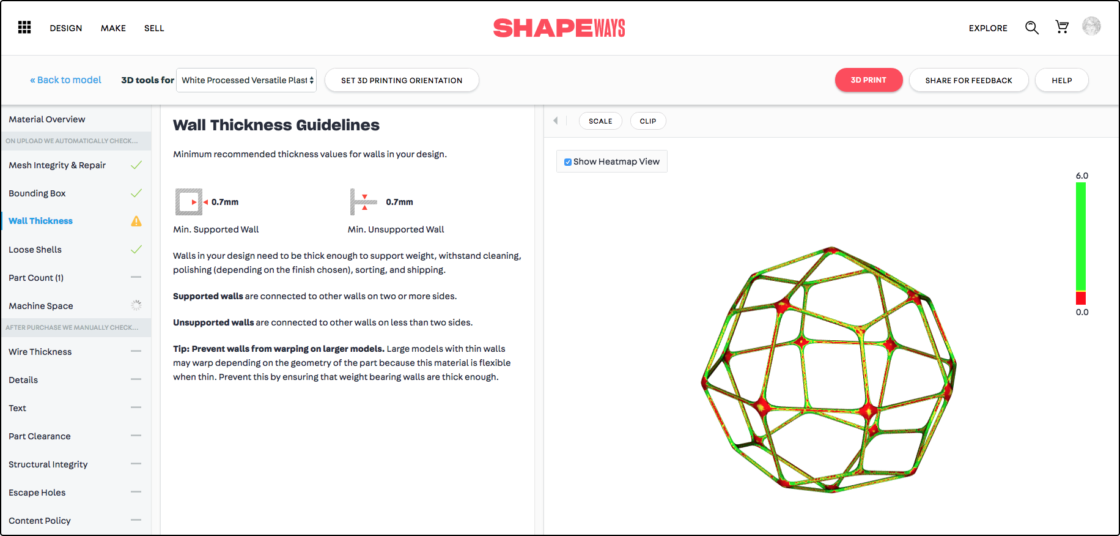
Although this model passed the Wire Thickness check, it fails the Wall Thickness check. The flattened nodes at the vertices, and even some of the long wires, are considered “walls” here, and they aren’t thick enough to get over the 0.7mm minimum thickness requirement.
Checking and Fixing Thickness Issues
You can check the thickness of your model in whatever design software you used to create it. Or, another easy way to determine the minimum thicknesses of your design is to import your model to Meshmixer and use the Thickness tool in the Analysis menu. You can then use Meshmixer to make your design thicker, if needed, by selecting the model and then using Edit > Extrude (using the Normal Direction) or Edit > Offset to expand your model outwards or inwards. To thicken only selected parts of your model, you can take the more targeted approach described in our previous article Tutorial Tuesday 50: Using Meshmixer to Make 3D Models Thick Enough to 3D Print.
Prototyping
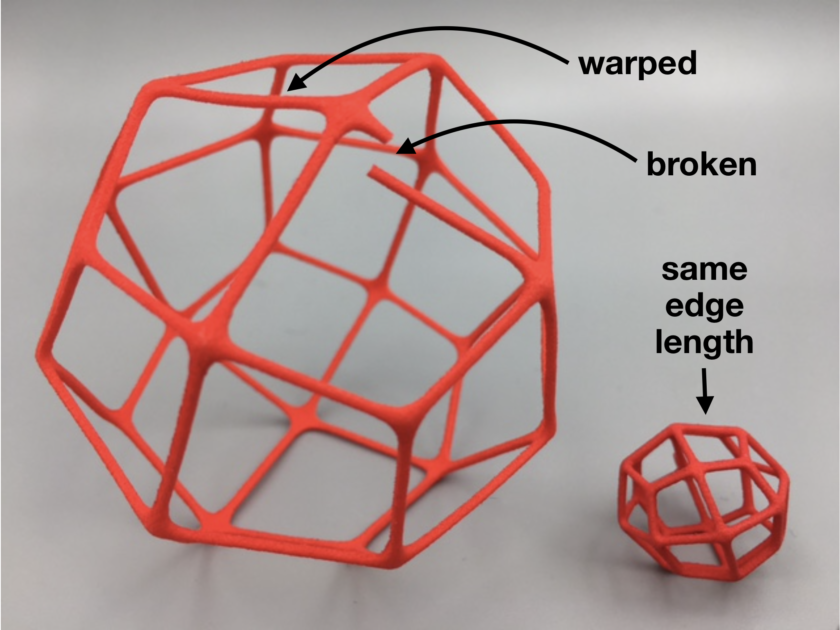
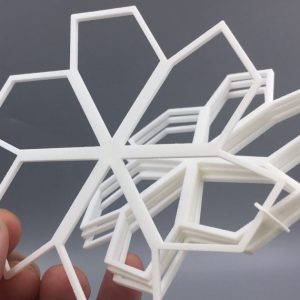
Even if your model passes printability checks, it’s worth printing a demo model to make sure that everything is okay. Sometimes, weak geometry can’t be determined until a model is actually printed and in your hand. Even if the print comes out successfully, it may be too delicate to hold up to its intended use. After our example model failed printability checks, we redesigned it so that it would just barely pass the checks and print successfully. It was a beautiful model, but it wasn’t long before it broke and warped:
I guess the moral of this story is: For best results, don’t try to just *barely* meet the print requirements; rather, make sure you are safely above them.
It’s worth pointing out that the size of the model itself matters as much as the thickness; the two go hand-in-hand. In the image above, the smaller model has the same wire thickness but is actually quite sturdy. The larger model is weaker because the wires are longer and have to hold up to greater stress when the model is handled. This means when prototyping, you can’t always get an accurate impression of the strength of your model by shrinking your model down, or designing a smaller version. Think about it this way: a wireframe model the size of your head will need a larger wire thickness than a model the size of your pinky!
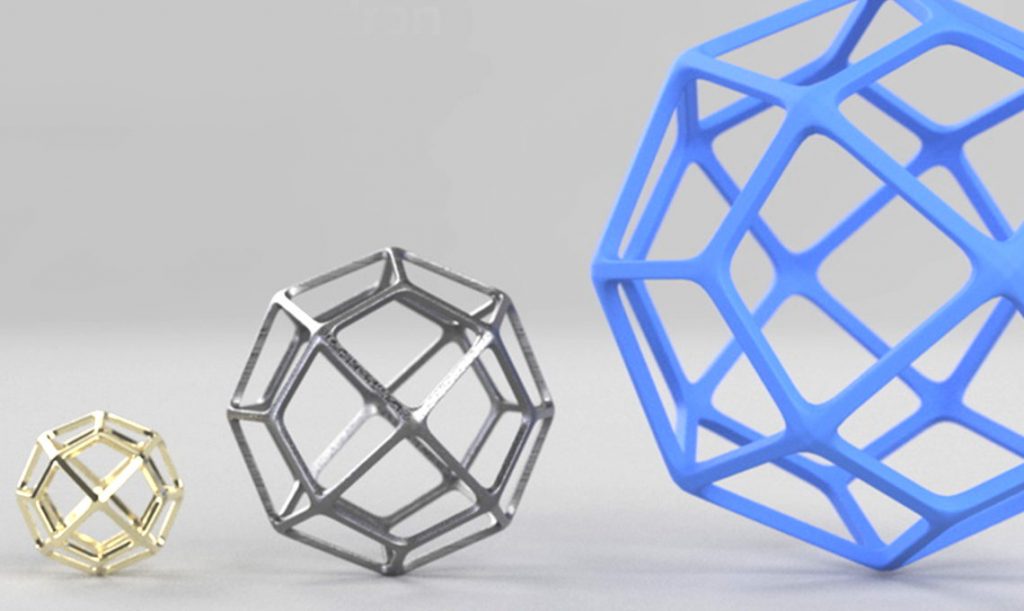
In the end, we decided to thicken up our Deltoidal Icositetrahedron model significantly. The final version looks like the blue model on the right in the image below. It’s much stronger, and the cost of printing was only increased by a few dollars.

Human Checks
Sometimes models pass the online checks at Shapeways, but then fail a secondary check when they are actually ordered for printing. That’s because actual human beings at Shapeways check your model manually while they prepare it for 3D printing. They check for things that require a lot more expertise than the automatic computer checks, like how large your model is, how the different pieces of it fit together, and a lot of things that you or I might not think of. If they notice a problem then they will email you, and try to suggest ways that you can modify your model to increase the likelihood that it will print successfully.
Keep in mind that the printing engineers at Shapeways want to make sure that your model can print correctly not just once, but over and over. A model that passes the auto-checks and listed guidelines may have weak areas that may not break on the first print, but are likely to break the second or third time. This means that even if your print comes out well in a “Print it Anyway” situation, it still might not be stable enough to offer as an item in the Marketplace. Variations in print stability can arise from small differences in the printing and finishing process, like how the models are packed or oriented in the machines, or how it interacts with other models in the polisher.
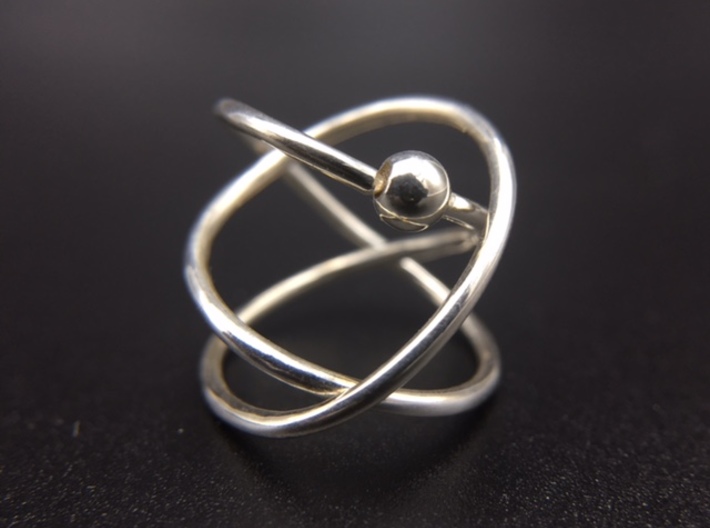
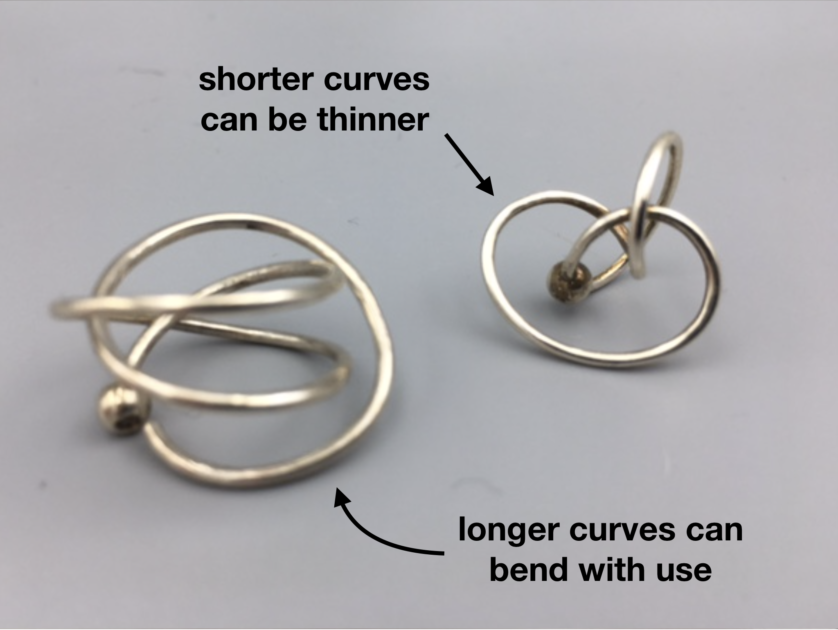
As an example, consider our Hoop Knot Earring:
According to the Design Guidelines for Silver, we needed to make the wires at least 1mm in diameter. However, it’s best to exceed that significantly; consider that Silver models from Shapeways are 3D printed in wax, cast in Silver using lost wax casting, and then finished and polished. All of those procedures could damage a model with weak geometry. When we uploaded our Hoop Knot Earring for printing, it passed all of the auto-checks. But when we tried to order a print of it in Silver, the kind and knowledgeable human engineers at Shapeways said that the geometry of our model was too weak. They suggested adding connectors and even emailed me this helpful illustration:

Of course, in this case I couldn’t add connectors since that would have ruined the design; instead I had to make the wires thicker to give the model more stability. That resulted in the print shown below on the right. Later I tried to make a larger version, shown on the left, but an interesting thing happened; since the wires had to travel further, they were more prone to bending and becoming misshapen when I opened and closed the earring. Even though the larger model had thicker wires, in the end it didn’t work as well as a functional item.
In the end, you’ll have to use a combination of your own design analysis, automatic printability checks, manual printability checks, and physical prototyping to successfully print delicate or geometrically complex models. If you’ve got your own tips and tricks that help you through this process, let us know!
——————
As an Amazon Associate we earn from qualifying purchases, so if you’ve got something you need to pick up anyway, going to Amazon through this link will help us keep Hacktastic running. Thanks! :)

Leave a Reply