
To make files for laser cutting, you need two-dimensional information. You could download a picture from the internet, draw something yourself, or create an image in a program like Illustrator or Inkscape. Ideally you should save this 2D information in some kind of vector graphics format such as SVG. In this post we aren’t going to talk about any of that, but rather how to create a 2D-laser-cuttable SVG file from a 3D-printable STL file using the free online in-browser modeling program Tinkercad.
SVG from STL with Tinkercad
To start, import any STL file to Tinkercad. Move the model up or down so that part of the model intersects the Workplane, then export to SVG format. This will produce an SVG file that matches the layer of the STL file that you intersected with the Workplane. Here’s an example using one of our procedurally-generated clock designs:
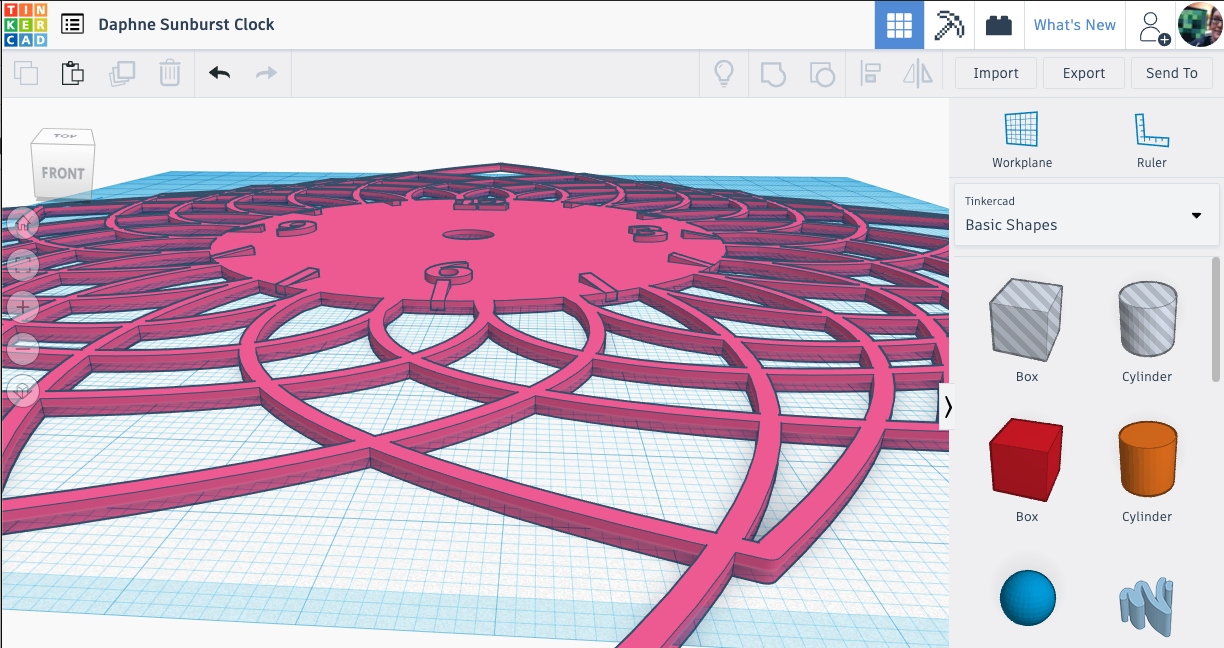
In this example we had to create two SVG files: one for the outline of the clock and one for the numbers and hour marks. To make the first file we shifted the model slightly down to make sure we had a good intersection of the overall design with the workplane, then exported to SVG. To make the second file we shfited the imported STL file lower so that the text and marks we wanted to capture intersected the blue Workplane, then exported again to SVG.
Cutting with the Glowforge
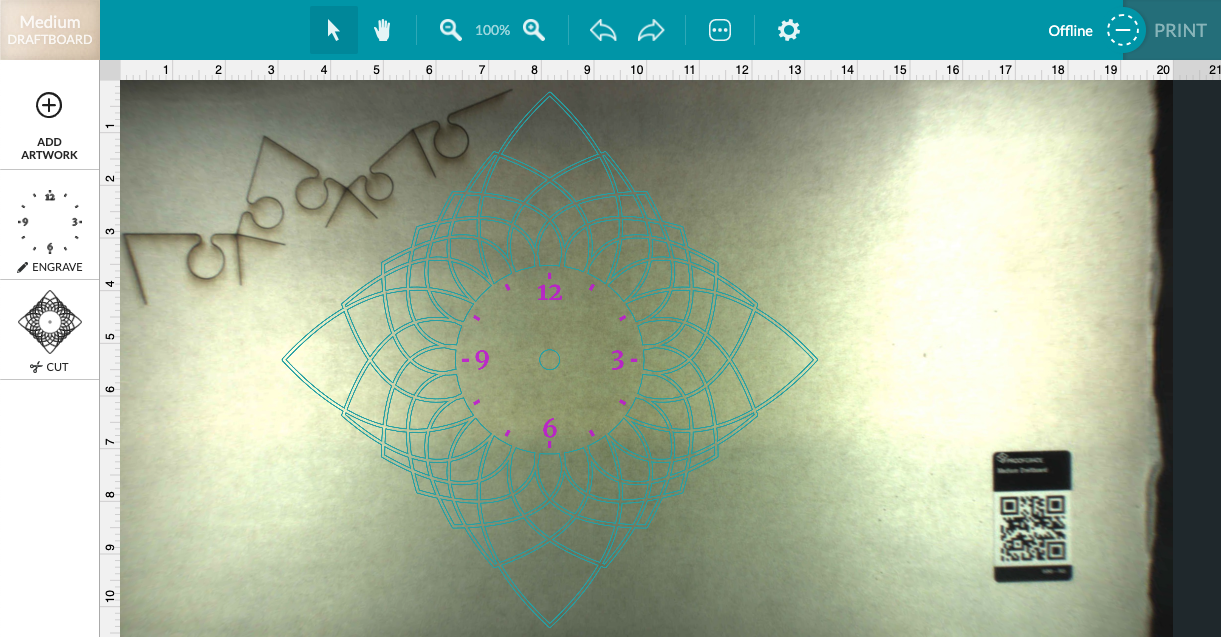
You can of course use any kind of laser cutter to cut out SVG designs, but this week I had access to a Glowforge at ICERM, so that’s what I used. The Glowforge’s claim to fame is that it is very easy to use, just plug-and-play. To send a file to the Glowforge you actually upload the file to their online printing app and then the online app communicates the file to the machine. It was indeed very easy to import the two SVG files and to line them up in the Glowforge app. We set the outline to Cut and the numbers and marks to Engrave:
The cutting part took less than 15 minutes, which allowed for only the shortest of Tweet-alongs:
In the time it took me to Tweet that, we progressed quite a bit pic.twitter.com/3IpKEGSstj
— Laura Taalman (@mathgrrl) September 5, 2019
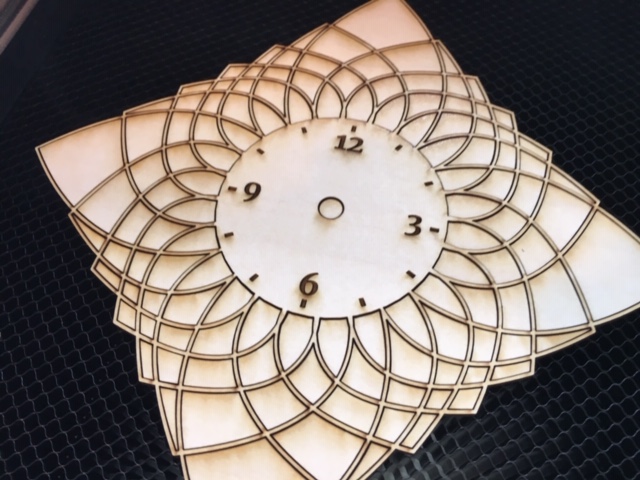
Here’s what it looked like after removing the rest of the board but not yet lifting out the clock design:
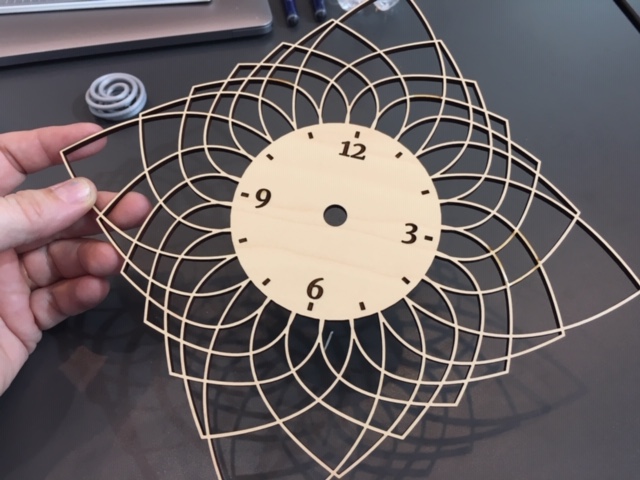
All of the little interior pieces just fell out effortlessly when we lifted out the clock. The Glowforge plywood material came with a thin layer of paper on the top and bottom that was easy to remove. This paper protects the final model from laser burn/char marks. Here’s the finished cut piece:
Try it yourself!
If you want to try making a clock like the one above, you can customize your own procedurally generated Sunburst Clock or download pre-made STL models from our Thingiverse page:
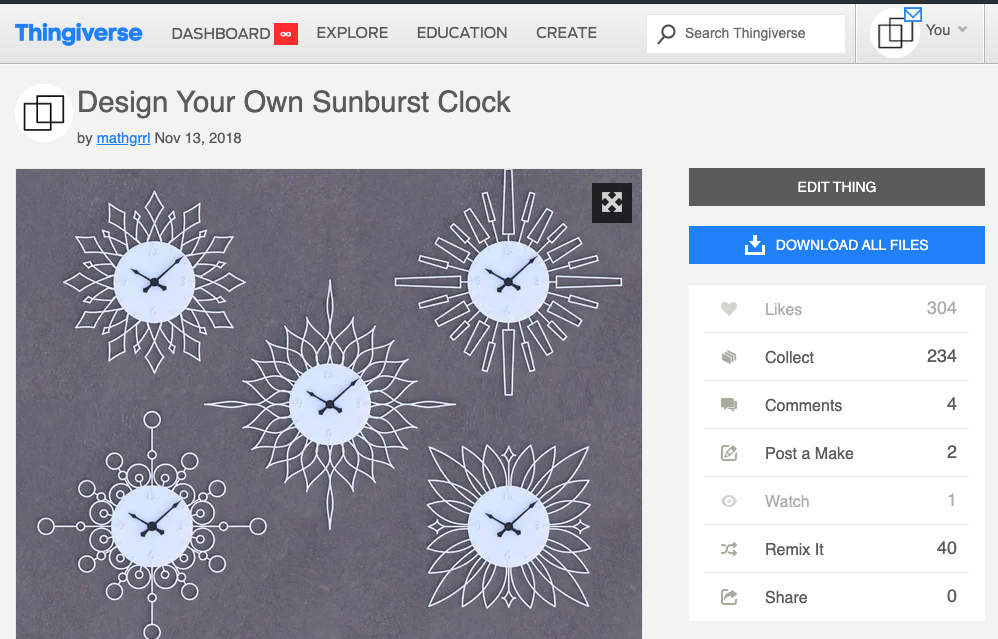
After converting to SVG and laser cutting, simply screw on a small battery-powered clock assembly to finish your clock.
Of course this trick works for any 3D model, not just clocks. Go to any 3D repository like Thingiverse or PrusaPrinters, download some interesting STL design, and turn (a slice of) it into a laser cutting project. Or, go directly to Tinkercad and design something new for exporting to SVG and cutting!
——————
As an Amazon Associate we earn from qualifying purchases, so if you’ve got something you need to pick up anyway, going to Amazon through this link will help us keep Hacktastic running. Thanks! :)

Leave a Reply