
Also published in Shapeways Magazine
——
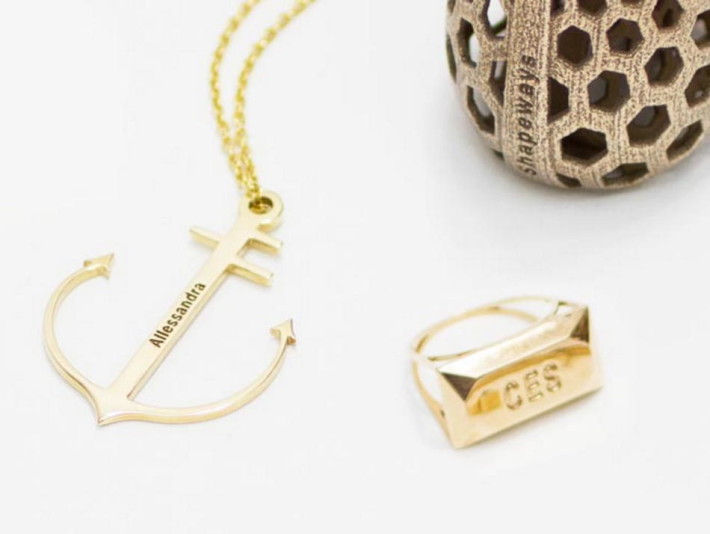
One of the most powerful things about 3D printing is the ability to create customized, one-of-a-kind objects. You could choose to make many different personalized jewelry pieces from one ring or pendant design by making modifications on a case-by-case basis in your own design software. Or, you can use Shapeways’ CustomMaker tool to make your shop designs personalizable with just the click of a mouse, enabling yourself or your customers to add their own text or images to parts of your designs. This week on Tutorial Tuesday, we’ll talk about how you can turn your existing designs into easily personalizable, one-of-a-kind pieces.

Getting Started with CustomMaker
CustomMaker runs on Shapeways’ own Javascript voxel-based design language ShapeJS, but you don’t need to know anything about that to apply it to your designs. Using CustomMaker to add customizable text and image fields is as easy as dragging and clicking with your mouse.
So how does it work? Suppose you have an existing design on Shapeways that you want to make personalizable. Start by going to the “Customization” section of the product edit page for that design and activate the “CustomMaker” radio button.
Then, select either “Add Text Box” or “Add Image Box” and click somewhere on your object to make the text or image box appear. You can drag to move or re-size the text or image box however you like. The tool will even automatically curve your text or image around rounded parts of your design! Choose whether you want the text or image to be “embossed” (protruding out from your model) or “engraved” (carved into your model), set the detail depth and font parameters, and click “Preview” to see an example of how the customized text or image would appear on your design.
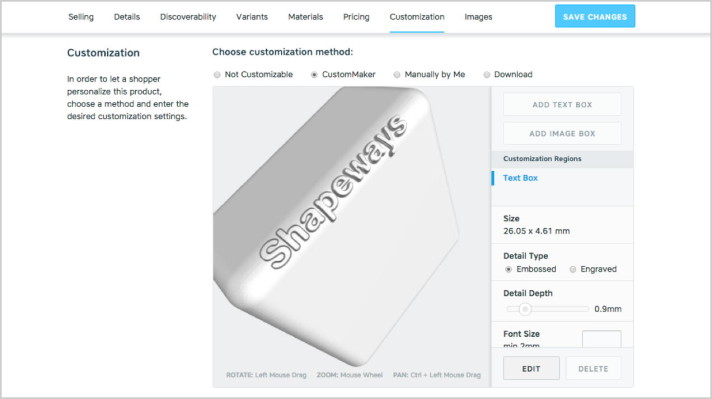
You can change settings while in the Preview mode and the design will automatically update. To change the placement of text/image box again, press “Edit” to exit the Preview mode. To add a second customizable feature, first “Save Changes” and then return to the Customization menu and preview. You can add up to one text box, one image box, or one of each type of box.
CustomMaker Resources
For a video overview, check out Lauren Slowik’s tutorial How to Use CustomMaker:
For more in-depth information see the Shapeways tutorial Getting Started with the CustomMaker Tool. To discuss CustomMaker issues with the Shapeways designer community, check out the Shapeways forum Customizable Products & Design.
Customizable Products on Shapeways
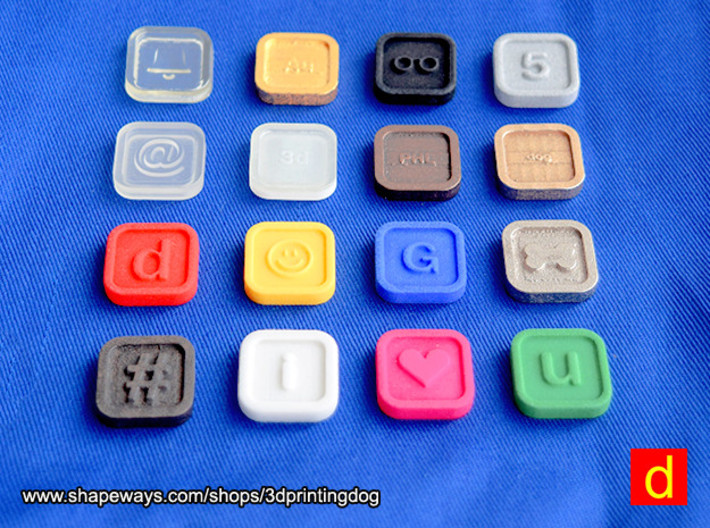
To see existing CustomMaker designs on Shapeways, check out the list of All Customizable Products in the Shapeways Marketplace. Or just search for anything on Shapeways and then click the “Customizable” checkbox in the left sidebar to restrict to personalizable items. One of my favorites is the elegantly simple Tile by 3Dprintingdog, which lets you upload any image, drawing, or emoji to personalize the design:
Have you used CustomMaker on any of your designs? Do you have any questions about applying CustomMaker to your existing models? Let us know about it in the comments 🙂
——————
As an Amazon Associate we earn from qualifying purchases, so if you’ve got something you need to pick up anyway, going to Amazon through this link will help us keep Hacktastic running. Thanks! :)


Leave a Reply