
Also published at Ultimaker Education
—–
At James Madison University, every student must satisfy a math requirement. For those students who are not majoring in subjects that require specific mathematics courses, one option is our general education MATH 103 course, “The Nature of Mathematics.” The goal of MATH 103 is to expose students to mathematics and mathematical thinking in a broad sense, with whatever topics the instructor chooses to cover.
Teaching math with 3D printing
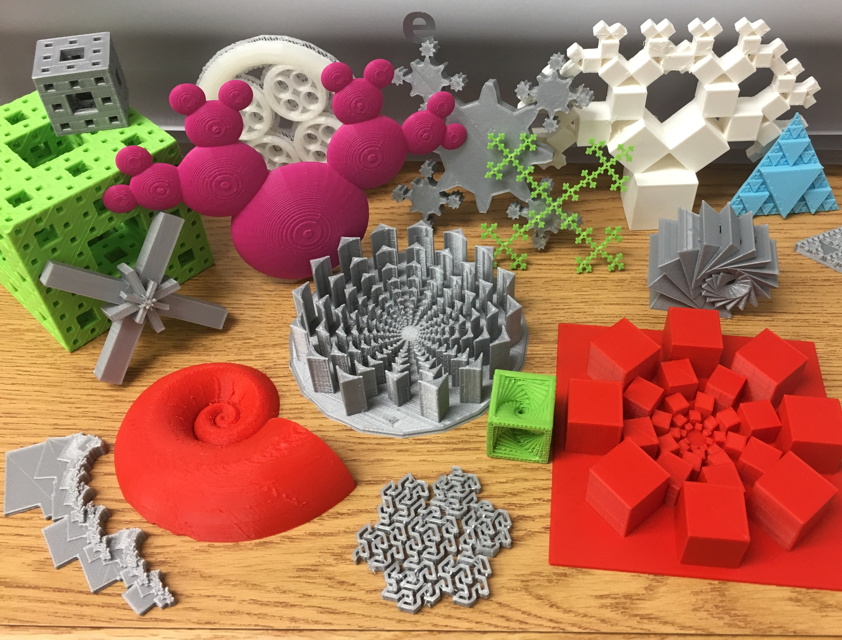
This semester I taught MATH 103 at JMU using 3D printing and design as the basis for exploring fractals, infinity, and other mathematical curiosities. My overarching goal for the course was for students to “learn to learn” on their own, and to practice thinking like a mathematician: asking questions, getting stuck, starting all over again, and eventually telling a mathematical story or making a mathematical argument.
The students learned Tinkercad, OpenSCAD, and other 3D design tools to construct mathematical objects from scratch, and then investigated those objects and presented their work in written and oral form. They used WordPress as their main form of documentation, so you can actually see all of their projects at our class website.
Last semester I wrote about the MATH 103 students’ first projects with fractals in the Ultimaker Education article 3D printed fractals at JMU 3SPACE. That semester is now over and I can report on their other projects and explorations.
Projects from the Fourth Dimension
The main project for the course was to work in groups to investigate various topics chosen from Matt Parker’s excellent book Things to Make and Do in the Fourth Dimension.

The students chose the projects themselves and then pitched them to me for approval. My goal in approving projects was to help students identify and research the mathematics they would be explaining through the objects they created, and to push them to do more than they thought they could do mathematically.
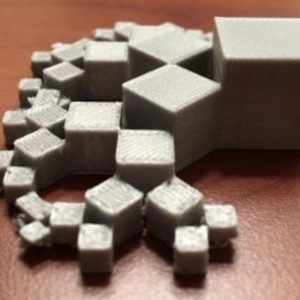
For example, one group studied Prince Rupert’s Cube, the famous construction whereby a cube can pass through another cube of the same size (or, in fact, actually one of a smaller size!). As a warmup, they used Tinkercad to recreate a well-known form that can pass snugly through a triangular hole, a square hole, and a circular hole, depending on its orientation:

In the Prince Rupert’s cube construction, a cube passes through another cube through a hexagonal cross-section. This can be difficult to represent in a physical print, because the cube being passed through has parts where it is connected only at single points. The students had the ingenious idea to make loops holding the pieces of the passed-through cube together. Here’s what their final design looked like, with a red cube passing through a green cube of the same side length:

Part of the mathematical story that this group of students chose was to calculate the largest red cube that could pass through a green cube of side length 1 unit. It turns out that the red cube can actually be about 6% larger than the green cube, and still pass through! Here’s some of the mathematics that the students wrote up to explain this:

To read the entire story on Prince Rupert’s cube, check out the students’ final blog post on the course website.
Each group’s project was different; topics included hinged dissections, equitable cake cutting, knot theory, and polyhedra. Some groups had to learn Fusion 360 or OpenSCAD to complete their projects, some had to perform certain calculations or proofs, and others had to provide historical background, depending on their topics.
All groups were expected to design a 3D print from scratch, share their work on Thingiverse, and compose blog posts on the design and mathematics behind their projects. To see all of the students’ blog posts for this assignment, check out the Open Projects section of our class blog.

Fractal Carpets
After having the students work on many different projects, it seemed like a good idea to have them switch gears and all do different versions of the same, more guided, project. Returning to our original study of fractals, the students were given some OpenSCAD code and asked to modify it to create their own “Fractal Carpets”. These fractals were basically 4×4 variants of the well-known Sierpinski Carpet. My goal was to have each student construct and 3D print their own unique Carpet fractals, and then calculate the surface area and dimension of their individual Fractal Carpets.
Here are some of the Fractal Carpets that the students created. They named these the “Space Invader”, “Tetris”, and “Centerless” Fractal Carpets, from left to right:

The figures above show the “third level” of each fractal. Students printed levels 1, 2, 3, and, if possible, level 4. However, their calculations and investigations always had to do with the infinite/final level of their fractal.
Below is the OpenSCAD code I gave to the students. The students for the most part had no prior experience with OpenSCAD, so we did a short introduction to coding before getting started on this project. Students only had to make simple modifications to the template code in order to make a unique Fractal Carpet.
// mathgrrl 4x4 fractal carpet maker for MATH 103
//////////////////////////////////////////////////////////////////////
// template cells
template = [
[0,0],
[1,0],
//[2,0],
[3,0],
[0,1],
//[1,1],
[2,1],
[3,1],
[0,2],
[1,2],
[2,2],
[3,2],
[0,3],
[1,3],
//[2,3],
[3,3]
];
//////////////////////////////////////////////////////////////////////
// parameters
level = 3;      // SET TO 1, 2, 3, or maybe even 4
thickness = 1;  // do not change
width = 100;    // do not change
//////////////////////////////////////////////////////////////////////
// renders
linear_extrude(height=thickness)
fractal(n=level,cells=template,diam=width);
//////////////////////////////////////////////////////////////////////
// module for making the fractal
module fractal(n,cells,diam){
 if (n>0) {
 for (i = cells)
 translate([i[0]*diam/4,i[1]*diam/4])
 fractal(n-1,cells,diam/4);
 }
 if (n==0) {
 square(diam,center=false);
 }
}
Other than the code, the students were given the instructions below. The math instructions refer back to the surface area and dimension calculations that students first learned about in their initial fractal projects, earlier in the semester.
Design instructions
- STEP 1: Comment in/out some number of boxes from the template
- STEP 2: Render with n=1; re-choose boxes if necessary to make connected
- STEP 3: Render with n=2; re-choose boxes if necessary to keep connected
- STEP 4: Render with n=3 and n=4 (any higher will CRASH)
3D printing instructions
- Record: Make a note of which cells you commented out to make your design
- Export: Run “F6” and Save STL files for Levels 1, 2, 3
- Print: Levels 1, 2, 3 (each should take 1-2 hrs with Racer X, no support, no adhesion)
- Print: If possible, try Level 4! (may work for certain open/blocky designs? or not)
Math instructions
- PROBLEM 1: Compute the surface area of the “k^th level” for k=1, 2, 3, 4
- PROBLEM 2: Compute the surface area of the “infinity level” using geometric series
- PROBLEM 3: Compute the fractal dimension of the “infinity level” using scale/copies equation
The students also 3D printed grids to help illustrate the self-similarities of their Fractal Carpets. For example, here is the Space Invaders Fractal Carpet with a grid to illustrate that the level 3 fractal is made up of smaller copies of the level 2 fractal:

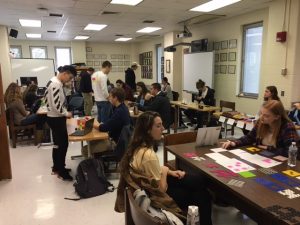
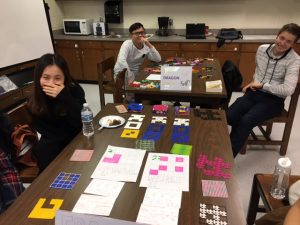
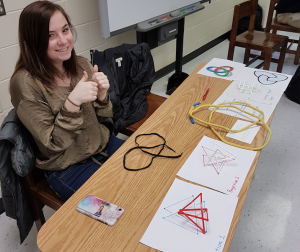
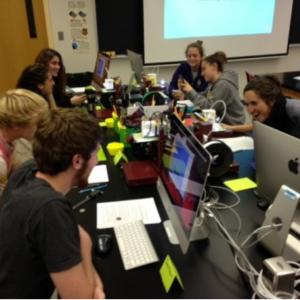
Showtime!
One major goal of this MATH 103 class was to help students learn how to communicate mathematics. At the end of the semester the students put together a public showcase and presented their projects to various student and faculty visitors in the Department of Mathematics and Statistics. They showed off their fractal creations, constructed giant Dragon Curves, cut up some cake, and put together hands-on demonstrations of their mathematical explorations. Here are just some of the pictures from the event:


What’s next?
At the end of the semester, the JMU 3SPACE classroom finally packed up and said goodbye to its original location. We have now moved our gear into the main campus library in a much more high-visibility area, and we are excited for the future (and to have windows!). Here’s our equipment moved into the new space, just waiting to be set up for next semester…
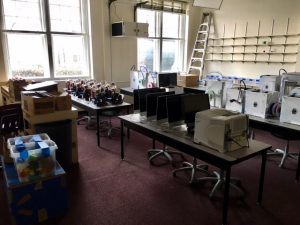
Wish us luck and stay tuned for our future endeavors!
——————
As an Amazon Associate we earn from qualifying purchases, so if you’ve got something you need to pick up anyway, going to Amazon through this link will help us keep Hacktastic running. Thanks! :)
Leave a Reply