
As we’ve seen in our previous posts on machine knitting, punching holes into cards can be tedious if any part of the process is manual. We started out our Knitting Machine Punch Card Trials with the usual analog method of punching holes into cards ourselves with a hand-held puncher, making up the pattern as we went along. Things got better when we moved to Designing Knitting Machine Punch Cards with StitchFiddle, where we created patterns by hand using an online drawing program and then cut those punch patterns using an electronic craft cutter. Today we’ll speed up the pattern-creation process significantly by bringing OpenSCAD code to the party.
Patterning with OpenSCAD
With OpenSCAD we can create patterning shortcuts that allow us to quickly combine and modify basic elements like diagonals, squares, and dots to make complex designs. Here’s what it looks like in action, with the code on the left and the output on the right, including punches for the machine belts to make the card fit a standard Brother KH-881 knitting machine:
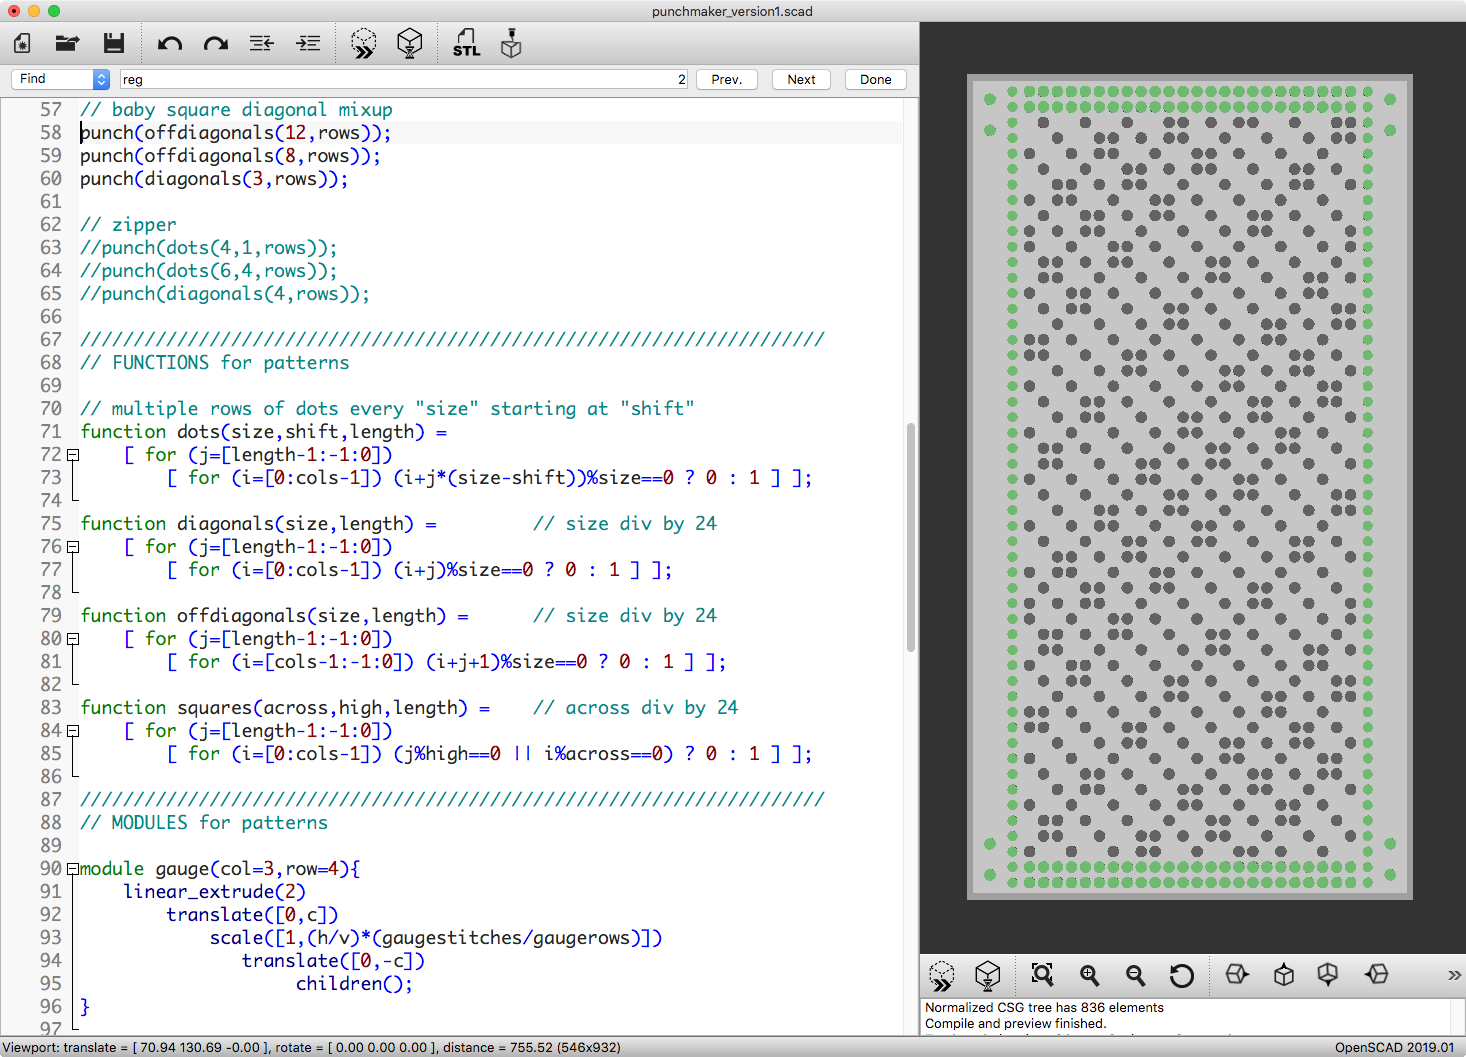
You can see the complete code in the Appendix at the bottom of this post. The basic idea is to define basic shapes and repeat and modify them to make patterns. For example, here is the code for punching open squares:
function squares(across,high,length) = // across div by 24
    [ for (j=[length-1:-1:0])
        [ for (i=[0:cols-1]) (j%high==0 || i%across==0) ? 0 : 1 ] ];
This code lets the user define a width and height for each square, and then set how long the overall pattern should continue. The nested loops place zeroes (for holes) at any coordinate location where either the horizontal or vertical position divides the selected square size. To use this pattern we put it into a “punch” module that actually creates the visual design, as shown in the code and leftmost screenshot below:
punch(squares(4,5,rows));
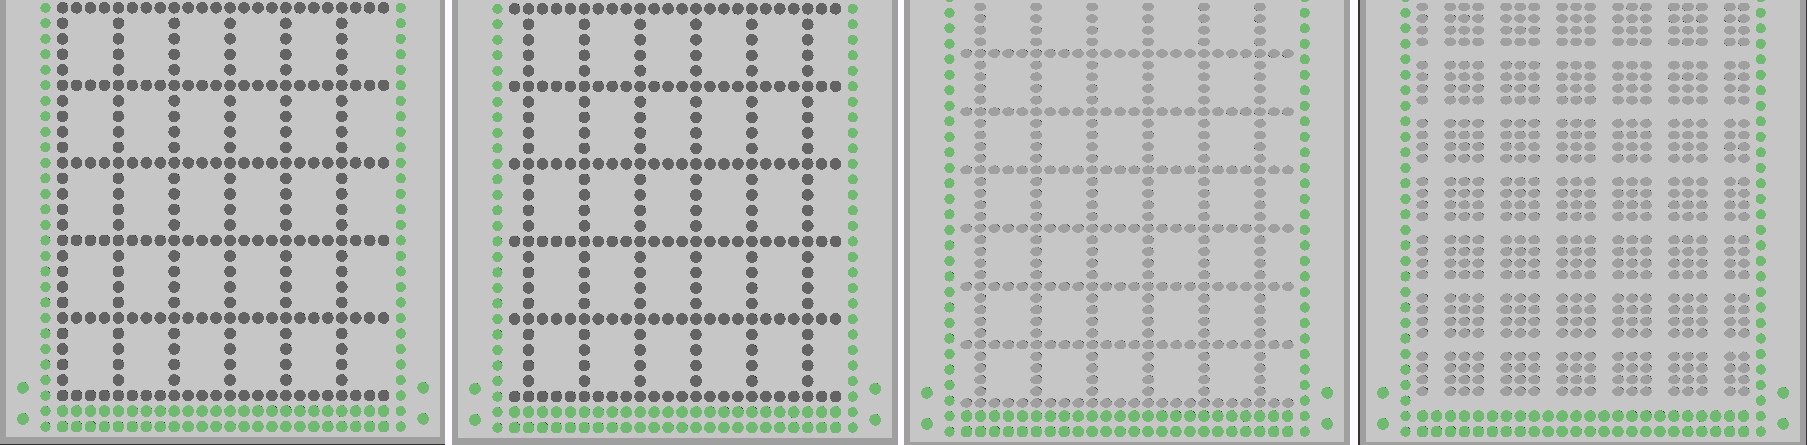
We can shift the pattern left or right, as shown in the second screenshot above, using “shift”:
punch(squares(4,5,rows),shift=1);
And prepending a “gauge” modifier changes the aspect ratio to show what the knitted piece itself would look like in this pattern (note that physically knit stitches are typically wider than they are tall), as shown in the third screenshot:
gauge()punch(squares(4,5,rows),shift=1);
Finally, we can “reverse” the pattern so that holes and non-holes trade places, as shown in the fourth screenshot:
gauge()punch(squares(4,5,rows),shift=1,reverse="yes");
To see how this code works, see the Appendix at the bottom of this post. All of these patterns can be output as SVG files from OpenSCAD and then sent directly to the Silhouette Studio software for the Cameo craft cutter.
Machine Knitting the Punched Patterns
The example from the top of this article used a combination of diagonals and off-diagonals to make a complex baby-squares-mixed-into-diagonals pattern:
// baby square diagonal mixup
punch(offdiagonals(12,rows));
punch(offdiagonals(8,rows));
punch(diagonals(3,rows));
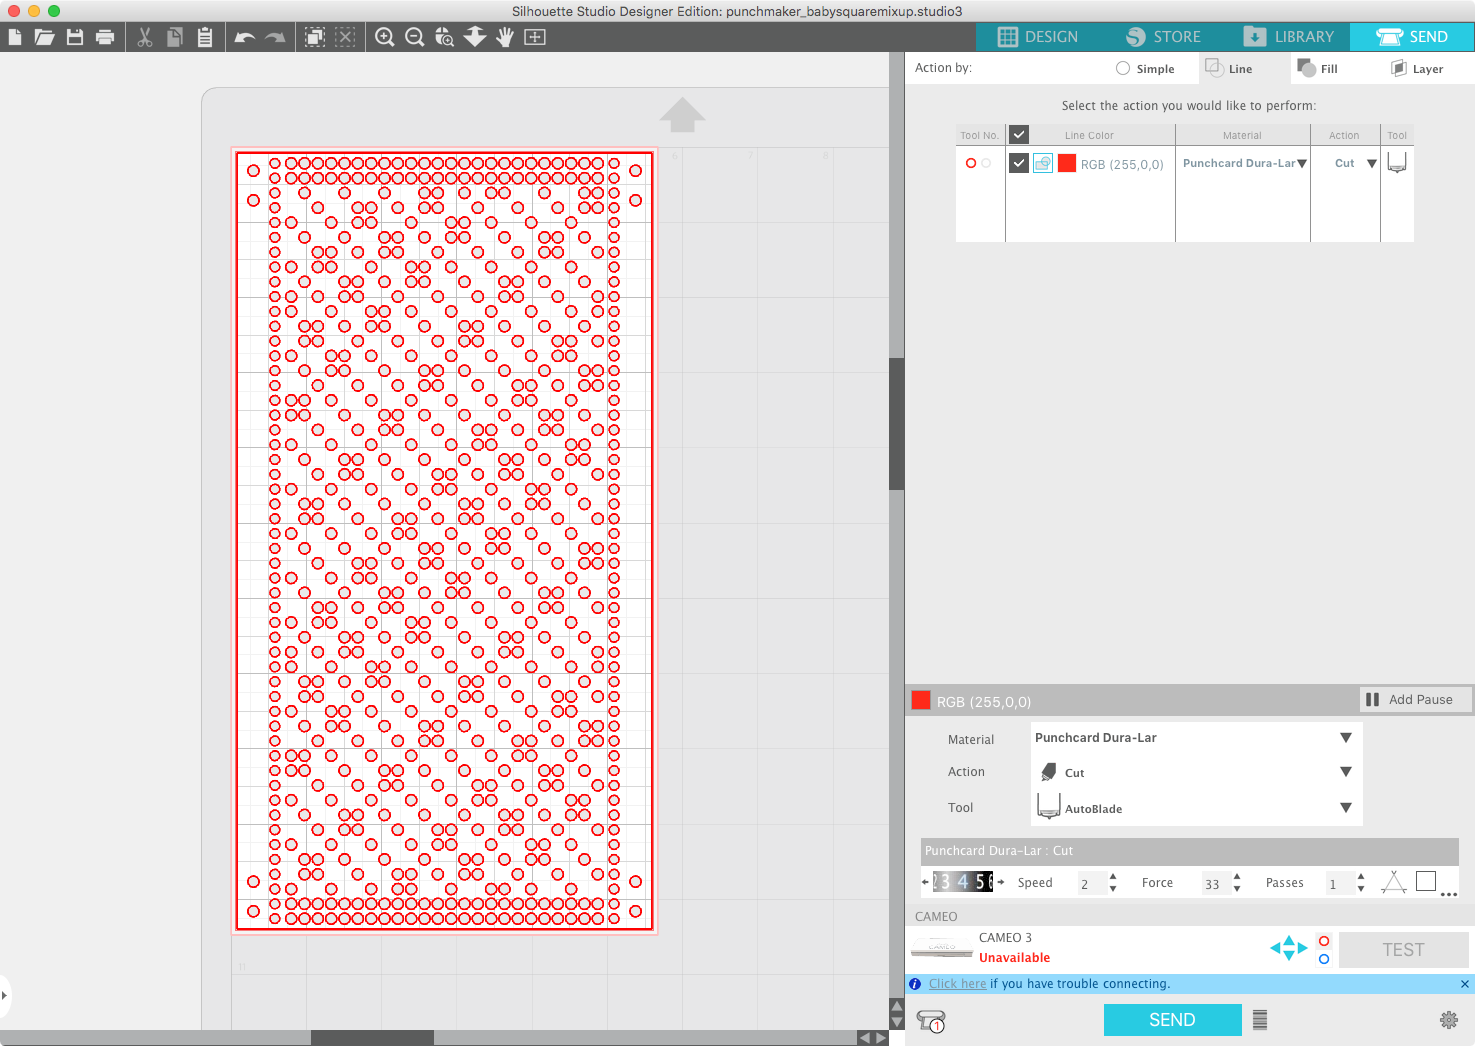
To print a punch card with this pattern, we export from OpenSCAD in SVG format, load it into Silhouette Studio, select all lines and set them to red (our “cut” color), and then send the job to the cutter with settings for our Dura-Lar paper:
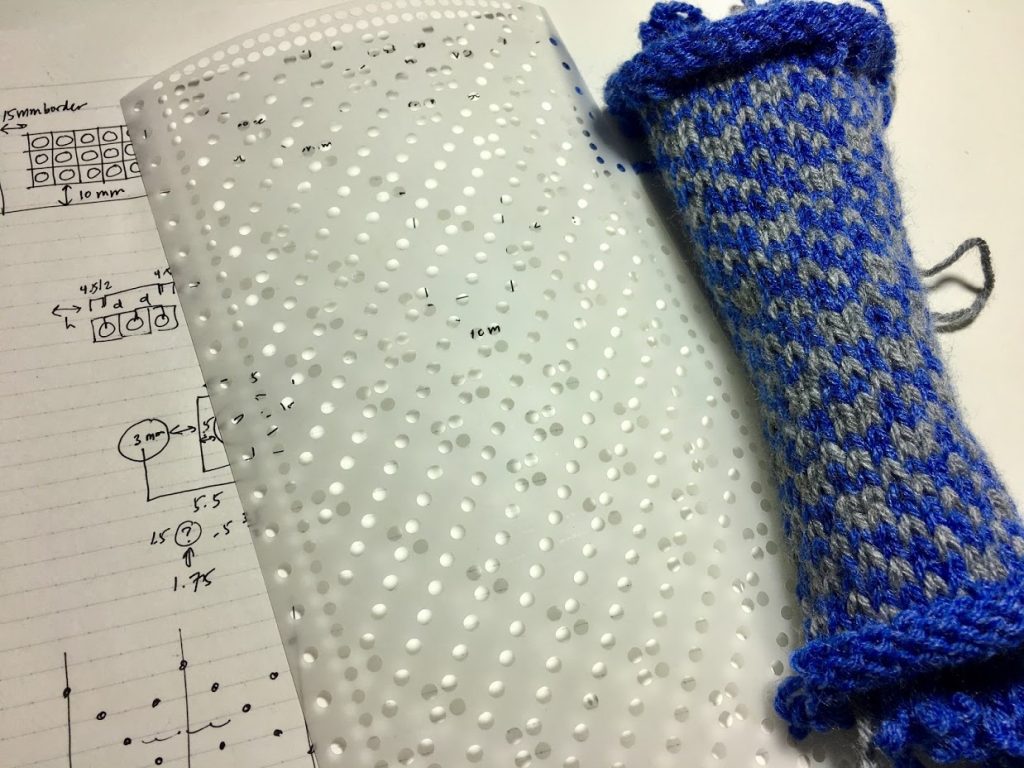
Here’s how this pattern comes out as a punched card, ready to put into the knitting machine:
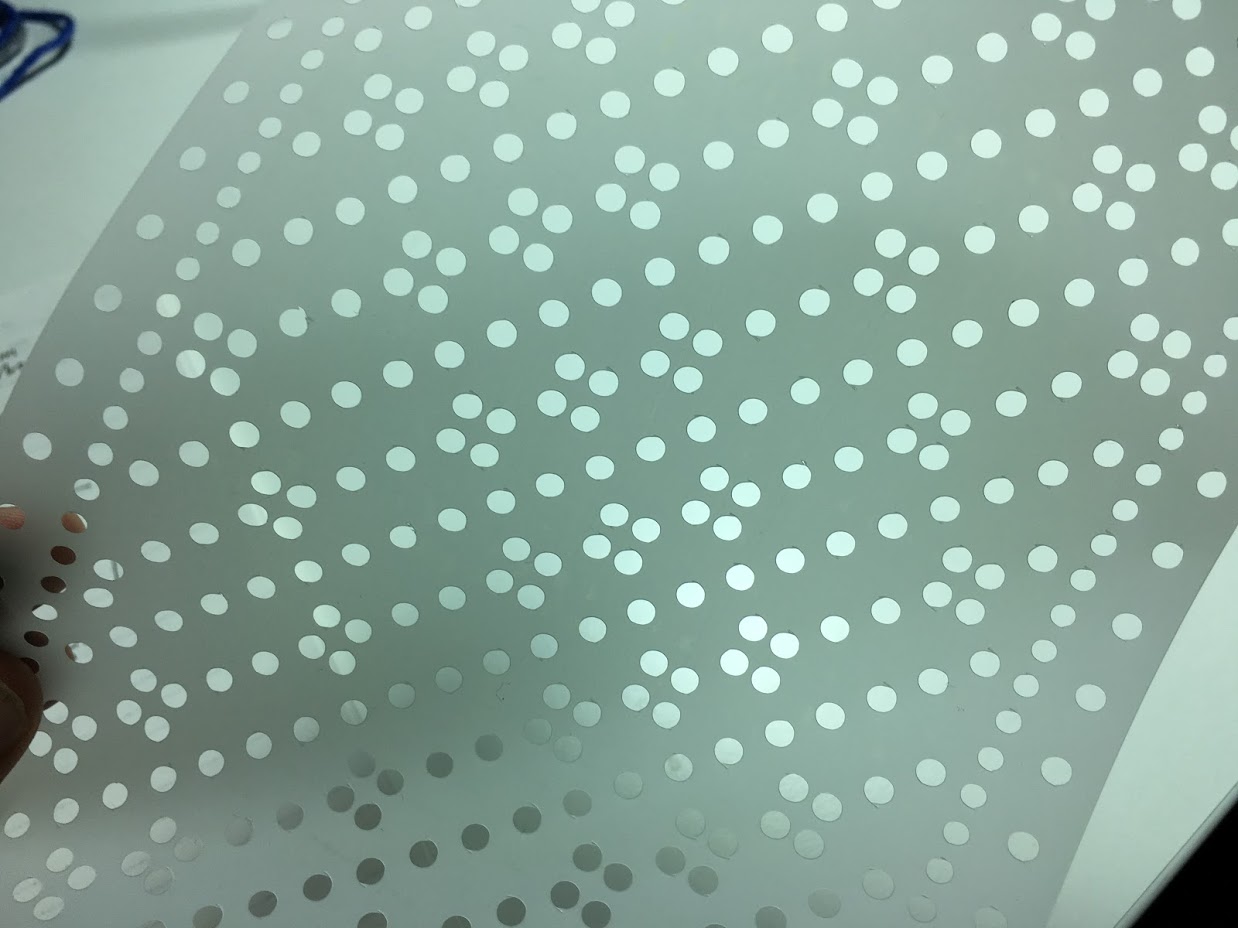
It took a lot of trial and error to get the size of the card, the size of the holes, the distance between the holes, and other features just right so that the cut punch card would work in the knitting machine. However the beauty of doing all this with code is that once that is done, you never have to do it again! Even better, it would not be difficult to modify the code to make the punch cards fit different knitting machines. Feel free to use the code in the Appendix below to make your own cards!

Here’s the resulting knit swatch for this “mixed-up baby square diagonals” pattern:
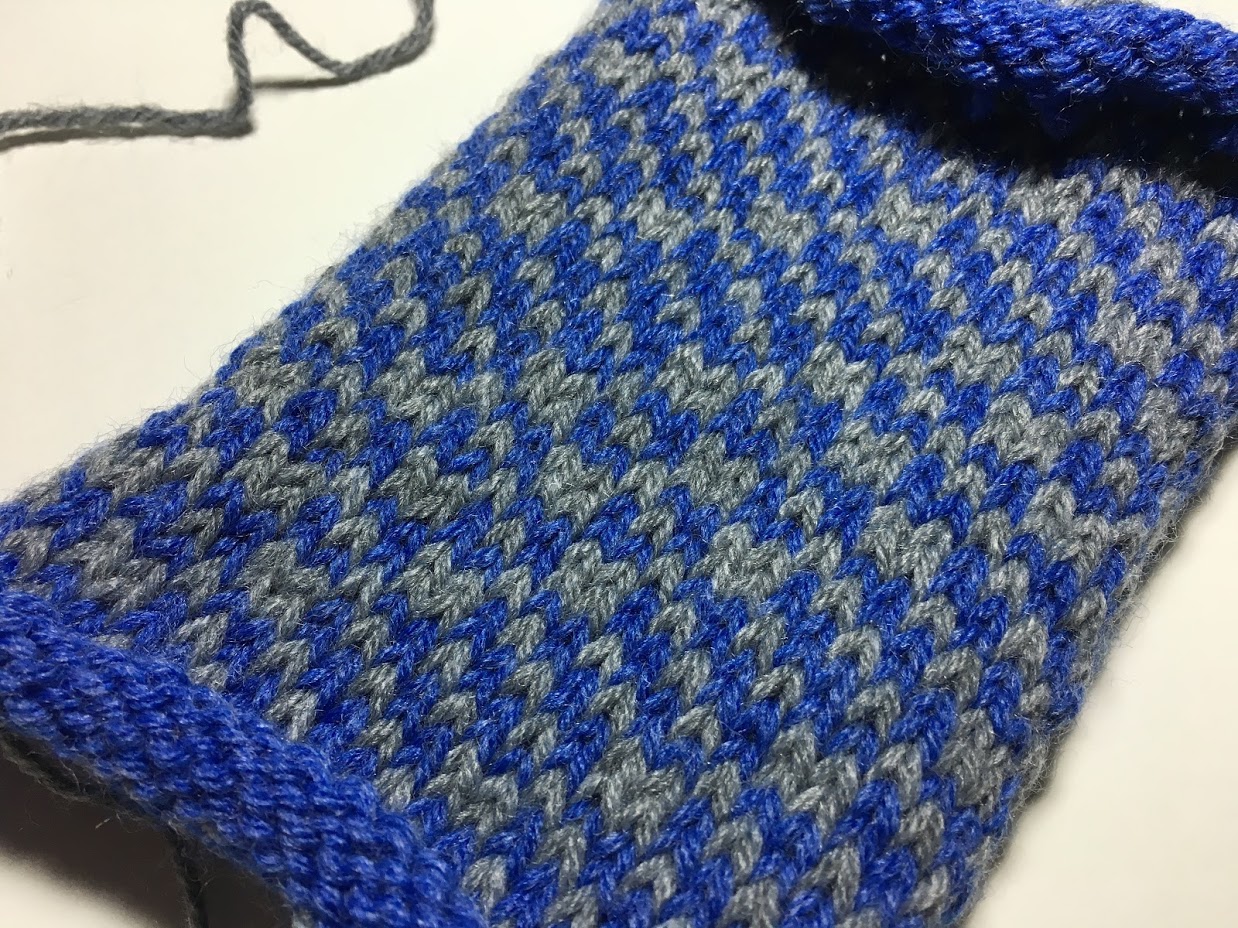
This isn’t the best pattern (and it would certainly look better with a more contrasting pair of yarn colors), but that’s kind of the point.
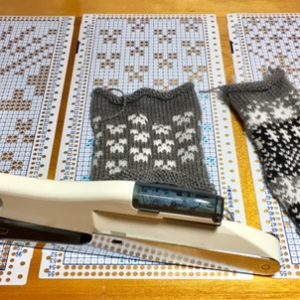
More precisely, the point is that we can now generate TONS of patterns very quickly using this OpenSCAD code and the craft cutter. It takes only about ten minutes to generate a pattern with the code, export it to SVG, cut out the pattern in a punch card with the Cameo, and then knit up a swatch with the knitting machine. The key to design is to fail fast and often — so that you can iterate and improve fast and often. With this code we are finally ready to try and fail quickly as many times as we like!
Appendix: Full OpenSCAD code
This code is available for you to freely use with attribution (please credit me) for any non-commercial purpose (selling your own knit items is fine, but selling punch cards is less fine; please ask me first), under a Creative Commons license. If you want to modify this code and have any questions, please feel free to ask!
// mathgrrl punch card maker

/////////////////////////////////////////////////////////////////////
// parameters

$fn=48; // resolution

rows = 48; // number of pattern rows
cols = 24; // 24 is standard

p = 3.75; // punch diameter
r = p/2; // punch radius
h = 4.5; // horizontal distance between punch centers
v = 5; // vertical distance between punch centers

b = 16; // horizontal card border
c = 11; // vertical card border

width = cols*h+2*b; // card width - should be 140 for 24 punches
height = rows*v+2*c; // card height - should be 322 for 60 rows

gaugerows = 6; // test gauge and enter here
gaugestitches = 5; // test gauge and enter here

x = 1; // allows x in visual punch layout

%color("white") card(width,height); // makes gray background for F5

/////////////////////////////////////////////////////////////////////
// punch the BORDER HOLES

edge(width,height);
belt(rows);
loop(rows);
overlap(rows);

/////////////////////////////////////////////////////////////////////
// punch a PATTERN (choose one)

// one-line experiments
//punch(offdiagonals(6,rows));
//punch(squares(4,4,rows));
//punch(diagonals(6,10),shift=1,reverse="yes");

// diamonds
//punch(diagonals(6,rows));
//punch(offdiagonals(6,rows));

// uneven diamonds
//punch(diagonals(6,rows));
//punch(offdiagonals(5,rows));

// baby squares
//punch(diagonals(3,rows));
//punch(offdiagonals(3,rows));

// baby square diagonal mixup
punch(offdiagonals(12,rows));
punch(offdiagonals(8,rows));
punch(diagonals(3,rows));

// zipper
//punch(dots(4,1,rows));
//punch(dots(6,4,rows));
//punch(diagonals(4,rows));

/////////////////////////////////////////////////////////////////////
// FUNCTIONS for patterns

// multiple rows of dots every "size" starting at "shift"
function dots(size,shift,length) =
    [ for (j=[length-1:-1:0])
        [ for (i=[0:cols-1]) (i+j*(size-shift))%size==0 ? 0 : 1 ] ];

function diagonals(size,length) = // size div by 24
    [ for (j=[length-1:-1:0])
        [ for (i=[0:cols-1]) (i+j)%size==0 ? 0 : 1 ] ];

function offdiagonals(size,length) = // size div by 24
    [ for (j=[length-1:-1:0])
        [ for (i=[cols-1:-1:0]) (i+j+1)%size==0 ? 0 : 1 ] ];

function squares(across,high,length) = // across div by 24
    [ for (j=[length-1:-1:0])
        [ for (i=[0:cols-1]) (j%high==0 || i%across==0) ? 0 : 1 ] ];

/////////////////////////////////////////////////////////////////////
// MODULES for patterns

module gauge(col=3,row=4){
    linear_extrude(2)
        translate([0,c])
            scale([1,(h/v)*(gaugestitches/gaugerows)])
                translate([0,-c])
                    children();
}

module punch(pattern,start=0,shift=0,reverse="no"){

    // convert to coordinate list
    // if/else requires updated OpenSCAD and lc-else setting in preferences
    coords = [ for (i=[0:len(pattern[0])-1], j=[0:len(pattern)-1])
                    if (reverse=="no" && pattern[j][i]==0)
                        [(i+shift)%cols,len(pattern)-1-j]
                    else if (reverse=="yes" && pattern[j][i]!=0)
                        [(i+shift)%cols,len(pattern)-1-j] ];

    // place punches according to dimensions
    place = [for (i=[0:len(coords)-1])
                 [h*coords[i][0]+b+h/2,v*coords[i][1]+c+v/2]];

    // put the punches on the card
    for (i=[0:len(place)-1]) translate(place[i]) color("gray") circle(r);

}

/////////////////////////////////////////////////////////////////////
// MODULES for border punches

module belt(rows){
    color("lightgreen")
    for (j=[-2:rows+1]){
        translate([b+h/2-5.5,(c+v/2)+j*v]) circle(r-0.25);
        translate([b+h/2+(cols-1)*h+5.5,(c+v/2)+j*v]) circle(r-0.25);
    }
}

module loop(rows){
    color("lightgreen")
    for (j=[-1,0,rows/2-1,rows/2]){ // use this for two at top and bottom
    //for (j=[-1:rows/2]){ // use this for all the way up and down
        translate([b-10.5,c+v+j*2*v]) circle(r);
        translate([b+cols*h+10.5,c+(j*2+1)*v]) circle(r);
    }
}

module overlap(rows){
    color("lightgreen")
    for (i=[0:cols-1],j=[1,2]){
        translate([b+h/2+i*h,c+v/2-j*v]) circle(r);
        translate([b+h/2+i*h,c+v/2+(rows-1+j)*v]) circle(r);
    }
}

/////////////////////////////////////////////////////////////////////
// MODULES for card

// card outline (inside edge is the desired punch card outline)
module edge(width,height){
    extra = 2;
    translate([-extra,-extra]) square([width+2*extra,extra]);
    translate([-extra,-extra]) square([extra,height+2*extra]);
    translate([-extra,height]) square([width+2*extra,extra]);
    translate([width,-extra]) square([extra,height+2*extra]);
}

// card shading (display only)
module card(width,height){
    linear_extrude(.1) square([width,height]);
}
——————
As an Amazon Associate we earn from qualifying purchases, so if you’ve got something you need to pick up anyway, going to Amazon through this link will help us keep Hacktastic running. Thanks! :)
I will definitely get into this once I get my feet planted on the ground, thanks!
One of my favorite patterns was a sort of circuit board-looking design (but seamlessly repetitive). For some reason, they made the punch card as a multicolor skip stitch card which requires stopping and switching colors every 2 rows.
I wanted to design things like that for multicolor Fair Isle (so that you can just knit away all at once) and this tech will definitely help