3D scanning is a serious pain and in my experience none of the solutions have worked particularly well in terms of capturing fine details… but that’s because I keep trying to make it work with free software and tools. As with so many things in life, it turns out that 3D scanning actually works, if you’ve got the money.
Or, that is, if the university library has the money and gets a fancy EinScan-SP 3D scanner that they let you try out…
Scanning with the Trnio App
A couple of years ago we tried using Trnio to capture a scan of a Ganesha statue we picked up while traveling in Ahmedabad with the Lady Tech Guild. You can read about the full photo-capture and mesh-fixing process in our previous post Full-Color Prints from Trnio Photogrammetry.
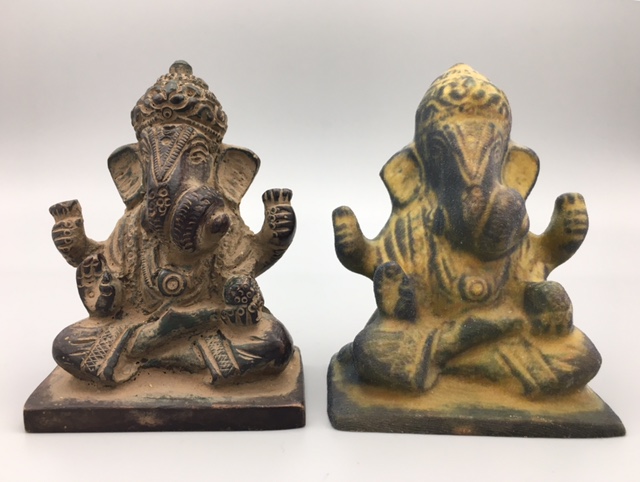
The short version of the story is that after a lot of file conversion and mesh cleanup using MeshLab and Meshmixer, we eventually got to a somewhat lumpy model that we printed in Full-Color Sandstone at Shapeways; it looked like this (original statue on the left, replica on the right, of course):
Scanning with the Qlone app
This summer I worked with JMU Libraries and the fearless Jamie Calcagno-Roach (Head of Innovation Instruction at JMU) to host a “3D Scanning Sandbox” and explore how the 3D scanning landscape has changed over the last couple of years. Trnio is still around, as well as some new faces like the Qlone scanning app. Qlone is easy to use; you print out a checkerboard mat and then photograph your object from many angles over the mat. The checkerboard gives the Qlone software the clues it needs to stitch all the photographs together.
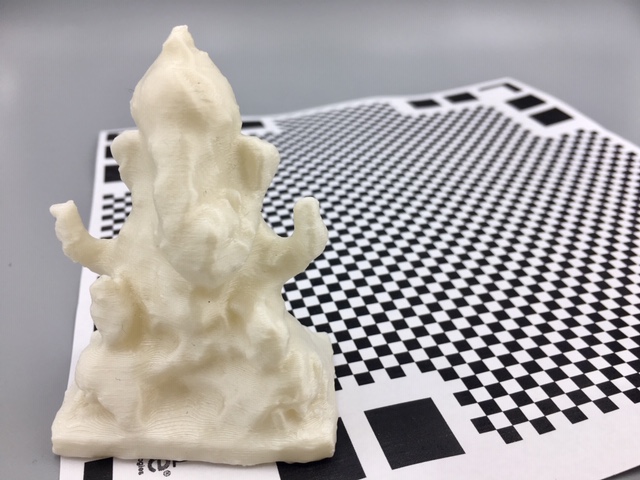
Qlone is free — except that to “unlock” a model and be able to download it for printing, you pay a dollar, which is certainly a fair price. The Qlone scan is about the same quality as the one from Trnio, I think, but the scanning process is easier, faster, and more enjoyable in Qlone. We printed the resulting Ganesha model on a desktop printer, but without the color texture it pretty much just looks like a melty lump:
Photogrammetry with Meshroom
The Library also had a fancy DSLR camera with a Macro/Nano lens, so the next thing we tried was to take about fifty high-quality closeup photos of the model ourselves and then stitch them together with the open source photogrammetry software Meshroom.
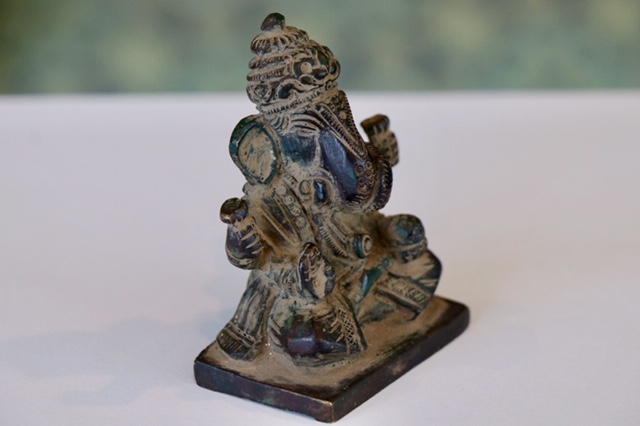
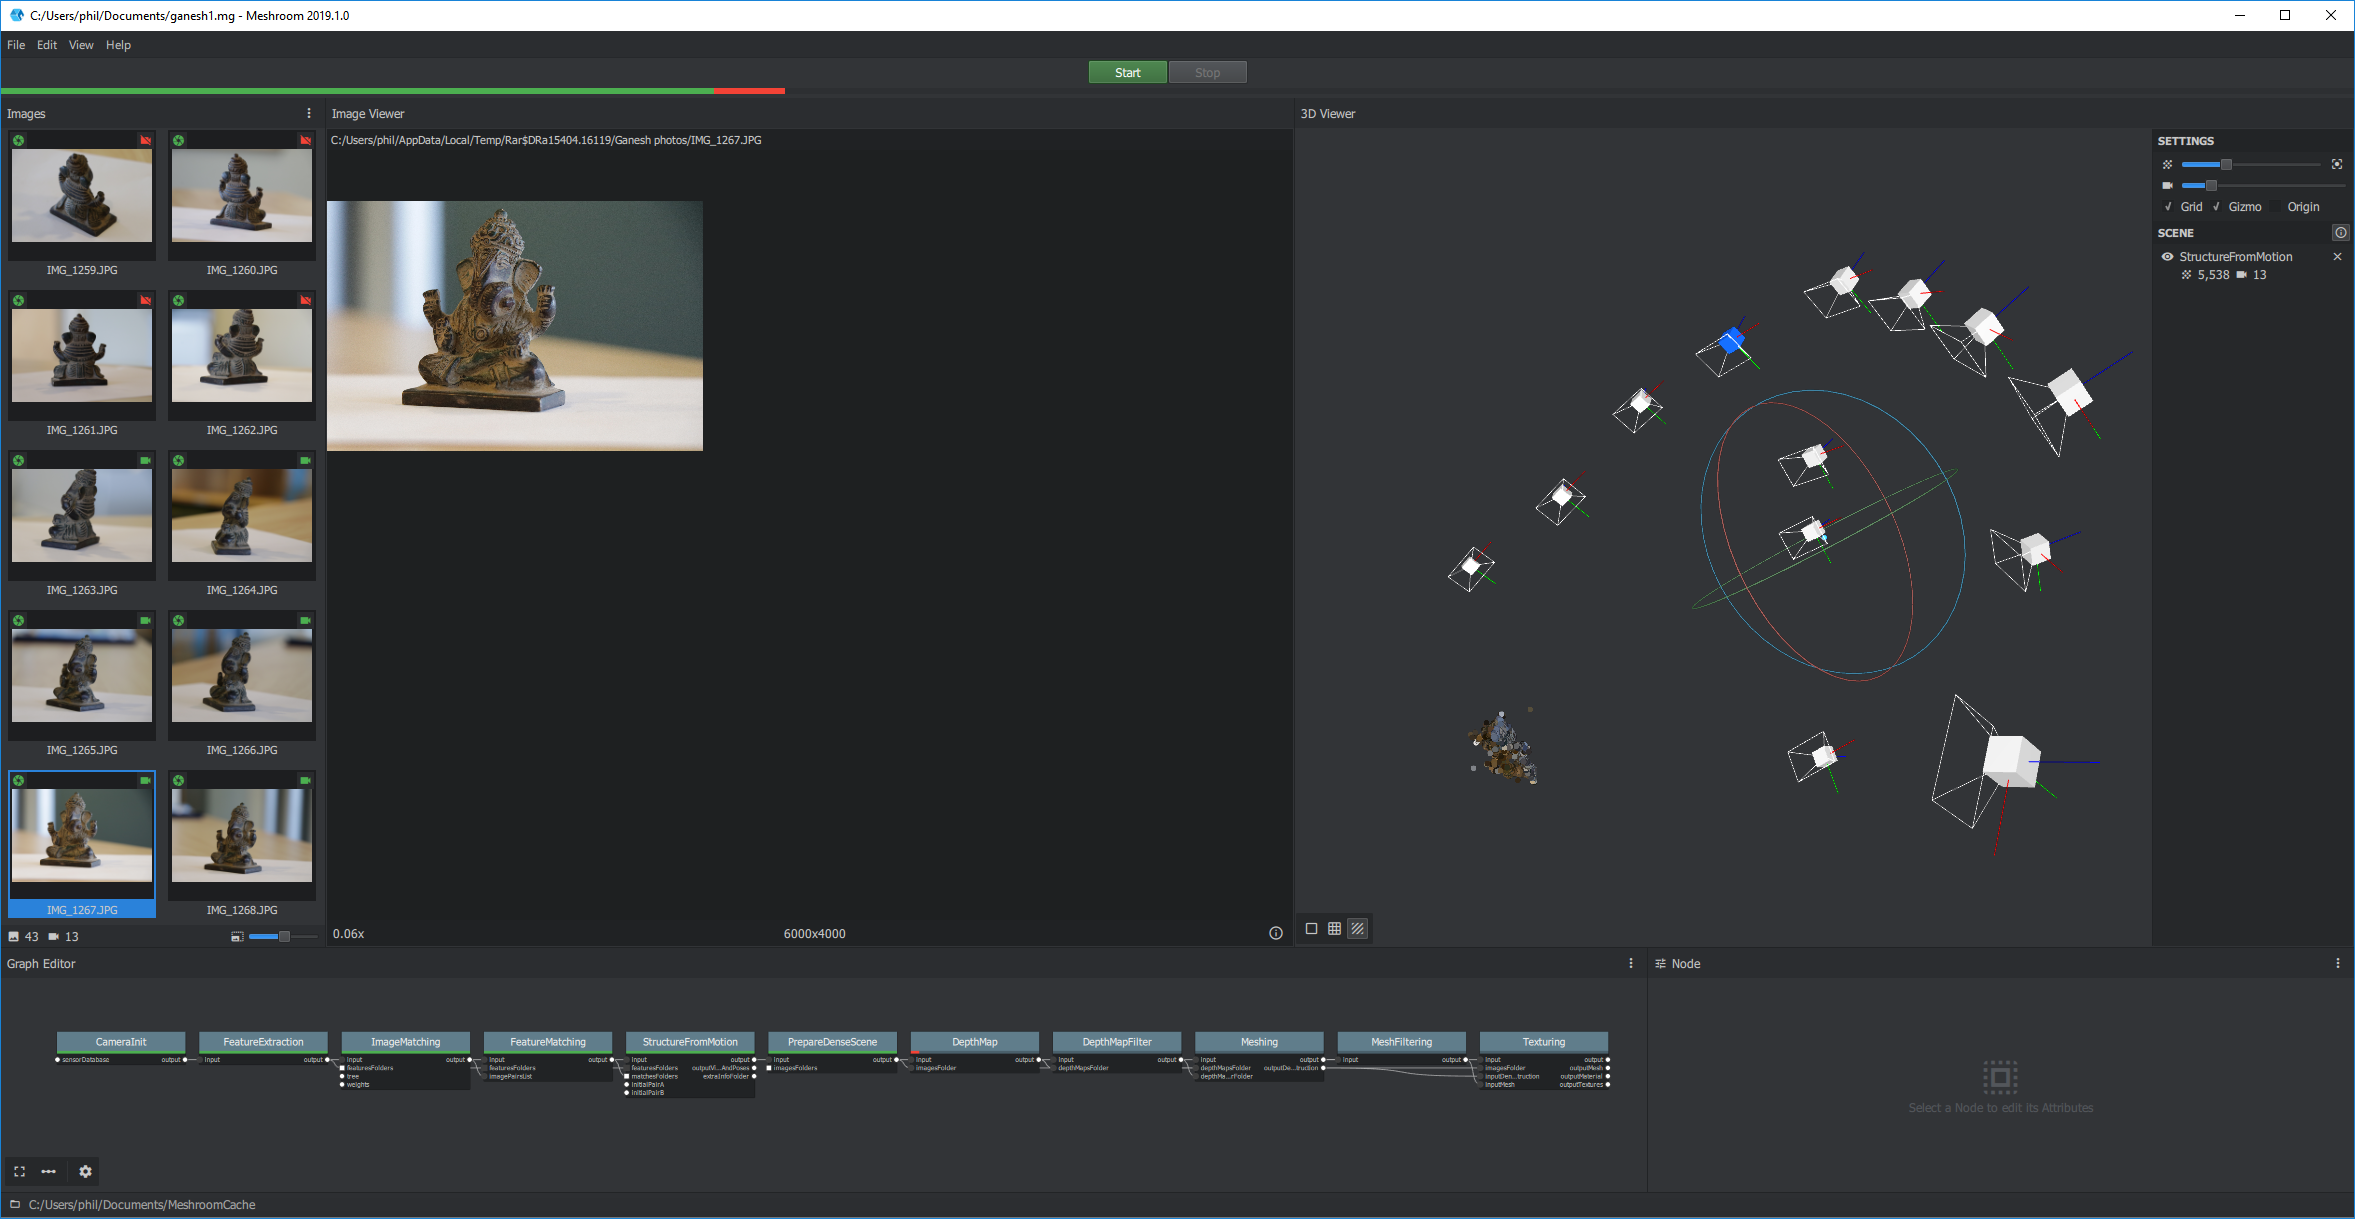
Unfortunately, for some reason only about half of our photos were usable in Meshroom, and all of them were from one side of the model (probably due to poor lighting on the other side). Meshroom was unable to complete its magical stitching processes with so few photos on just one side:
We’ll try Meshroom again later for some large scale items, but it turns out that there is an even better option for small models…
Going Pro with EinScan
This last option worked better than we ever could have hoped for! However, it’s so expensive that you can’t even see a price for it online unless you request a quote. I believe it cost the Library about $2600, give or take. It’s the EinScan-SP 3D Scanner, and it consists of a rotating turntable attached to a camera arm. There are markings around the turntable that help the EinScan software line up and orient the images it captures.
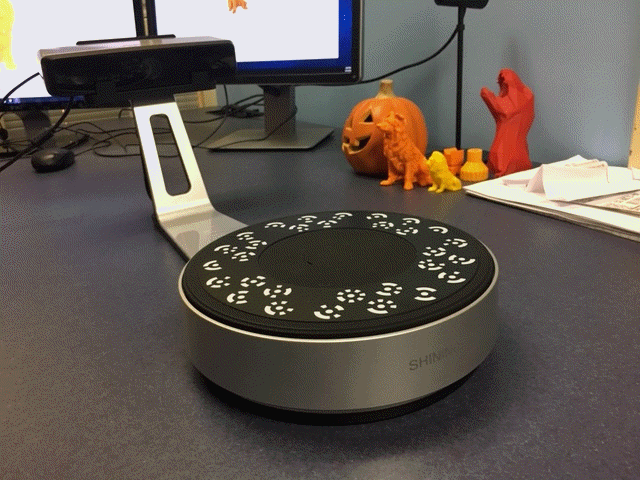
The EinScan is very easy to use: just put your model on the turntable and let the scanner do the rest, spinning and automatically taking photos at various intervals. You can specify how close together and how detailed the photos will be. You can even turn the model over to run the scan from a different angle, and the EinScan software will stitch all the photos from all the angles together to build a 3D model of your object. If any spots on the model surface are missed, you can ask the software to fill them in with suitable surface patches.
The MakerBot Digitizer also did all of these things, but it could never manage to capture much surface detail; in comparison the Digitizer is like a Polaroid camera with a dirty lens, and the EinScan is like a 4K television. To be fair, the Digitizer was far cheaper and came out years and years ago; it really was ahead of its time. We now use ours as a rotating platform for scanning with Qlone. :)
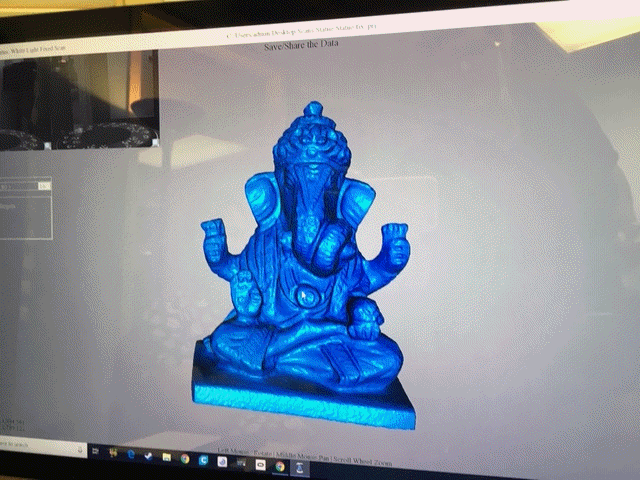
The EinScan of our Ganehsa statue was taken by Lucas Wheeler, who is the 3D Printing Technology Specialist at JMU Libraries. Here’s what it looked like in the software (we chose to do a non-texture scan, so this is all physical detail and no colorization):
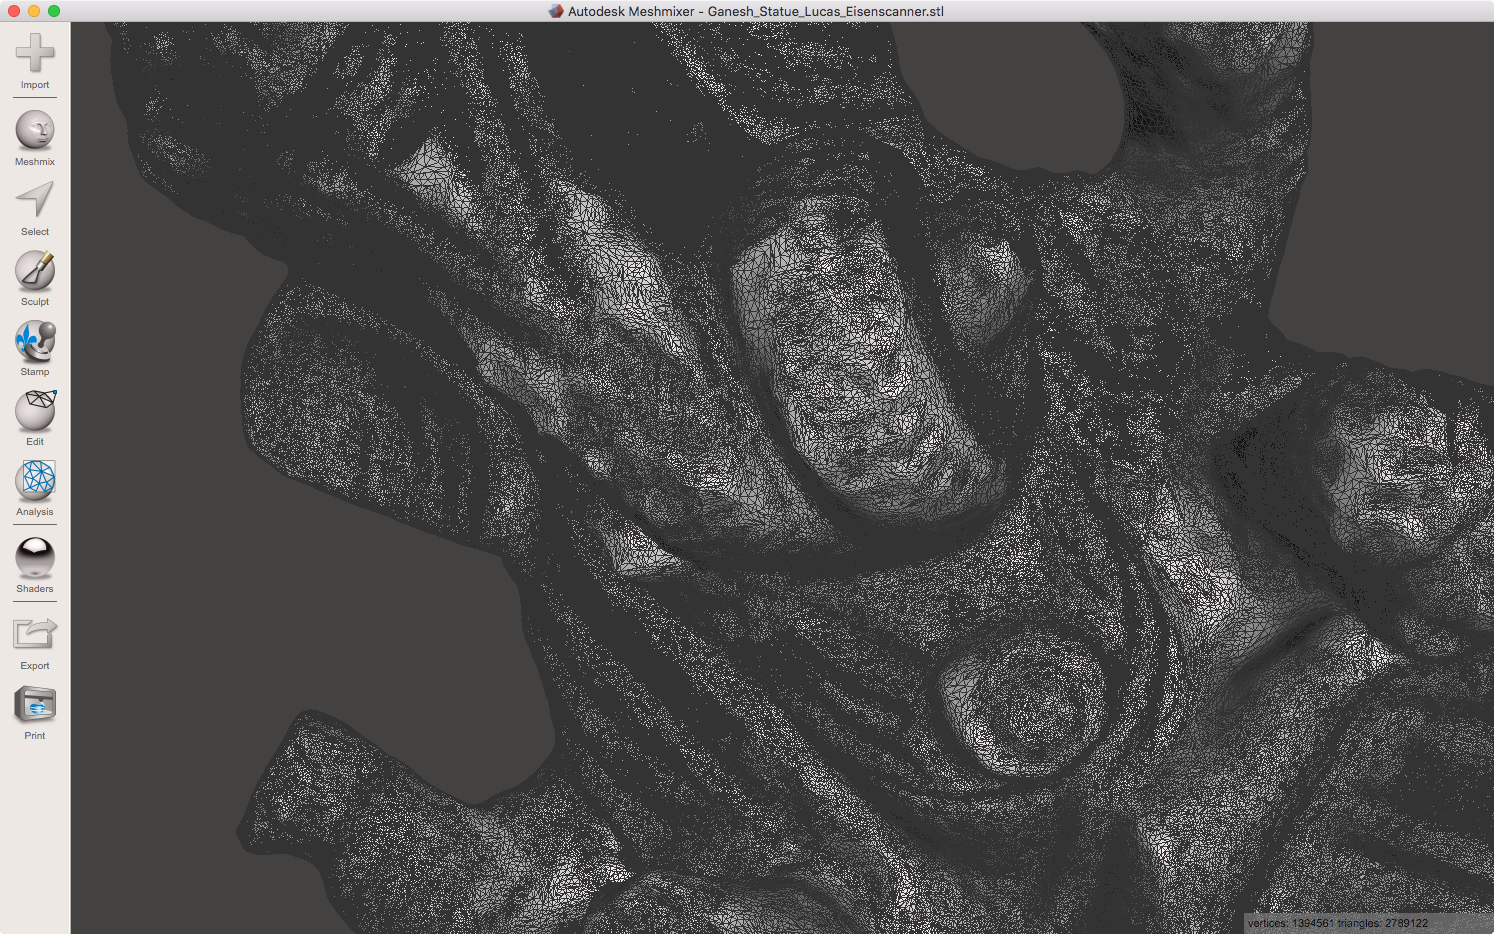
And here’s what the digital model looks like in Meshmixer, with triangular mesh visible so you can see the impressive amount of fine detail that was captured:
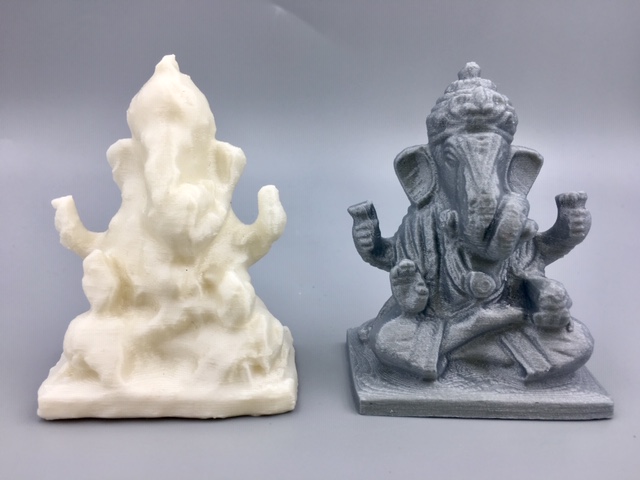
Even after printing on a standard desktop 3D printer in only one color, the detail comes through really nicely. The photo below shows 3D prints of our lumpy Qlone scan on the left ($1) and the highly-detailed EinScan scan on the right ($2600):
What’s next?
If you want to 3D print this new detailed Ganesha statue scan yourself, you can download the free STL model from our Thingiverse page: Ganesha Statue Scan – Updated!
Or, if you don’t have a 3D printer and don’t have the time to travel to Ahmedabad to pick up a statue for yourself, you can order a Nylon, HP Jet Fusion, or Stainless Steel 3D print of this model from our Shapeways shop: Lord Ganesha Statue.
Next step is to figure out how to scan medium-large items (like the size of a laundry basket) and large items (like a tall outdoor statue). Later this summer Jamie and I will try to capture such larger scans by taking DSLR photos and stitching them together with photogrammetry software like Meshroom, ReCap, or Agisoft… stay tuned :)
——————
As an Amazon Associate we earn from qualifying purchases, so if you’ve got something you need to pick up anyway, going to Amazon through this link will help us keep Hacktastic running. Thanks! :)


This was really helpful, thank you so much for explaining the quality of the print, and the why and how!