

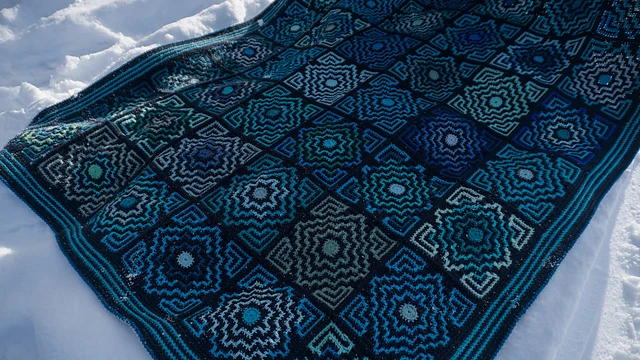
This is the first in a series of posts about a space-filling riff on Tinna’s Terrazzo Afghan (go buy the pattern on Ravelry!), the original of which looks like this:
Our design is going to start off looking like one of Tinna’s Terazzo squares, but it’s going to continue as a larger and larger square, with lots of different but “space-filling” patterns along the way. It won’t be ONE space-filling curve (sorry, math geeks), but it will fill space efficiently as we build the pattern.
Here’s how the center of our remixed design will look (thank you stitchfiddle.com for making it easy to chart out a pattern online!):
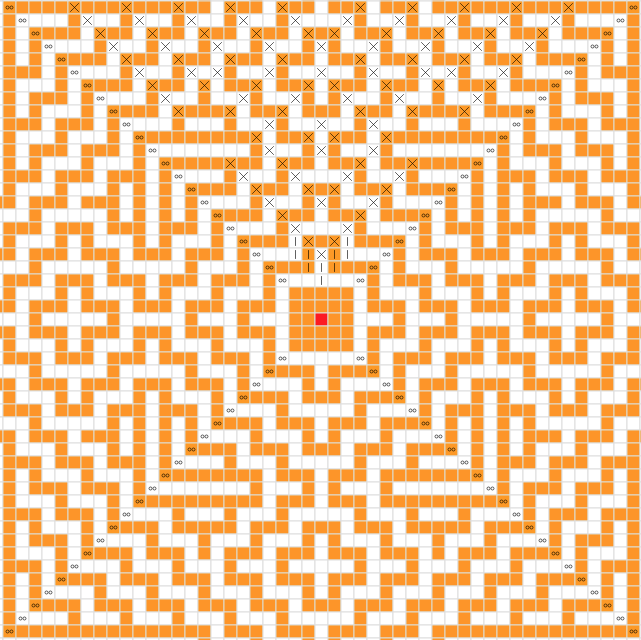
In the top part of the image there is some notation to indicate when to do the drop-down stitches. The pattern will continue out from here, once I figure out exactly what it will look like. Whatever happens, since it will be just one giant crazy square, there won’t be any joining together to do at the end, hooray!
I’ll put this pattern on Ravelry for free once I am done with it, but you’ll still need to buy Tinna’s pattern for the instructions; my contribution is just a different design for her amazing pattern… and some tips I learned along the way, as a beginner at crochet.
Getting started
If you want to make a remix like the one I’ll be talking about here, then you should begin by learning how to do the original design. In particular, see Tinna’s video of crocheting a Terrazzo from the beginning, and repeat the steps in that video until you can do them *perfectly* and understand how the joins work and how to count:
The lessons you will learn in this video alone are worth spending $7 on the pattern to support Tinna for her teaching and beautiful designs. This post is going to be based on the starter piece Tinna shows how to make in her video.
It took me a LONG time to get the first 10-12 rounds of the piece to be perfect, and to really understand the pattern. To be perfectly honest, it took me a long time just make the very center bit, because I decided I wanted it to be square instead of round:
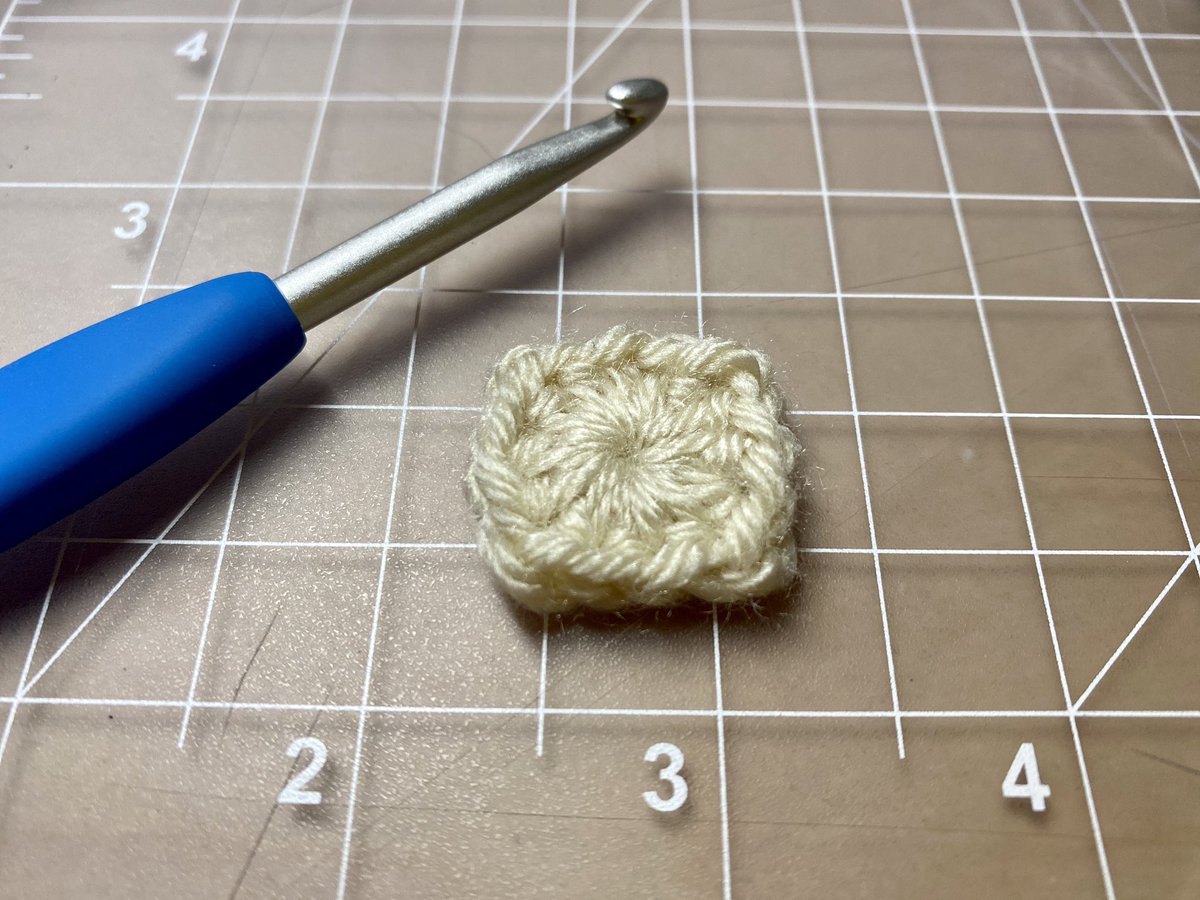
To get this effect, go through the *entire* stitch — not just the back loop — in all corners of the second round. This gives a more square-ish effect in the center instead of the rounded dot. The photo above is also a nice shot of one of my favorite crochet hooks. I thought I was terrible at crochet until I got these amazingly smooth and ergonomic hooks: Clover Amour Crochet Hooks (affilliate link).
Do you suck at counting?
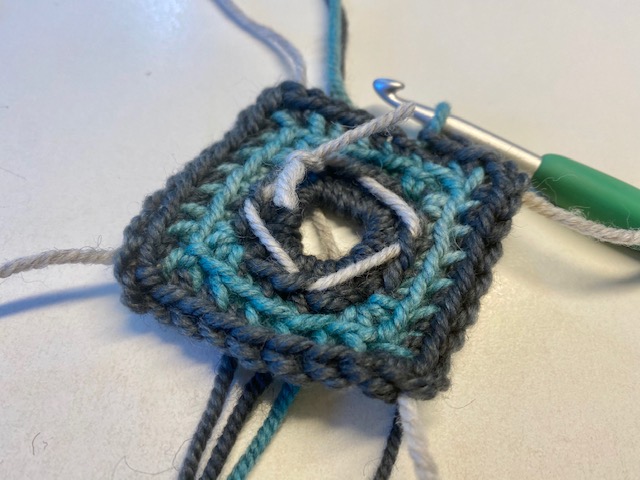
I literally have a Ph.D. in mathematics and I still suck at counting. After messing up the first part of Tinna’s design many, many times, I decided to physically mark the loops in the center of each edge with some scrap yarn to be sure that I counted correctly. The first drop-down stitches of the pattern will go into the blue loops directly *above* my marked loops:
You might notice that I haven’t pulled the center of the starting “magic loop” tight yet; I found this very helpful for keeping a light/puffy “hand” to my stitches in the first few rows. You can always pull it tight later.
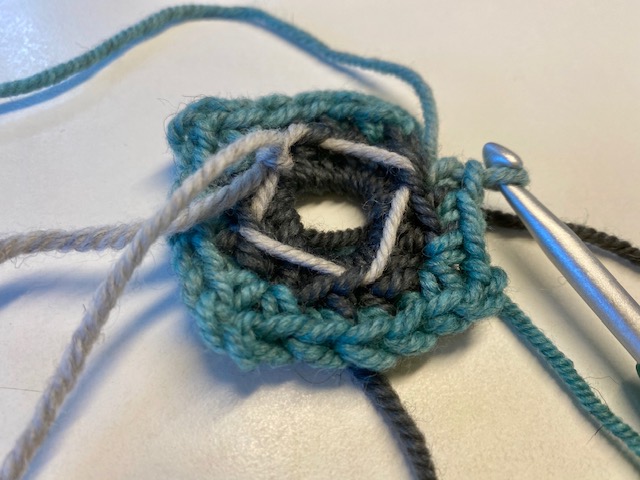
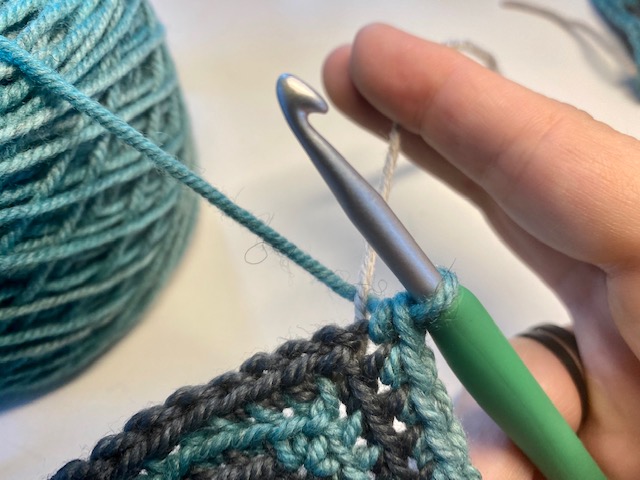
My troubles with counting did not end with the first few rows; it turns out that I am terrible at counting in all stages of the project. My solution was to run a lifeline just before every ch2 in each corner to help me catch miscounts immediately. In the photo below, the lifelines are the gray strands that come out of the corners:
Here’s what it looks like from the back, after a few more rows, and twisting the line into every round just before the ch2 in each corner (eventually I cut the center of the “x” and turned it into four lifelines that travel up the corners as the work gets larger):

I can’t stress enough how useful this lifeline is. I use it on literally every side of every round, to make sure that I’m in the right place and everything is counted out correctly. It sounds like it would be easy to count but if you’re like me then it is not easy at all for this pattern.
Here’s how to weave in the lifeline at each corner, by placing it over the working yarn just before doing the two chain stitches in the corners:
Don’t be afraid to start over… again
Since our modified design is going to consist of one giant growing square pattern built from the center, it’s really important to get the center right. We can’t just hide the first square in the side of the blanket somewhere, it’s going to be the focal point! You may have to start the design over a few times to perfect the center.
But it will get better each time! See the image below; a counting error in the piece on the right forced me to start over and do the piece on the left, which is much improved. (Yes, I know, I had a counting error even with all the lifelines and markings described above. I’m serious, counting is hard.)
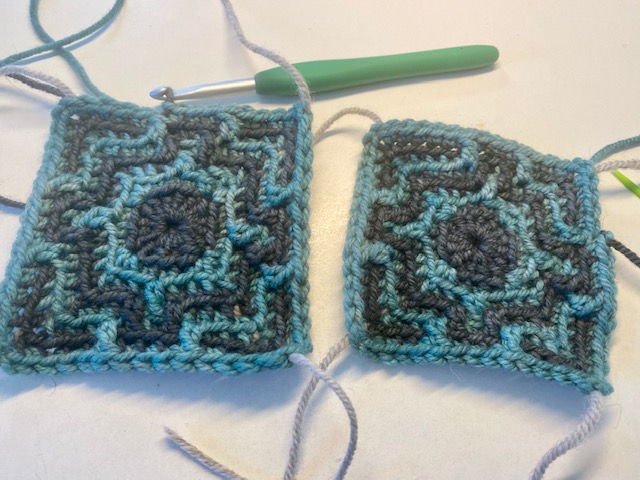
There are two main improvements, besides fixing the counting error: First, in the new piece on the left I didn’t pull the center together until just before this photo, while in the old piece on the right I pulled the center together at the beginning; this completely changed the fullness and regularity of the piece! Second, you can see some bulkiness in the innermost blue ring in the lower right corner of the piece on the left. This is fixed in the rightmost piece by attaching the blue yarn into the back loop only. My advice is that whenever new yarn is attached (this only happens when a new color is introduced into the piece, not every round), you should stitch into the back loop, and then put the first sc after that into the same full stitch.
The eagle-eyed will notice that my design starts out just like the center of Tinna’s square except in the negative, with the dark and light colors reversed. I didn’t do that on purpose and in fact I didn’t even notice until much later into the crocheted pattern when it was way too late to start over, so at this point it is what it is. I think it might look better the non-negative way so you might want to consider reversing my remix if you end up making it…
At this point we’re about where Tinna’s video leaves off, and we have managed to crochet just PART of just ONE of the squares in her original design. In the next post we’ll go beyond that square and continue our new center-out space-filling pattern…
——————
We earn a tiny bit from referrals at no cost to you, so if you’ve got something you need to pick up anyway, going to Amazon through this link will help us keep Hacktastic running. Thanks! :)

Leave a Reply