
This very simple blanket pattern is great for using up yarn scraps (or to give you an excuse to purchase more yarn, let’s be honest). I made one of these blankets a few years ago but did not pay enough attention to the edges, which made the width a bit uneven. Despite this, what we refer to as “the rainbow blanket” is hands down the favorite blanket not only for our cats, but also for our son, young C.
This year I crocheted a new rainbow blanket for C to take to his freshman year at college (!!), and this time I made sure to get the edges just right. The details for the edges, and a video showing you exactly how to do it, are the reason for this post. In related news, now that my son is off to college, I actually have time to write blog posts again. :)
![]()
The pattern is based on the Vintage Vertical Stripe Crocheted Blanket Pattern from Bella Dia, except with two rows of each color and some attention to detail at the edges. It’s very forgiving about yarn thickness, and gives you a chance to play with color transitions. The finished piece is comfy and casual, and the holes keep the blanket airy and are fun to push your fingers through.
Materials
K hook, assorted scrap yarns. Some yarns may need to be doubled. Having rows of different weights and thicknesses is actually kind of interesting so don’t worry too much. Use a larger hook on the first row to keep it loose.
Terminology
Using American version of sc, dc: Single is through st and then through both loops on hook, and double is wrap, go through st, then through two loops on hook, then through last two loops.
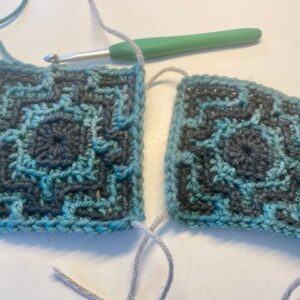
Swatching
Make an 8-10 stitch swatch in dc to practice the first row, set gauge, test each yarn thickness, and experiment with colors. You can add to this swatch as needed while the blanket grows to see how new yarns will look and feel. After a while you’ll have a good sense for which yarns work well and which need to be doubled, and what kind of color changes appeal to you; then you won’t need the swatch anymore.
![]()
Instructions
This is a very easy blanket pattern: basically just double crochet everywhere into the large gaps, with two dcs in the last gap. Pay attention to the starts and ends of each row, because if you aren’t careful then you can easily mess up the edge stitches and cause your blanket to get narrower or larger at the row changes. Change colors every two rows (always on same side) for “ladders” effect.
- Set up row: Start with a thick yarn for the first row. Slip knot, cast on N sts (you choose how many) and keep it loose, ch 2. Then dc into the back bump of each st starting w/last cast on st before the ch 2. Put an extra dc into the last bump. Change color now (even though you did only one row of the starting color instead of two).
- First double row: With new color, sc into the first gap, ch 1 (this is effectively a dc in the first gap), dc into each gap starting with second gap, 2 dc into last gap (solving the fencepost problem so that the blanket has a consistent number of stitches every row). Turn work and sc into the first gap, ch1 (effectively a dc in the first gap). Then dc into each gap until the end, 2dc into last gap. Cut yarn, leaving a sizable ending tail, wrap starting tail of yarn up to ending tail, pull both tails through open loop.
- Next and all following double rows: Pull old strands to left, hook through first gap and pull a loop of the new color through the gap. Then sc over old strands with both ends of new yarn, drop short end of new yarn, ch1. Weave in and work over old ends for 10-12 stitches, pulling old ends through top loops of existing work along the way as you dc into each gap with the new color (see video below), dc into each gap across the entire row with 2 dc into last gap. Turn work and sc into the first gap, c1, then dc into each gap until the end with 2 dc in the last gap. Cut yarn, leaving a sizable ending tail, wrap starting tail of yarn up to ending tail, pull both tails through open loop.
- Ending row: Same as above but use a thick yarn and only do one row instead of two (just like the starting row).
Edge stitches
The video below shows exactly how to start a new color row, how to finish the first row of a color and turn, how to end the second row of a color, and how to weave in ends as you go.
Cat Approved
This lovely cat would like you to know that this blanket is very nice and he can’t wait to get fur all over it now that it is done.
![]()
——————
We earn a tiny bit from referrals at no cost to you, so if you’ve got something you need to pick up anyway, going to Amazon through this link will help us keep Hacktastic running. Thanks! :)

How do you prevent rows using lighter weight yarns from being shorter than rows using thicker yarns?