

This is part 2 of our notes as we work through the basics on a Brother KH-260 knitting machine. In part 1 we dusted off the machine and made a quick fair isle Trash Swatch. This time we’ll review how to get the ribber bed adjusted and lubricated, and then create a piece of circular knitting that is open on both ends.
The ribber bed that goes with the KH-260 is the KR-260. Although this series of Brother knitting machine beds are vintage 80’s, mine are actually brand new replicas made by Creative Factory Shop. It’s been great to have a knitting machine that is actually new, compared to some of my other units which needed a lot of cleaning and parts replacement. I can highly recommend Creative as a source for “new-vintage” knitting machines; my experience shopping with them was excellent, the unit shipped in extremely secure packaging, and there was plenty of communication back and forth.
Adjusting ribber position
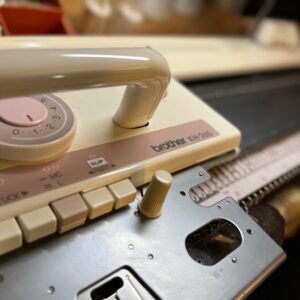
I’m going to assume that you already know how to set up the ribber bed with the main bed (if not see the KR-260 User Guide), and focus on final adjustments and making the carriage run smoothly. There are two kinds of screws that control the positioning of the ribber bed in relation to the main bed; one controls horizontal position, and one vertical, as shown in this photo:
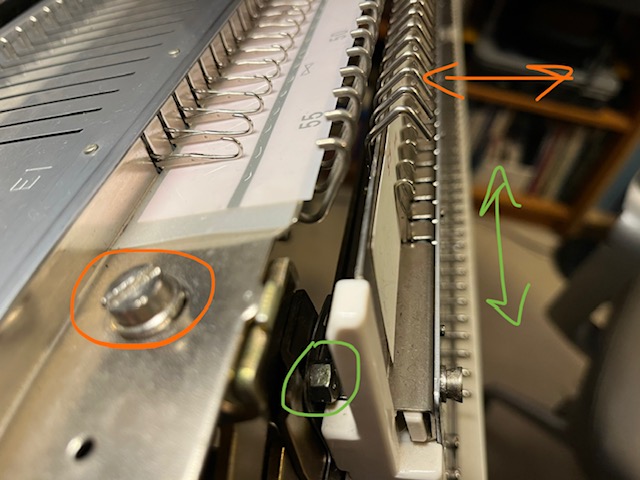
The easy-to-access orange-circled screw above can actually slide back and forth in a groove, but I haven’t had much luck with that. However, sometimes I can get the bed to move horizontally a bit by loosening or tightening this screw. The green-circled screws are difficult to reach but allow you to make significant vertical adjustments on both sides of the ribber bed. It’s a fiddly process and I don’t recommend messing with these screws unless you think something is wrong with how your bed is positioned, but it can be a life-saver if your beds seem too far apart or too close together. The following video by Purple Peregrine illustrates how to vertically reposition your ribber bed with these screws:
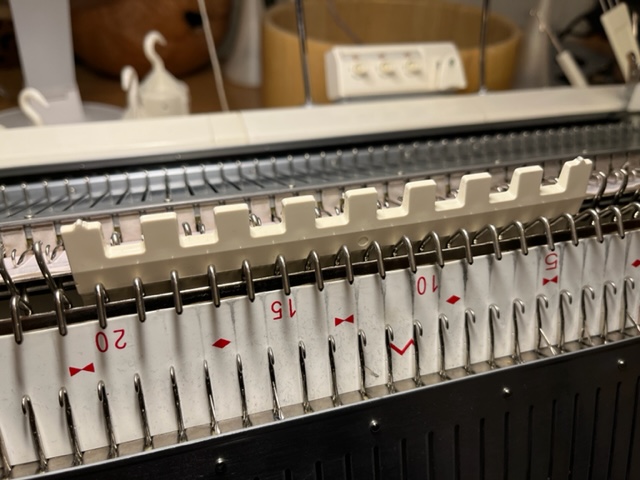
I’ve had some trouble getting a definitive answer on how close the beds should be, but I believe it should look like the photo below when you drop a needle pusher between the two sets of gate pegs; notice that it does not fall all the way through:
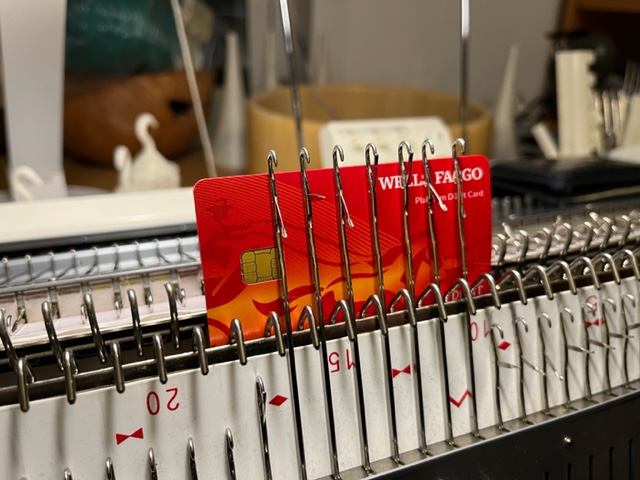
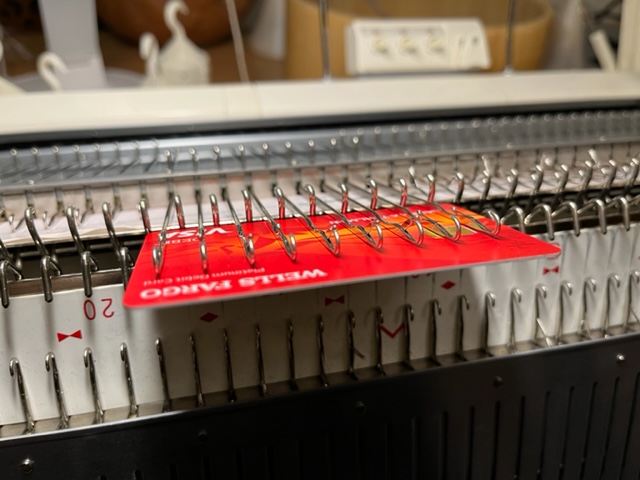
I’ve heard people say that you should be able to fit a credit card in the gap, but I think they are referring to a different gap. Specifically, I believe the credit card is supposed to fit snugly and not push the needles too much when you insert it between extended needles on one bed and the gate pegs on the other bed, both ways:
Lubrication and maintenance
For a long while I was a little afraid to put any kind of lubricant on my knitting beds, for fear of using the wrong types of products and harming my machines. This video from theanswerladyknits set me straight:
After watching this video I settled on using LPS-1 Greaseless Lubricant for cleaning and maintenance, and LPS Food Grade Silicone Lubricant for quick light sprays whenever I want to smooth things out. I always seem to lose the little straws that come with these types of spray cans, so I also invested in what surely will be a lifetime supply of Spray Can Extension Straws. Be sure to lubricate the bed, the needles, any rails or tracks where things rub against each other, and the underside of the carriage. The carriage should glide smoothly and easily in both directions with just the push of a finger.
Knitting a tube
To create a tube on the double bed setup you just knit in one direction on the main bed only, and then knit in the other direction on the ribber bed only. In other words you slip in one direction on the ribber, and slip in the other direction on the main bed. Following the instructions below will result in a tube of circular knitting with live stitches bordered by waste yarn at the top and bottom. You can pick up the live stitches with a circular needle and work with them by hand later as needed.
OPEN-ENDED CIRCULAR TUBE - MATHGRRL

Start with main/ribber carriage on the right
Pitch at H3
Pull out 20 needles on main bed and 19 on ribber inbetween
Tension 0 main / 0 ribber
With no yarn set/test the needles:
<---
--->
Load waste yarn in carriage
<---
Adjust yarn as needed on ends
Hang comb & weights
Cut waste yarn and weight both ends
Tension 7 main / 7 ribber
Slip L main / Slip R ribber
Set counter to 0
Load main color
---> (first row may be tight)
<---
--->
<--- (x repeat rounds until as long as you need)
Cut main yarn and weight end
Load waste yarn
--->
<--- (x 2 more rounds)
Cut yarn and knit off the machine
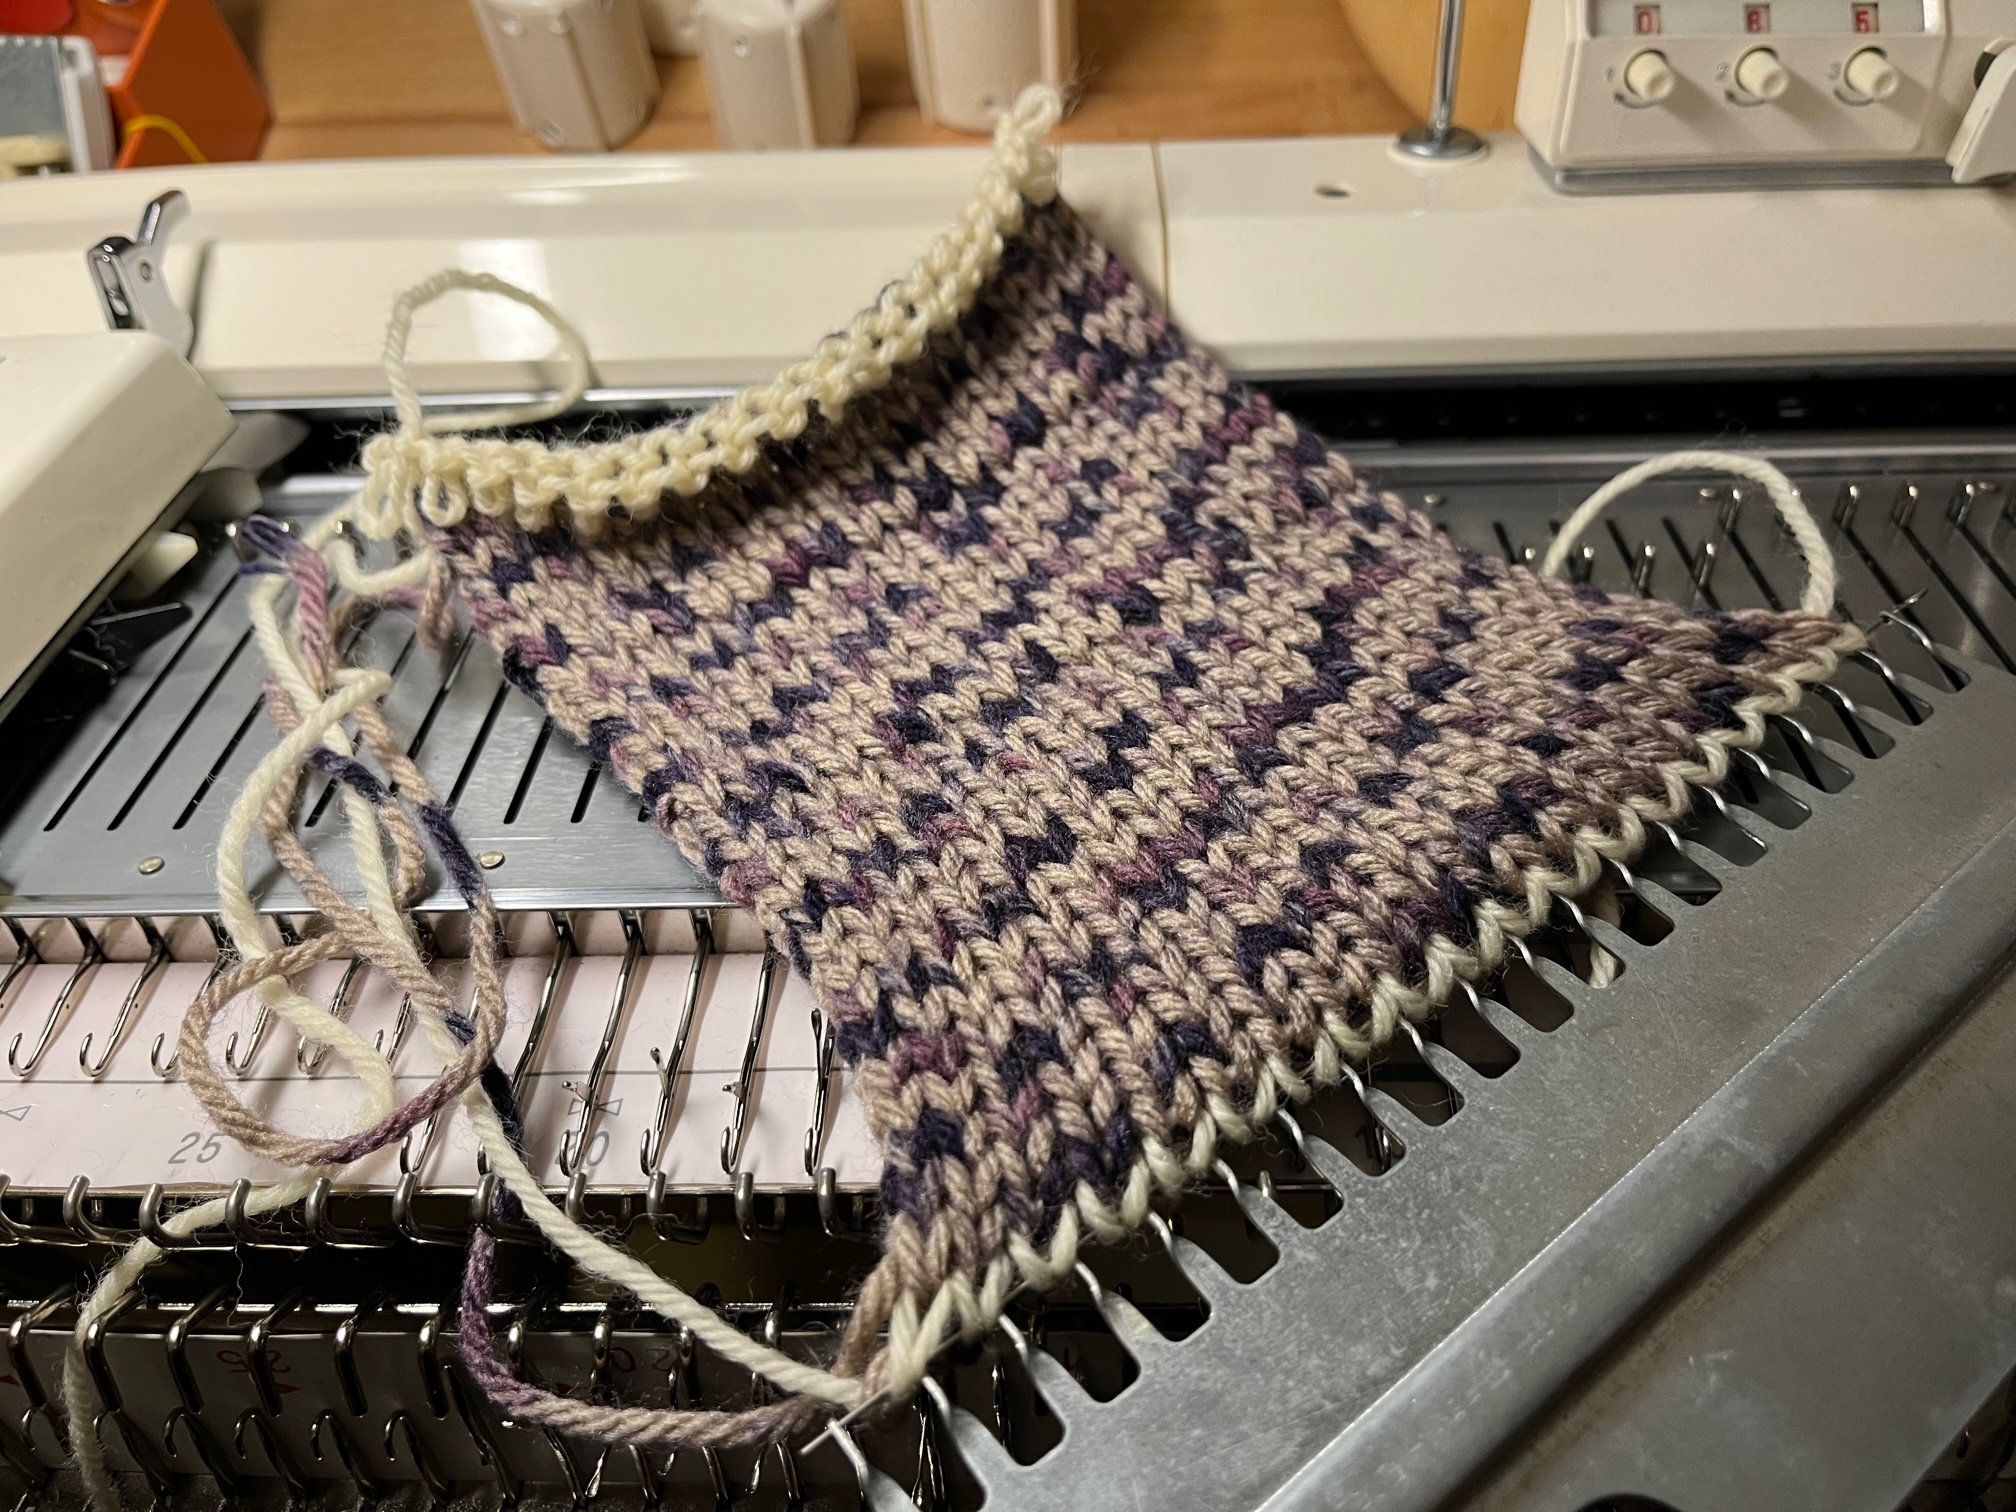
YARN NOTE: In this Field Notes series we will use inexpensive yarn so we can knit up experiments and fail/iterate often. The yarn in the photo above is Impeccable Speckle Yarn by Loops & Threads (100% Acrylic, Medium 4 for US 5mm needles and H hooks). This particular thickness of yarn is very nice for one-color tube knitting on the KH-260/KR-260, but would likely be too thick for fair isle or tight ribbings.
What’s next?
We have a reason for wanting to make tubes… long long tubes… stay tuned :)
——————
We earn a tiny bit from referrals at no cost to you, so if you’ve got something you need to pick up anyway, going to Amazon through this link will help us keep Hacktastic running. Thanks! :)
Leave a Reply