
This is the second in a series of posts about getting started with 3D printing, and the printer we’ll be using along this journey is the MakerBot Replicator Mini. If you have a different sort of printer I hope you can still get something out of these posts, although admittedly they are going to include a lot of Mini-specific walk-thoughs and technical hardware and software discussions, at least at first.
The first thing I recommend printing on the Mini is Cute Octopus Says Hello, one of MakerBot’s own designs on Thingiverse and the model they use for illustrating their filament colors. This is one of the simplest designs you could choose: it has no overhangs, nothing complicated, and it scales well. In fact we’re going to print a mini-version at 50% scale.

Thingiverse link: http://www.thingiverse.com/thing:27053
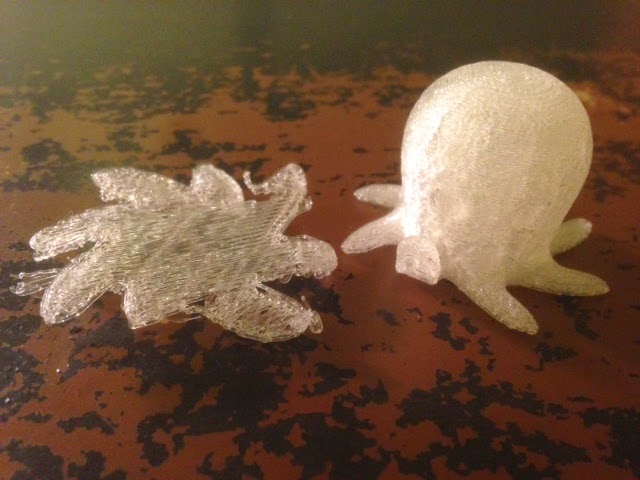
Our octopus-printing is going to be split over three days. Today is Level 1: Straight up easy. We’ll print the octopus shown on the left in the picture above, with no special modifications or settings. Tomorrow and the next day we will level-up to changing some settings that speed up the print and use less filament.
Step 1: Load the model.
From the MakerBot Desktop software, click “Explore” and then search Thingiverse for “cute octopus says hello”. The model we’ll be using should be first in the list, and dated June 31, 2012. Click on the model and then click the red “Prepare” button to see the file. Then click the new “Prepare” button near that file to load it into the software.
Step 2: Rotate the model.
This isn’t necessary but it seems kind of unfriendly for the octopus to face away from us, so we’ll turn it around. Click on the octopus and then click on the “Turn” button. The bottom of the three options will rotate the model around the vertical z-axis. Click the third “+90” button two times to turn the octopus around.

Step 3: Scale the model.
Since we’re on a Mini we’ll start by printing “mini” at 50% scale. Of course this will also make the print a lot faster; this is a linear decrease to 50% scale, so the volume will decrease by much more (we’ll talk more about this later). Click on the “Scale” button, type in 50.00% percent in the “Scale To” box, and press Return/Enter.

Step 4: There is no step 4.
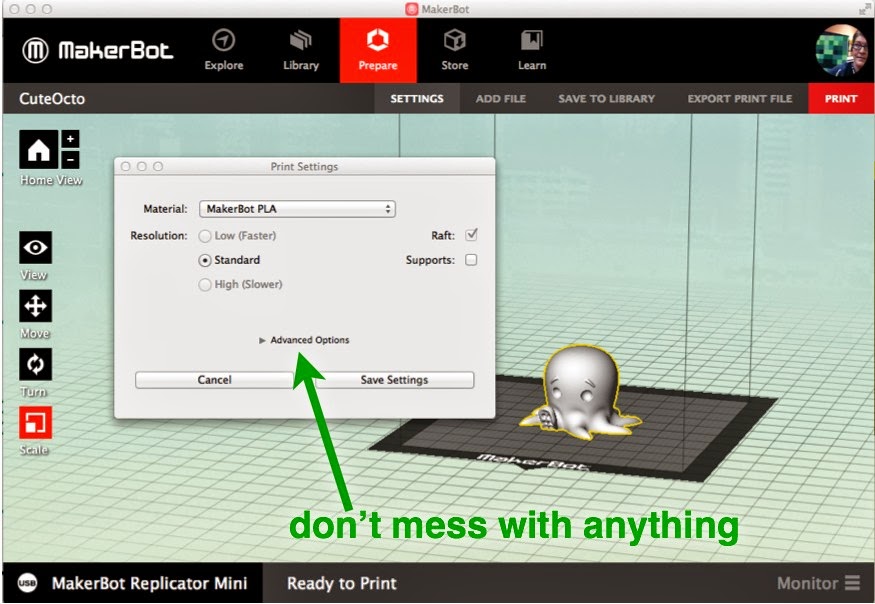
This is the easy day, remember? Let’s color inside the lines for this first print, and not change anything under the “Settings” tab.
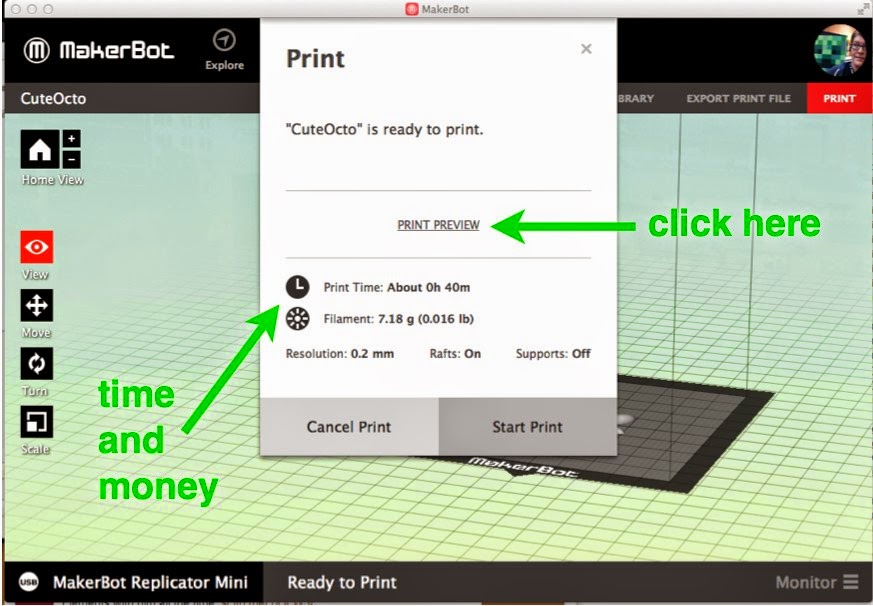
Step 5: Press Print!
Okay now you can press the red “Print” button. This will bring up a window that shows how much time and filament the print will cost you. Before printing click “Print Preview” so you can check out what the Mini will be doing as it prints.
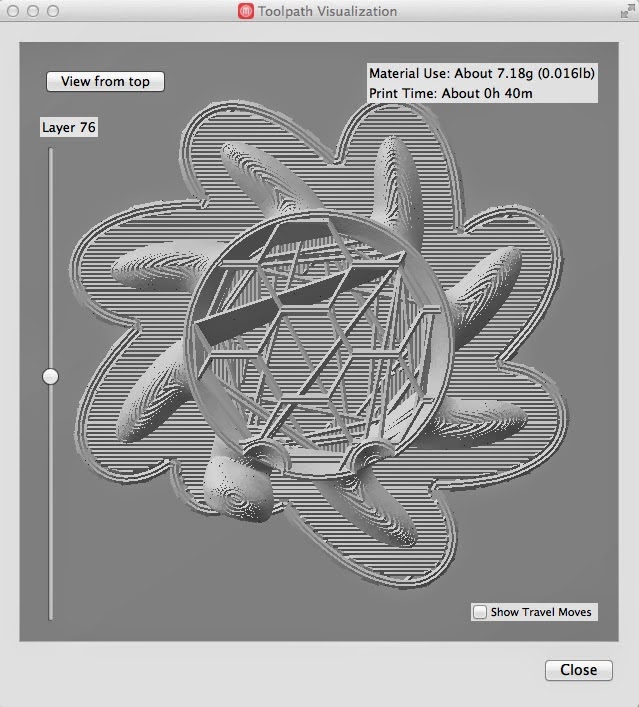
Step 6: Print Preview.
Next time: Advanced settings!

Time disclaimer: I have decided that I do not obey time. Time is not the boss of me. So yeah, I am writing these posts in the future and backdating them to the past, and you're reading it in the future of my future now. My MakerBot Desktop software was just updated today to 3.2.1 even though that didn't exist on the day of this post on June 25, and all these prints were done in Brooklyn even though I didn't move there until July 1. This is the part of the Philip K. Dick novel where you realize that your boss didn't die, YOU did, but that was in the past of your future alternate reality, and wait no actually it was your boss and also.