Also published at Shapeways Magazine
—–
Saint Patrick’s Day is almost here, and to celebrate we’ll do a step-by-step walkthrough tutorial on designing 3D Celtic knots from scratch with Fusion 360. Celtic knots make great pendants and earrings, and it’s easy to put your own style and spin on the knots that you create.
Drawing Celtic Knots from a Grid
There are lots of good tutorials online for drawing two-dimensional pictures of Celtic knots, for example this tutorial from Circle Line Art School:
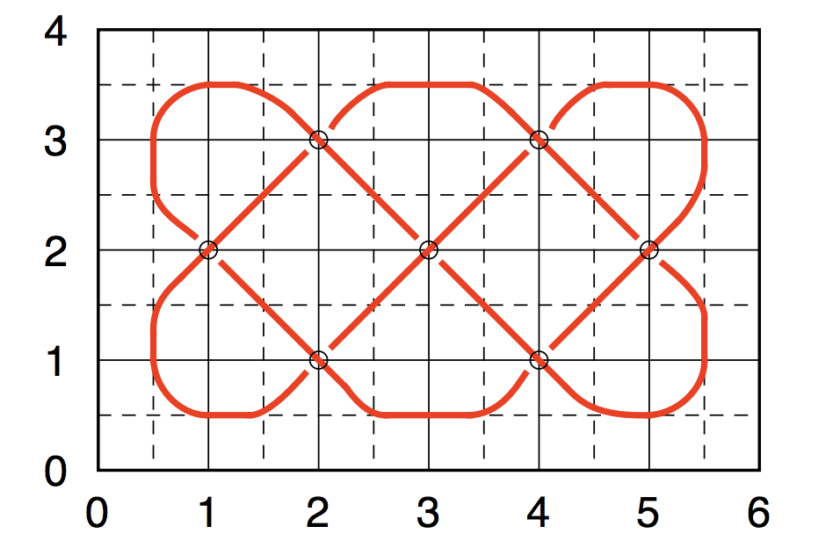
Celtic knot drawing methods like the one in the video above usually involve drawing a grid of dots and then drawing woven ribbons through the spaces between those dots. For constructing a 3D Celtic knot, it is easier to start with a grid of dots and then connect those dots with splines that you can later thicken into woven pipes. This is actually more similar to how mathematicians think about Celtic knots; for example, the image below is from the paper A Celtic Framework for Knots and Links by computer scientist Jonathan Gross and mathematician Thomas Tucker. Notice that the path of the knot goes through crossing points on the grid, and then we are to imagine that the paths are lifted up or down out of the paper to construct each crossing of the knot.
Tracing Knots with Splines
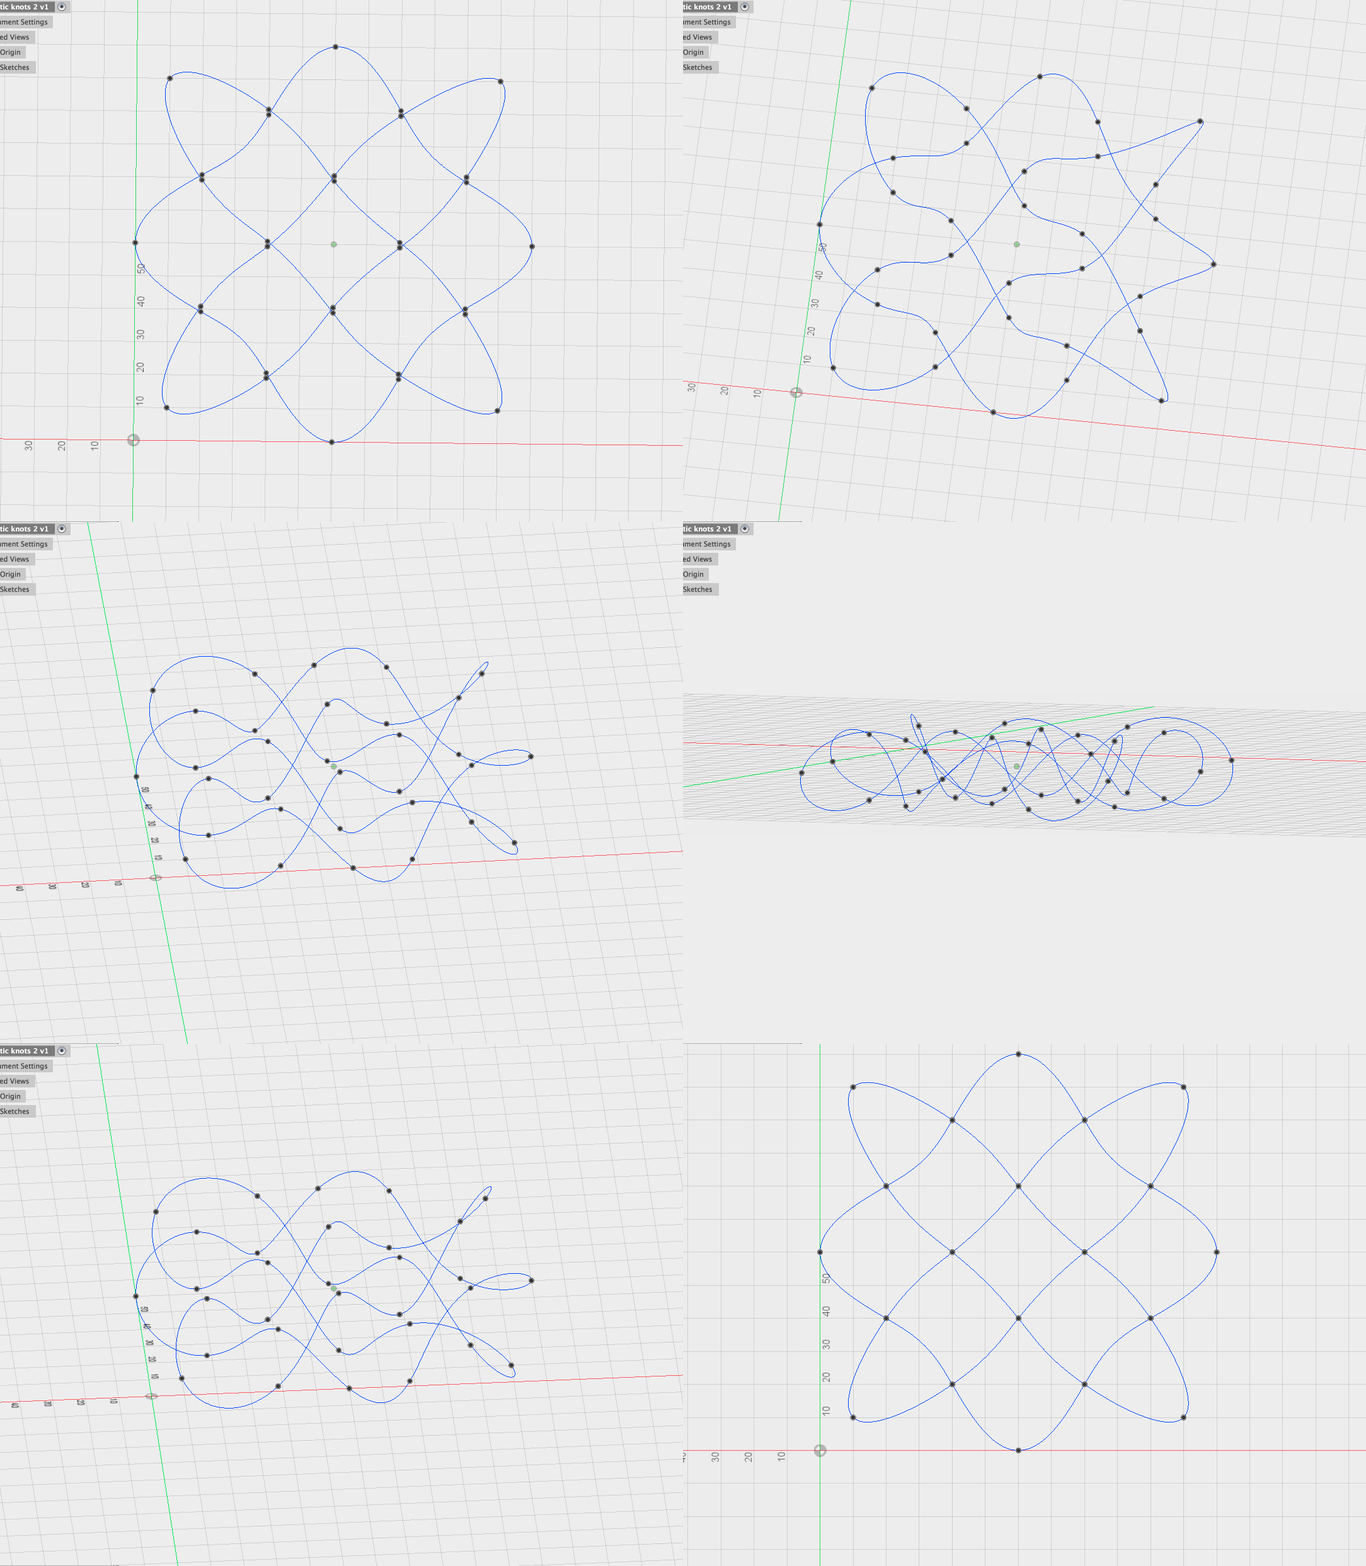
The quick overview of our technique is that we are going to make a grid of dots in a Fusion 360 sketch, then connect the dots with splines, then shift those splines up or down at the crossing points. This gives us a thin curve that traces out the desired knot, and we’ll be able to sweep a circle around that curve to make a round 3D tube that traces out the knot. Before we get into the details, let’s look at two examples. In general, you want to have as few points as possible long your spline curves; Fusion 360 will be better at drawing a smooth curve between two far-apart dots than at connecting a bunch of close-together dots. On the other hand, you can use extra spline dots to stretch out the path of the spline, and/or change its curvature. Here are two spline paths that define exactly the same Celtic knot, but one has fewer connection points than the other:
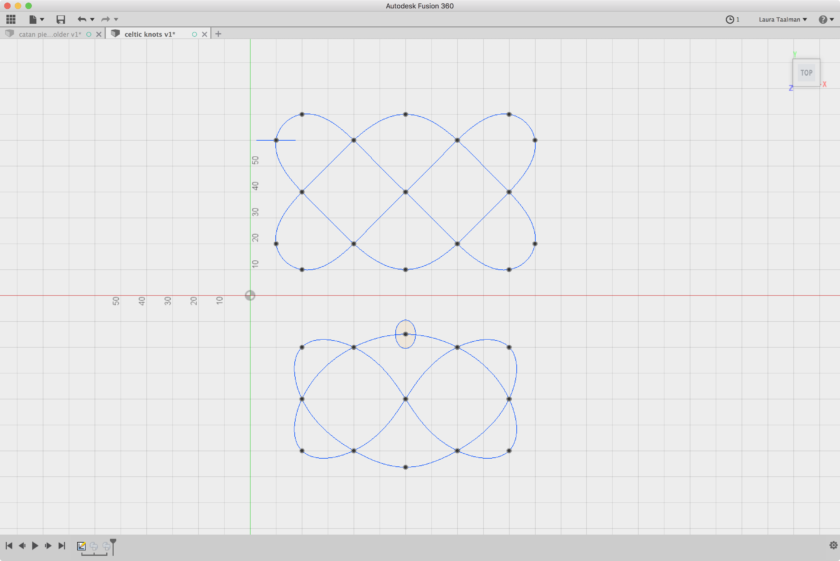
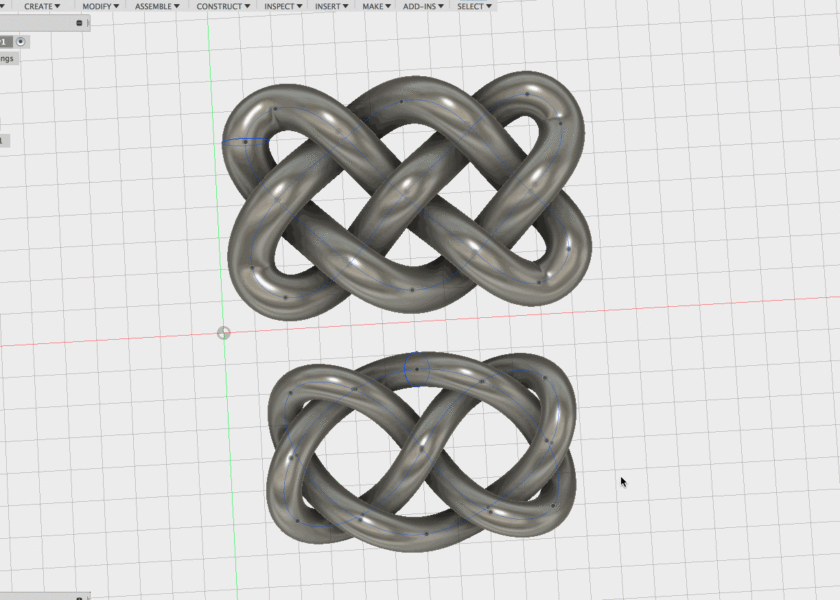
The image below shows what these two spline curves look like after sweeping circles around them to make into 3D knots. The very different look and style of these two knots — and even how thick we were able to make them — were determined entirely by how we chose to draw our splines. You’ll have to experiment with different spline curves to get the look you want.
Step-by-Step Celtic Knot Construction with Fusion 360
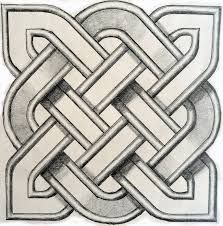
Okay, let’s get down to business. We’ll assume that you are a beginner at Fusion 360, and walk through each of the knot-constructing steps carefully. We will trace out curves to make this three-component Celtic knot:
Step 1: Get the software
Download Fusion 360 and sign up for an Autodesk account so you can use it. Fusion 360 is free to students, educators, and hobbyists. For tips on getting started, check out our earlier article Tutorial Tuesday 15: First Steps with 3D Design Software Fusion 360.
Step 2: Create a sketch and make a grid of points
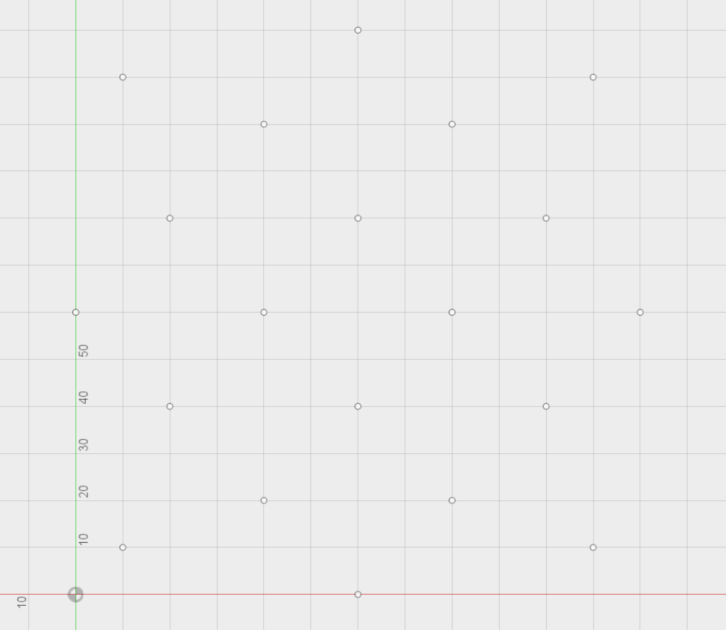
Create a Sketch and then choose Point from the Sketch menu and place points at the locations of the knot crossings and corners. Compare the dots in the screenshot below with the crossings and corners of the three-component Celtic knot shown in the image above. These points will help you keep track of the knot as you make it.
Step 3: Create a spline for each component of the knot
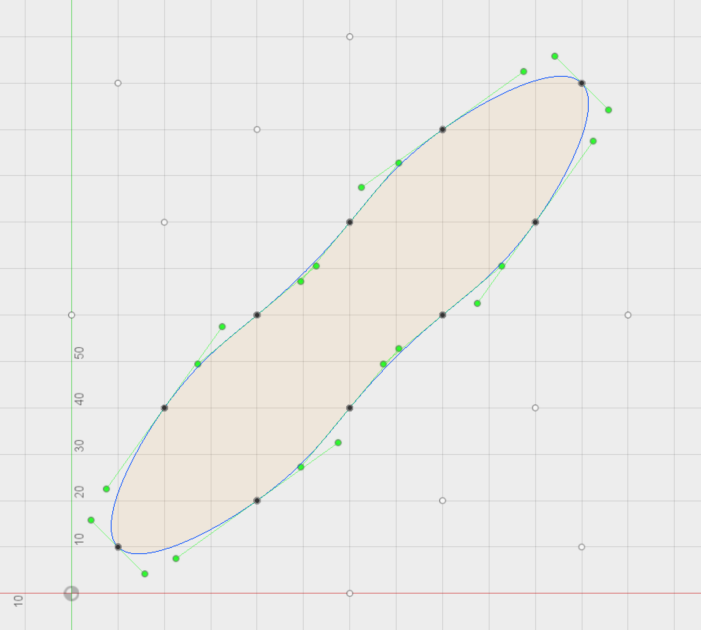
From the Fusion 360 Sketch menu, select the Spline tool. Click dots in order to trace out the path of the knot. Sometimes this will be the entire knot, and the spline will cross itself; this is okay. If your knot has more than one curve in it, then your first spline will only be part of the knot, which is also okay. End your spline at the first dot you chose and then hit Escape to exit the Spline tool.
Step 4: Move the spline up or down at each crossing point
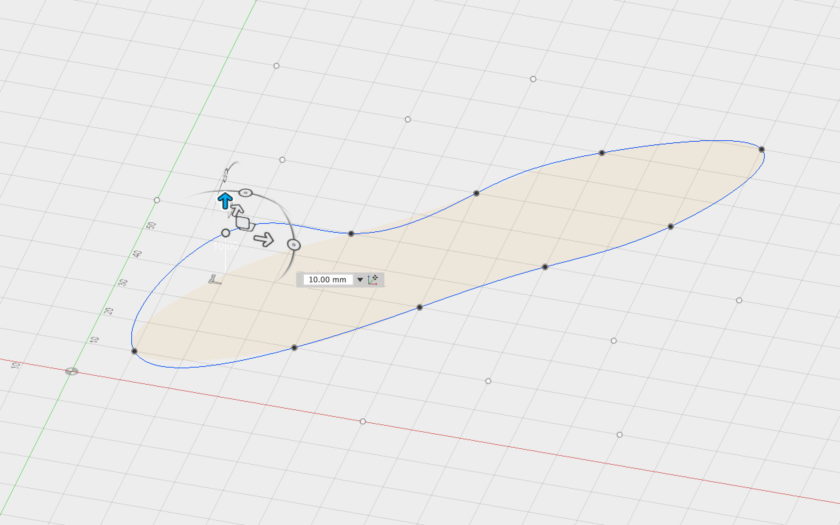
Each point that forms a crossing needs to shift up or down so that the curve of the knot will weave over and under. Right-click on a crossing point and select “move”, then use the vertical arrow to shift that point up or down a fixed amount. You can use Shift-middle-mouse-click-and-drag to rotate your view, and middle-mouse-click-and-drag to pan side to side. Celtic knots always have an “over-under-over-under” alternating pattern at the crossings. (Make sure not to shift the exterior non-crossing points!)
If your Celtic knot pattern has more than one component, then rotate your view back to be directly from the Top and make Splines for each of the remaining components. When you’re done you should have something like this:
When you’re done with the Spline curves, press the Stop Sketch button and move on to the next step.
Step 5: Create perpendicular circles on each component path
Now from the Construct menu, choose the Plane Along Path tool, and construct a Plane on each of the knot components. These planes will be used to construct Circles that we can Sweep along the component paths.
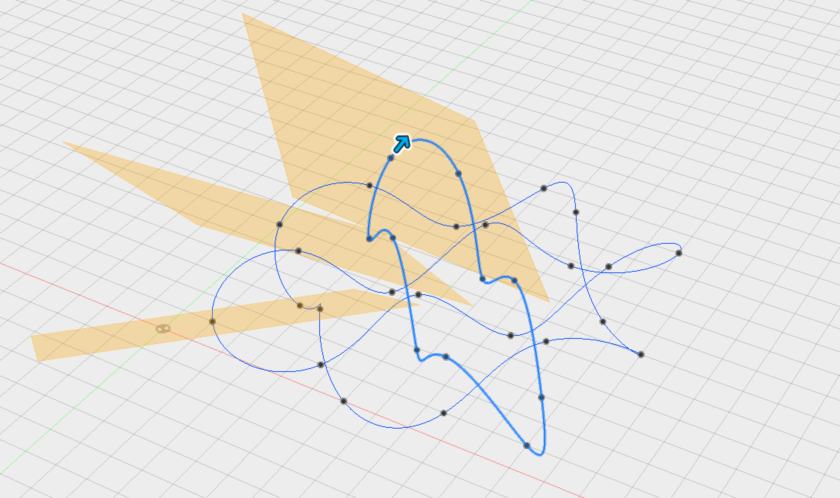
Start a new Sketch and choose one of the new Planes as the base for the Sketch. Then construct a Center-Diameter Circle from the Sketch menu, right at the center of that plane. Press Stop Sketch and repeat for any remaining Planes.
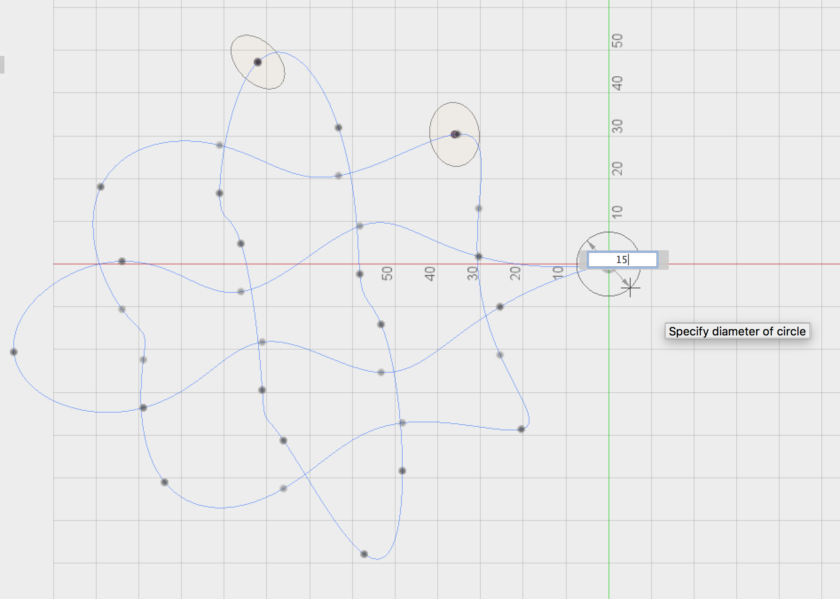
Step 6: Sweep the circles along the spline paths
Finally, from the Create menu, select the Sweep tool. Set one of the Circles as the Profile, then set the corresponding Spline as the Path, and click “OK”. If you get an error then you may have to go back to the previous step and reduce the diameter of the Circle.
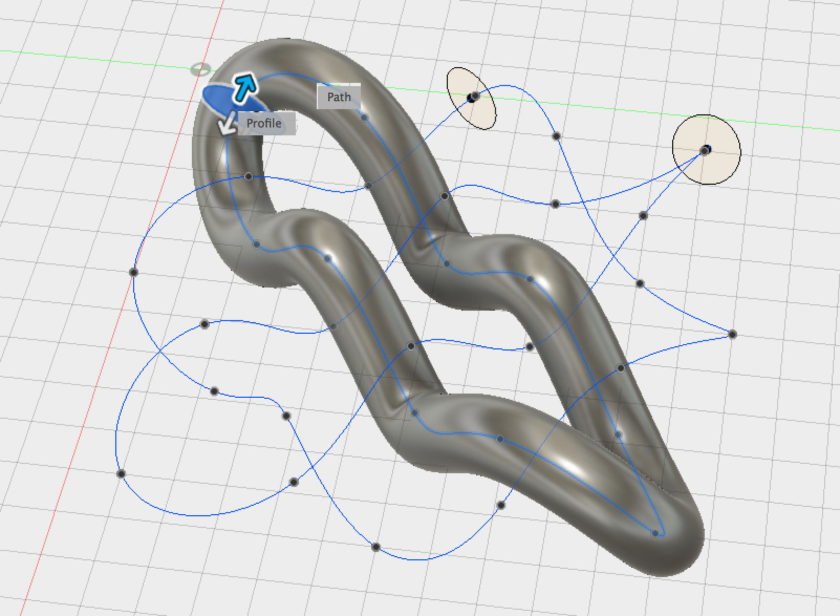
Repeat this step for any remaining components of the knot. Pro tip: Sometimes the Sketches will vanish after you create the first Sweep; if this happens then open up the “Sketches” arrow on the Browser list on the left of the screen, and turn the little lightbulbs back on!
You can adjust the Circle diameters as necessary to get the look that you want. To do this, right-click on the corresponding “Sketch” icon in the Timeline bar at the bottom left of the Fusion 360 window, and choose “Edit Sketch”; resize the circle and close the Sketch, and Fusion 360 will re-Sweep the curve with the new circle.
Renders and Prints
Here’s how our Celtic knot looked at the end of this process (and adding some new Materials for style):
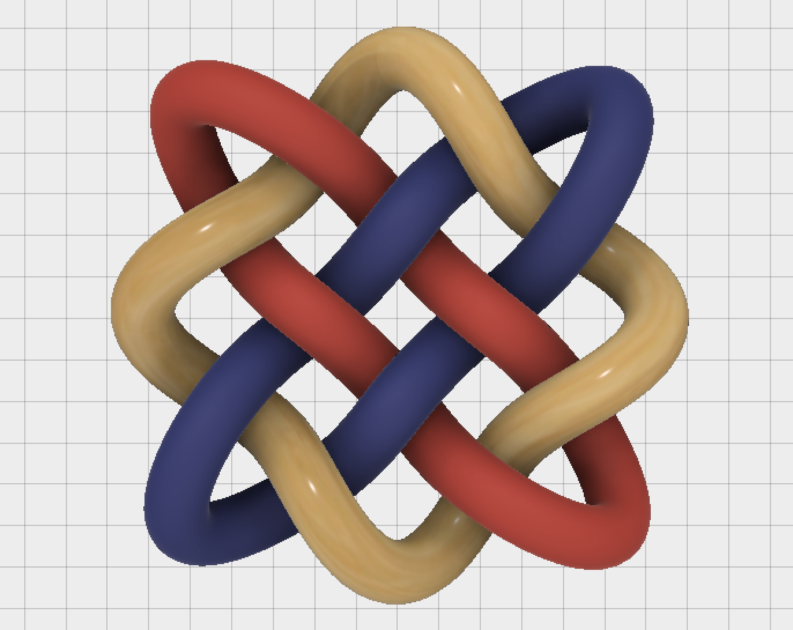
To export the knot for printing, open up the Bodies menu in the Brower list on the left of the window, and then right-click on each Body (one for each component) and select Save as STL. We did a scaled-down prototype test print on our XYZ Da Vinci Color printer in black and white:
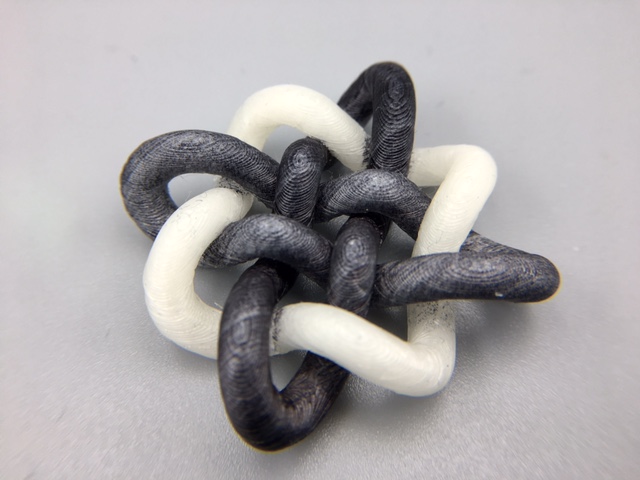
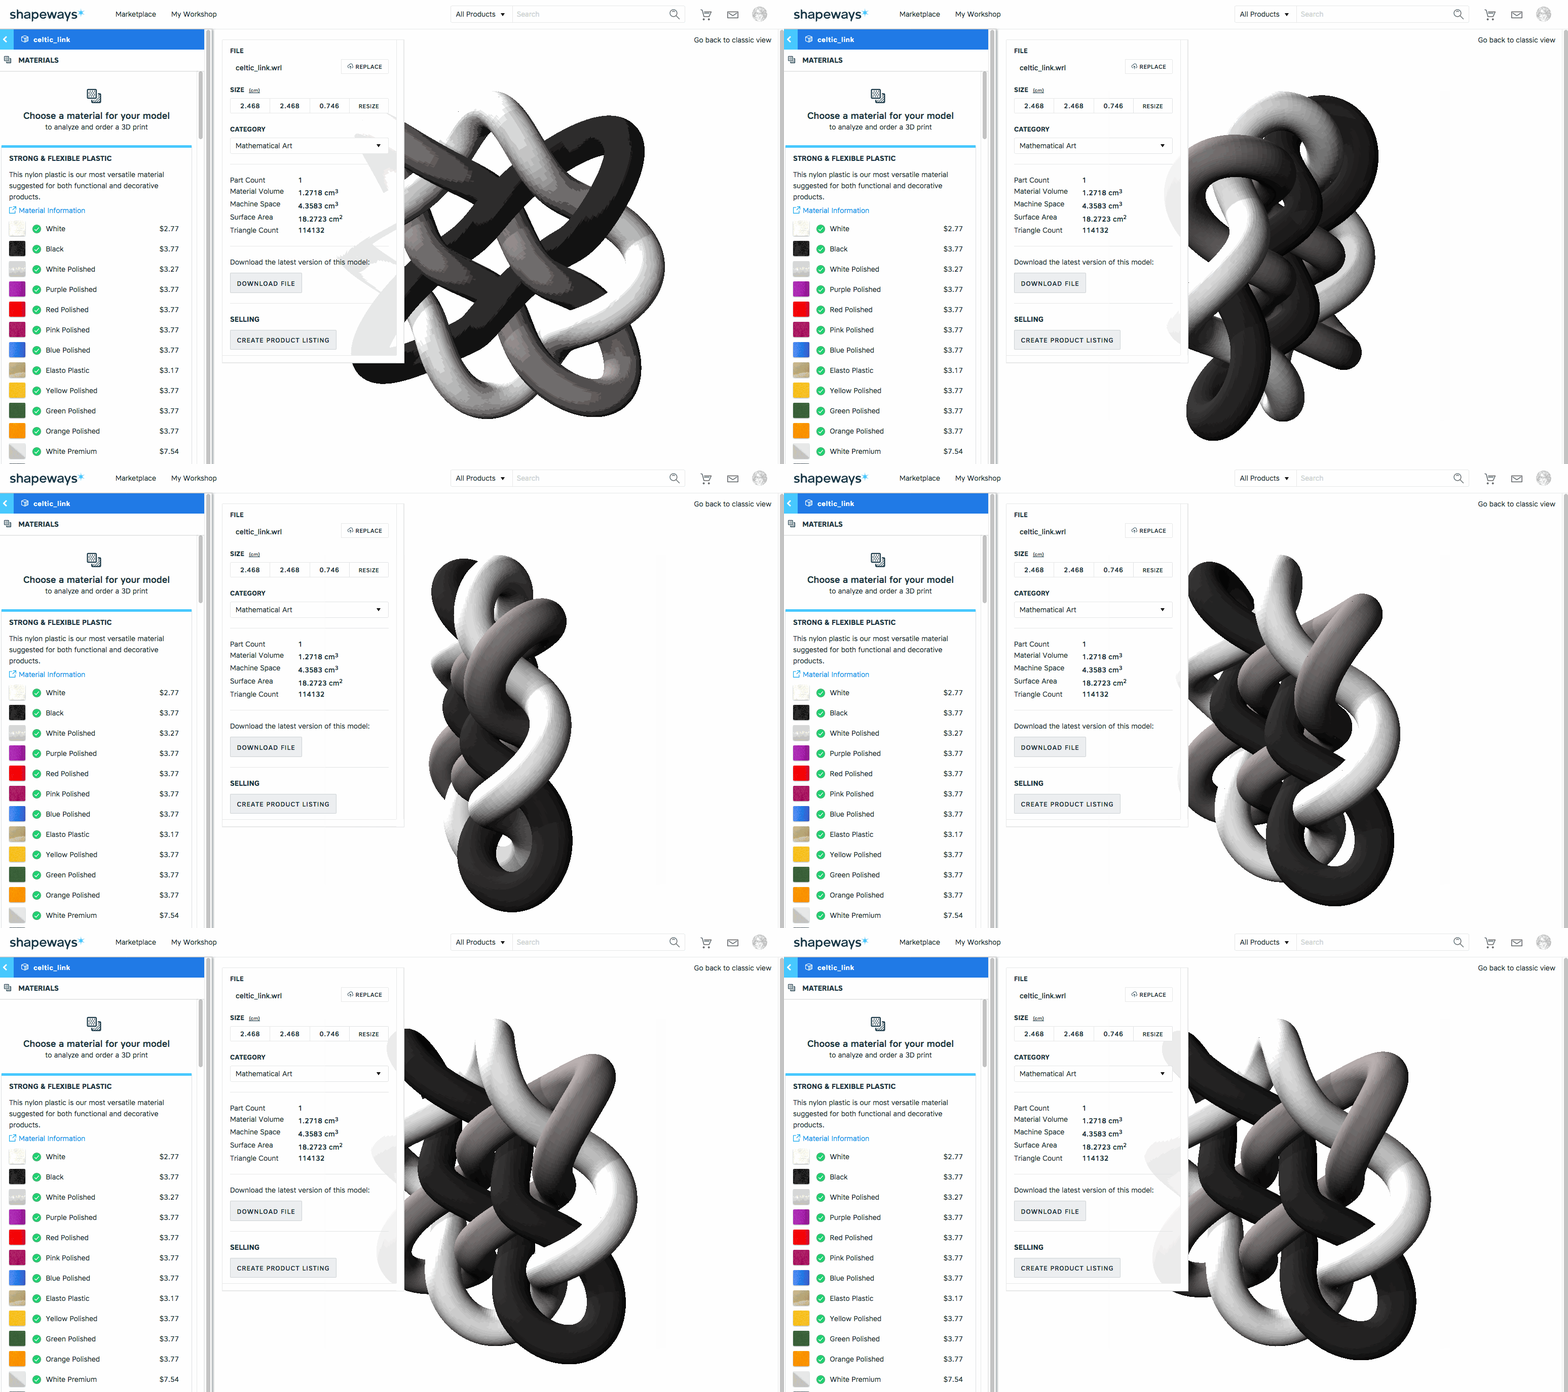
And here it is uploaded to the Shapeways site. We’ve ordered prints in Full Color Sandstone, Stainless Steel, and Strong & Flexible, and will post photos on our Shapeways geekhaus shop when we get them back!
——————
As an Amazon Associate we earn from qualifying purchases, so if you’ve got something you need to pick up anyway, going to Amazon through this link will help us keep Hacktastic running. Thanks! :)


Leave a Reply